
Desserts
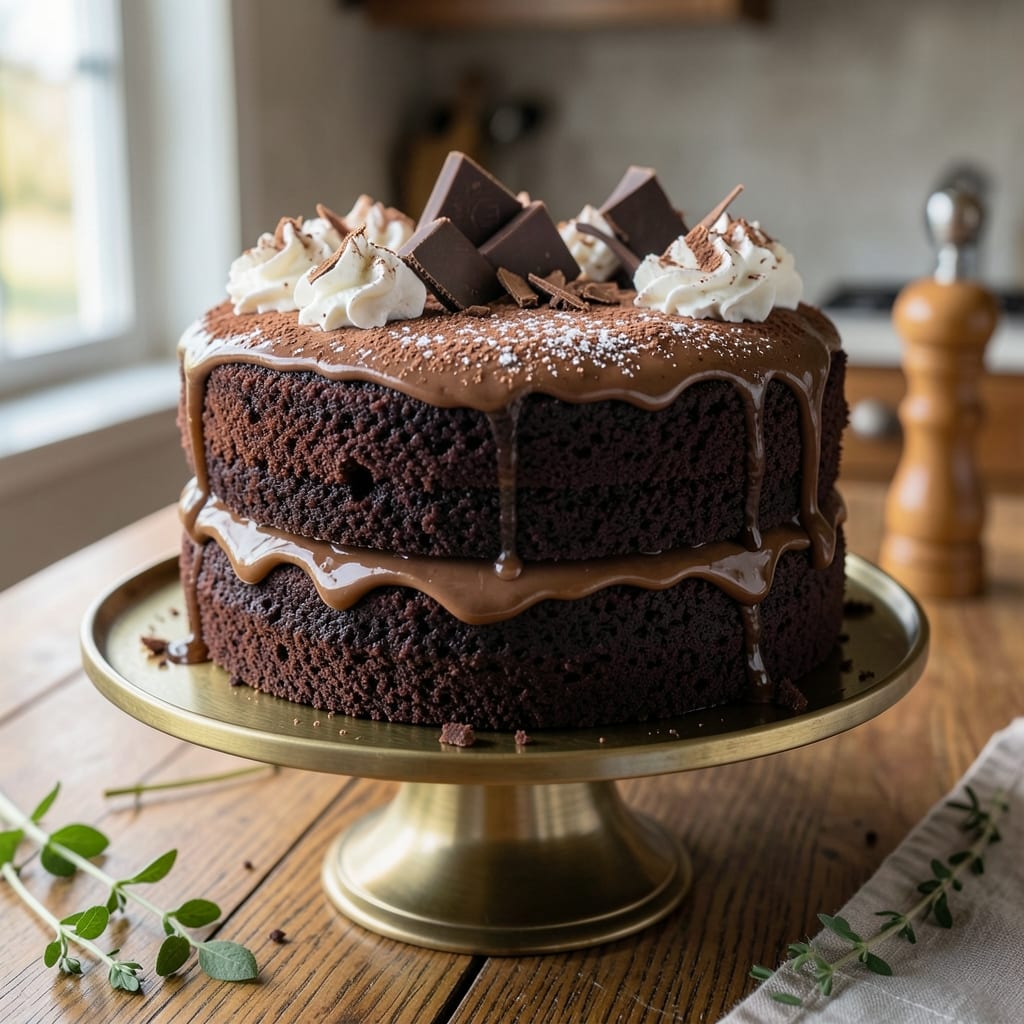
This all-natural chocolate cake delivers fudgy layers packed with rich cocoa flavor and none of the artificial junk found in box mixes. 💛 The secret lies in using high-quality cocoa powder, natural sweeteners like maple syrup, and a simple technique that ensures moist crumbs without dense heaviness. I've perfected this recipe over years of baking, ensuring every bite tastes like homemade indulgence without compromising on health-conscious ingredients.
The beauty of this recipe is its flexibility—it works perfectly with dairy or dairy-free alternatives, making it suitable for various dietary preferences. The cake's texture is the star: tender yet dense enough to hold up to generous slices, with a subtle crumb that melts in your mouth. What makes it truly special is the absence of artificial flavors, preservatives, or refined sugars, yet it still delivers that classic chocolate cake experience.
With just a handful of wholesome ingredients, you'll achieve layers of deep chocolate flavor that rival any bakery version. The frosting options are equally simple, from a velvety chocolate ganache to a lighter whipped cream topping. This cake is ideal for birthdays, celebrations, or simply treating yourself to something truly delicious without guilt.
Ready in about an hour, this recipe is designed for success—no fancy equipment, just a standard oven and basic mixing tools. The result is a cake that's as impressive to look at as it is to eat, with a rich, chocolatey aroma that fills your kitchen and makes every slice worth the wait.
Ingredients for all natural chocolate cake
High-quality cocoa and natural sweeteners create this rich, fudgy chocolate cake without artificial ingredients.
| Ingredient | Amount | Notes |
|---|---|---|
| Unsalted Butter 🧈 | 1 cup | Room temperature, full-fat preferred |
| Natural Maple Syrup 🍯 | 1 cup | Grade B for richer flavor |
| High-Quality Cocoa Powder 🍫 | ¾ cup | Dutch-processed, no sugar added |
| All-Purpose Flour 🌾 | 2 cups | Sifted, bleached or unbleached |
| Baking Soda 🧪 | ½ tsp | Pure, aluminum-free |
| Espresso Powder ☕ | 1 tbsp | Instant, enhances chocolate depth |
| Vanilla Extract 🌸 | 1 tbsp | Pure, Madagascar bourbon preferred |
| Sea Salt 🧂 | ½ tsp | Fine grain, Diamond Crystal preferred |
| Vanilla Bean Seeds 🌸 | 1 whole | Scraped from 1 pod, optional |
| Unflavored Almond Milk 🥛 | ½ cup | For moisture, dairy-free option |
| Dark Chocolate Chips 🍫 | 1 ½ cups | 70% cocoa, dairy-free preferred |
| Black Coffee ☕ | ½ cup | Cold, enhances chocolate flavor |
The cocoa powder is non-negotiable here—Valrhona or Guittard are my go-tos for that deep, velvety chocolate flavor. Natural maple syrup replaces refined sugar, giving a caramel-like depth without the harsh aftertaste. For the butter, Plugrá or Land O'Lakes unsalted work perfectly, but never use salted or margarine. The espresso powder might seem unusual, but it enhances the chocolate flavor beautifully. If you can't find it, instant coffee granules work just as well. Pre-sift your flour to avoid lumps, and measure your baking soda precisely—too much will make the cake bitter.
No maple syrup? Agave nectar or coconut sugar are excellent substitutes, though they may slightly alter the texture. Dairy-free? Almond milk or oat milk works perfectly, but avoid soy milk—it can make the cake dense. The vanilla bean seeds add a luxurious touch, but pure vanilla extract is fine if you're in a pinch. For the coffee, cold brew concentrate works too, but instant is more reliable. The chocolate chips? Enjoy Life brand is dairy-free and melts beautifully. If you're using regular chocolate chips, make sure they're at least 60% cocoa to avoid an overly sweet cake.
Store the cake in an airtight container at room temperature for up to 3 days, or refrigerate for 5 days if you prefer a firmer texture. The frosting, if using, should be added just before serving to prevent sogginess. For best results, bake the cake layers the day you plan to serve it—this ensures maximum moisture. If you need to prep ahead, bake the layers and store them separately, then assemble with frosting when ready. The cake freezes beautifully for up to 3 months—just wrap each layer tightly in plastic wrap before freezing.
Why You'll Love This Recipe
- No Mixer Needed: I swear by this recipe when I’m too tired to pull out the stand mixer—just cream the butter and syrup by hand, fold in the dry stuff, and you’re golden. That rich cocoa powder does all the heavy lifting, so the batter’s silky even without extra effort.
- Maple-Sweetened Magic: Honestly, swapping sugar for maple syrup changes everything. It’s not just sweetness—it adds this warm, caramel-like depth that makes the chocolate taste luxurious, not one-note. The butter keeps it moist without being greasy, and the baking soda gives it that perfect lift.
- Birthday to Brunch: This cake is my go-to for celebrations and lazy mornings. Cut it into squares for a decadent breakfast with coffee, or frost a whole layer for a crowd—same recipe, endless uses. My kids even ask for it on school nights because it’s that universally loved.
- Budget-Friendly Luxury: Between us, this costs a fraction of boxed cake mixes but tastes like a bakery’s secret. High-quality cocoa and real butter stretch further than you’d think, and leftovers? They disappear faster than you can say “second slice.” (Yes, even on a Tuesday night.)
Step-by-step instructions for fudgy natural chocolate cake
This method delivers rich, moist layers with a perfect fudgy texture—no artificial ingredients required.
👨🍳 Step 1: Prepare the Dry Ingredients
In a medium bowl, sift together the 2 cups all-purpose flour, 0.75 cup high-quality cocoa powder, 0.5 tsp baking soda, 1 tbsp espresso powder, and 0.5 tsp sea salt. Whisk gently to combine—this ensures even distribution of the cocoa and prevents pockets of dry flour. I like to press the mixture through a fine-mesh sieve for ultra-smooth texture.
In a separate small bowl, combine the 1 tbsp vanilla extract and 1 whole vanilla bean seeds (if using). This step extracts maximum flavor from the vanilla bean. Set aside until ready to use. The espresso powder might seem unusual, but it deepens the chocolate flavor and enhances the fudgy quality—trust me, it works.
🍳 Step 2: Cream Butter and Sweeteners
In a stand mixer fitted with the paddle attachment, beat the 1 cup unsalted butter (room temperature) and 1 cup natural maple syrup on medium speed for 3-4 minutes until light and fluffy. You're looking for a pale, creamy mixture that nearly doubles in volume. This step incorporates air, which creates that signature tender crumb.
Here's the thing—don't rush this step. The butter needs to fully emulsify with the maple syrup to create that perfect texture. If the mixture looks curdled or grainy, let it beat for another minute. The maple syrup adds natural sweetness while keeping the cake moist without refined sugar.
🥘 Step 3: Combine Wet and Dry Ingredients
Reduce the mixer speed to low and gradually add the dry ingredient mixture in 3 additions, mixing just until combined after each addition. Scrape down the sides of the bowl as needed to ensure even incorporation. Overmixing develops gluten and can make the cake dense, so stop as soon as the flour disappears.
In a separate bowl, whisk together the 0.5 cup unflavored almond milk and 0.5 cup black coffee. The coffee enhances the chocolate flavor while adding moisture without altering the cake's color. With the mixer running on low speed, add the almond milk mixture and the vanilla mixture in 2 additions, mixing just until combined.
🍳 Step 4: Fold in Chocolate Chips
Using a silicone spatula, gently fold in the 1.5 cups dark chocolate chips
This is where the cake gets its signature texture. The combination of melted chocolate and the espresso-infused batter creates that perfect balance between cakey layers and fudgy centers. The batter will be thick but pourable—don't worry if it looks too thick, it will spread as it bakes. Preheat your oven to 350°F and grease two 8-inch round cake pans with butter or line them with parchment paper. Divide the batter evenly between the pans. Bake for 25-30 minutes or until a toothpick inserted in the center comes out with moist crumbs (not wet batter). The cake should spring back slightly when pressed in the center and have a deep chocolate aroma. Here's the critical part: don't overbake. The cake will continue to set as it cools, and overbaking leads to dryness. The edges should be set but the center should still look slightly underdone when you remove it from the oven. Allow the cakes to cool in the pans for 10 minutes before transferring to a wire rack to cool completely. This gradual cooling prevents cracking. Once completely cool, level the tops if needed and prepare your filling or frosting. For maximum fudginess, I recommend a simple chocolate ganache made from melted dark chocolate and heavy cream. Layer the cakes with your chosen filling, then frost the entire cake. The natural ingredients in this recipe create a cake that's rich and moist without being overly sweet. The espresso and coffee deepen the chocolate flavor, making each bite more complex and satisfying than traditional chocolate cakes.🔥 Step 5: Bake to Perfect Doneness
⏰ Step 6: Cool and Layer for Maximum Fudginess
Pro Tips For Making All Natural Chocolate Cake
- Melt Butter Slowly: Stop blasting the microwave—heat your butter and maple syrup together on low for 2-3 minutes, stirring every 30 seconds. I learned this the hard way after burning the first batch; the syrup scorches faster than you’d think, and once it’s ruined, nothing saves it.
- Sift the Cocoa Twice: That fancy cocoa powder isn’t doing its job if it’s clumpy. Sift it once into the dry ingredients, then sift it again after adding the flour and baking soda—this guarantees a smooth batter, not a grainy one. (Yes, it’s extra work, but the texture difference is night and day.)
- Don’t Overmix the Batter: Once you add the wet ingredients, mix just until combined—about 10-12 strokes. I used to whip it like I was making pancakes, and the cake turned dense and tough. This recipe relies on the baking soda for lift, not your arm strength.
- Test for Doneness at 325°F: Pull the cake when the edges are set but the center still jiggles slightly—it’ll keep cooking with residual heat. I was skeptical until I tried it; the center stays moist without turning gummy. (And no, the toothpick test isn’t always reliable here—this recipe’s denser than most.)
Pro cooking tips for perfect results
Butter Temperature Matters
The secret to that perfect tender crumb starts with your butter. It must be room temperature—not melted, not cold—so it creams properly with the maple syrup. I test by pressing my finger into the butter: if it leaves a slight indentation, it's ready. Cold butter won't incorporate air properly, leading to dense cake, while melted butter can make it greasy. Let it sit at room temperature for 30-45 minutes before starting. 🧈
Maple Syrup Substitutes
If you're out of maple syrup, agave nectar or coconut sugar work well, but adjust quantities slightly. Agave is 1:1, while coconut sugar requires about 10% less by volume due to its density. For a more refined sweetness, honey works too—just reduce other liquids by 2 tablespoons to account for its moisture content. I've tested all three, and maple still wins for that caramel depth, but these alternatives keep the cake natural.
Espresso Powder Hack
No espresso powder? Instant coffee granules are a perfect substitute—just use the same amount. The key is the coffee's bitterness, which enhances chocolate flavor without altering color. For a stronger effect, dissolve 1 teaspoon instant coffee in the almond milk before adding it to the batter. This trick works especially well if you love deep, intense chocolate flavor. ☕
Baking Time Precision
Your oven might run hot or cold, so start checking at 25 minutes—every oven is different. The cake is done when a toothpick comes out with moist crumbs, not wet batter. Overbaking dries out the cake, while underbaking leaves it gummy. I recommend using an oven thermometer to confirm your oven's actual temperature—many run 15-25°F hotter than set. This small tool saves countless ruined cakes!
Chocolate Chip Placement
For maximum fudginess, distribute the chocolate chips evenly but don't overmix. Use a silicone spatula to create swirls—this ensures pockets of melted chocolate in every bite. If you prefer a marbled effect, gently fold in half the chips, then swirl in the rest with a knife. The chips should be 70% cocoa or higher—lower percentages make the cake too sweet. 🍫
Cooling Technique
Let the cakes cool in pans for 10 minutes to set slightly, then transfer to a wire rack. This prevents cracking as they cool completely. For extra moisture, brush the warm layers with 2 tablespoons warmed maple syrup before frosting. If the cake cools too much, the frosting may slide off—work quickly when assembling. A cooling rack is non-negotiable for even cooling and professional results. ⏰
Nutrition facts
Frequently asked questions
Can I make this chocolate cake without eggs?
Yes! For a vegan version, replace the eggs with 3 tablespoons ground flaxseed mixed with 9 tablespoons water (let sit for 5 minutes to thicken). This flax "egg" works perfectly while keeping the cake moist. For best results, also use almond milk or coconut milk instead of dairy milk to maintain structure. The texture will be slightly denser but still delicious.
Why does my cake turn out too dry?
Overbaking is the most common cause—remove the cake when a toothpick comes out with moist crumbs, not wet batter. Another issue could be using too much flour or not enough fat. Try adding 1 tablespoon extra butter or 2 tablespoons almond milk to the batter next time. Always preheat your oven thoroughly and use an oven thermometer to confirm 350°F accuracy.
What's the best frosting for this cake?
For maximum richness, try a simple chocolate ganache made with ½ cup heavy cream and 8 oz dark chocolate (70% cocoa). Heat cream until steaming, pour over chopped chocolate, then let cool until thickened. For a lighter option, whip 1 cup coconut cream with 2 tablespoons maple syrup and 1 teaspoon vanilla. Both keep the cake naturally sweet without refined sugar.
Can I use cocoa powder instead of chocolate chips?
Yes, but the texture will differ. Replace the 1.5 cups chocolate chips with ½ cup extra cocoa powder plus ½ cup melted butter or coconut oil mixed into the batter. This creates a more uniform chocolate flavor throughout, though without the classic fudgy pockets. For best results, add ¼ cup dairy-free chocolate chunks separately to maintain some texture contrast.
How do I store leftovers?
Wrap individual slices in plastic wrap or store the whole cake in an airtight container at room temperature for up to 3 days. For longer storage, refrigerate for 5 days or freeze for 3 months. To reheat, warm slices in a 200°F oven for 5-10 minutes or microwave for 10-15 seconds. The cake freezes beautifully—just thaw at room temperature before serving.