
Desserts
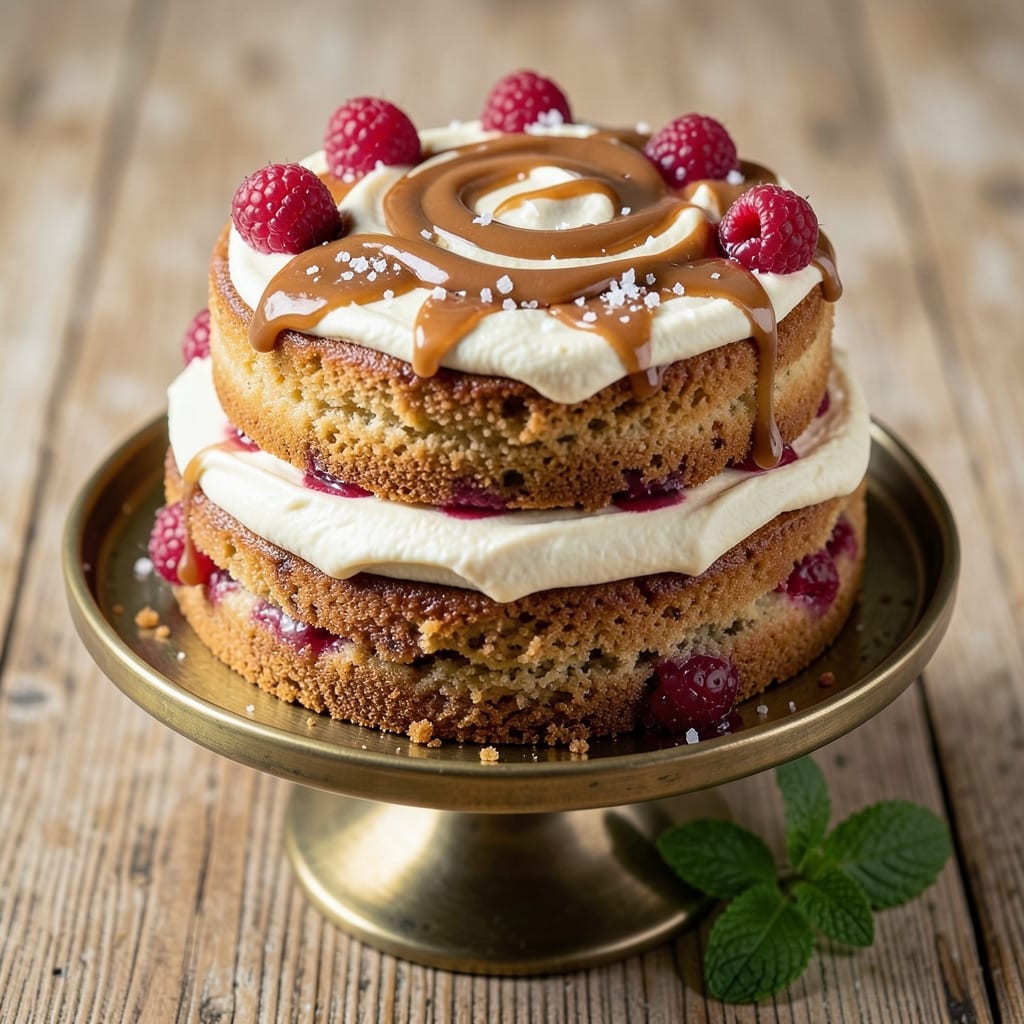
This all-purpose cake recipe delivers a light, tender crumb perfect for birthdays, weddings, or everyday treats—no special skills required. 💛 The secret lies in precise ingredient ratios and gentle folding, which create a cake that's moist without being dense, with a fine crumb that holds frosting beautifully.
What sets this recipe apart is its versatility—bake it as a single layer for sheet cakes, double the batter for tiered masterpieces, or divide into cupcakes. The formula works equally well with vanilla, chocolate, or spice flavors, making it your go-to foundation for any celebration.
By the time it emerges from the oven, you'll have a cake with golden domes, a tender crumb that melts in your mouth, and clean edges that slice perfectly. The frosting clings beautifully, whether you choose buttercream, ganache, or a simple glaze.
This recipe includes customization tips for flavors, layers, and decorations, ensuring you can adapt it to any occasion. Let's get started on creating your perfect cake base.
Ingredients for all purpose cake
Twelve ingredients, endless possibilities—this is the cake foundation that does it all.
| Ingredient | Amount | Notes |
|---|---|---|
| All-Purpose Flour 🌾 | 2 ½ cups | Sifted for lighter texture |
| Granulated Sugar 🍚 | 2 cups | White or light brown preferred |
| Unsalted Butter 🧈 | 1 cup | Cold, cubed for creaming |
| Large Eggs 🥚 | 2 whole | Room temperature for even mixing |
| Vanilla Extract 🌿 | 2 tsp | Pure extract, not imitation |
| Baking Powder 🧂 | 2 tsp | Aluminum-free for tender crumb |
| Salt 🧂 | ½ tsp | Fine sea salt preferred |
| Milk 🥛 | ¾ cup | Whole milk for richness |
| Vegetable Oil 🫒 | ¼ cup | Light, neutral flavor |
| Cake Flavor Extract 🍃 | 1 tsp | Vanilla, almond, or spice (optional) |
| Cornstarch 🌾 | 1 tbsp | For extra tenderness (optional) |
The flour is non-negotiable here—King Arthur or Gold Medal brands deliver consistent results. If you're baking at high altitudes, swap half the flour for cake flour for a lighter crumb. The butter? Plugrá or Land O'Lakes unsalted are my go-tos—they cream beautifully without overpowering. Keep everything cold until mixing to prevent gluten development, which is key for that tender crumb. For the sugar, Domino brand is my default, but light brown adds subtle depth if you're feeling adventurous.
No vanilla extract? Seedless vanilla bean paste at half the amount works in a pinch, though the flavor is slightly different. Running low on baking powder? Baking soda plus cream of tartar at the same ratio is a solid swap. The milk can be any kind—dairy, almond, or oat—but whole milk gives the richest texture. For a gluten-free version, Bob's Red Mill 1:1 flour replaces regular flour, though the crumb will be slightly denser. The oil keeps the cake moist without adding extra fat—vegetable or canola are neutral choices.
Store dry ingredients like flour and baking powder in airtight containers in a cool, dark place for up to 6 months. Butter and eggs should be used within 2 weeks of opening for best results. This batter keeps in the fridge for 24 hours before baking, making it perfect for last-minute celebrations. For make-ahead convenience, bake the cake layers, cool completely, then wrap in plastic wrap and store at room temperature for up to 3 days before frosting.
Why You'll Love This Recipe
- Pantry Staples Only: I swear by this recipe because it uses what’s already in my cupboards—no specialty items, no last-minute grocery runs. That creamy butter-and-sugar base? Just melt, mix, and bake. Honestly, I’ve made it with store-brand flour and still gotten a tender crumb that begs for seconds.
- Vanilla Butter Bliss: The moment I crack those eggs into the warm butter-sugar mix? Magic. That vanilla extract doesn’t just perfume—it deepens every bite, making the crumb so rich it feels like a hug. Between us, I’ve skipped the extract once. Never again.
- Birthday to Brunch: This cake is my secret weapon for anything. Frost it with cream cheese for a party, slice it warm with butter for a lazy Sunday, or crumble it over oatmeal when I’m in a rush. My kid’s school bake sale? Yep. My husband’s “I’m not cooking” night? Also yep.
- Leftovers That Last: Bake one batch, eat it three ways. The day-old slices toasted with jam? Life-changing. The crumbs in my coffee? Unexpectedly good. And because it keeps so well, I’m not scrambling to bake last-minute—just reheat and enjoy. (Yes, even on a Tuesday night.)
Step-by-step instructions for all-purpose cake
This versatile base delivers perfect texture every time—light, tender crumb with just the right rise.
👨🍳 Step 1: Cream Butter and Sugars to Light and Fluffy
In a stand mixer fitted with the paddle attachment, beat the 1 cup unsalted butter (cold, cubed) and 2 cups granulated sugar on medium speed for 3-4 minutes. You're looking for a pale, fluffy mixture that nearly doubles in volume—this incorporates air that creates that signature tender crumb. Here's the thing: don't rush this step. The butter should be fully creamed but still cool to the touch. If it gets too warm, chill the bowl for 5 minutes before proceeding.
I press down on the butter occasionally with a spatula to ensure even incorporation. The goal is to create tiny air pockets that will expand during baking, giving you that light, airy texture. You'll know it's ready when the mixture is smooth and ribbons form when the paddle is lifted—almost like ribbon candy. This is your foundation for a perfect cake.
👨🍳 Step 2: Add Eggs and Extracts for Richness
Add the 2 whole large eggs one at a time, mixing on low speed for 30 seconds after each addition until fully incorporated. Then add the 2 tsp vanilla extract and 1 tsp cake flavor extract (if using), mixing just until combined. The mixture might look slightly curdled at first, but don't worry—it will smooth out when we add the dry ingredients.
Here's where it gets fun: the extracts infuse subtle depth that makes this cake truly versatile. I like to use a mix of vanilla and almond extracts for a classic touch, but feel free to experiment with spice extracts like cinnamon or orange for variations. The key is to mix just until combined—overmixing develops gluten and makes the cake tough. We're aiming for a smooth, velvety batter at this stage.
👨🍳 Step 3: Combine Wet and Dry Ingredients Gently
In a separate bowl, whisk together the 2.5 cups all-purpose flour, 2 tsp baking powder, 0.5 tsp salt, and 1 tbsp cornstarch. This is your dry ingredient blend. With the mixer on low speed, gradually add about ⅓ of the dry ingredients to the wet mixture, mixing just until combined. Then add the 0.75 cup milk and 0.25 cup vegetable oil, mixing on low speed until smooth.
Now for the remaining dry ingredients—add them in two batches, mixing on low speed just until the flour disappears. Here's the critical part: don't overmix. You should still see a few flour streaks when you lift the paddle. The batter will be thick but pourable. Real talk: this is where most home bakers go wrong by overmixing, which leads to dense cakes. We want that tender, melt-in-your-mouth texture, and proper mixing ensures it.
🔥 Step 4: Bake to Golden Perfection
Preheat your oven to 350°F and grease two 9-inch round cake pans or one 9x13-inch pan (depending on your serving needs). Divide the batter evenly between the prepared pans. For best results, I use parchment paper rounds in the bottom of the pans to prevent sticking and ensure easy removal.
Bake for 25-30 minutes (or 30-35 minutes for the 9x13-inch pan) until a toothpick inserted in the center comes out clean. You'll see the edges start to pull away from the pan and the top develop a golden hue. Don't open the oven during baking—this causes the cakes to sink. The reason we wait until the toothpick test is that the cake continues cooking slightly after removal, and we want to avoid overbaking which makes it dry.
⏰ Step 5: Cool and Layer for Maximum Tenderness
Remove the cakes from the oven and let them cool in the pans for 10 minutes. Then transfer to a wire rack to cool completely. This gradual cooling prevents cracking and allows the moisture to distribute evenly throughout the cake. I know it's tempting to dig in immediately, but patience here pays off with a perfectly moist crumb.
Once completely cool, you can frost with your favorite buttercream, glaze, or even leave it naked to showcase the tender crumb. This all-purpose cake serves as the perfect base for birthdays, layer cakes, or even simple sheet cakes. The beauty of this recipe is its versatility—it's your blank canvas for any occasion.
Pro Tips For Making All Purpose Cake
- MEASURE FLOUR RIGHT: I learned this the hard way—spooning flour into cups packs it too tightly, and your cake turns out dense. Instead, use a kitchen scale (250g for 2 cups) or fluff the flour first, then scoop and level. That light, airy texture isn’t luck—it’s physics.
- CREAM BUTTER AND SUGAR LOW: Your mixer’s on high? Stop. Cream butter and sugar on medium until just pale, about 3-4 minutes. High speed traps air bubbles, and your cake might collapse later. Slow and steady wins the rise—trust me, I’ve seen the opposite happen.
- DON’T OVERMIX THE BATTER: After adding eggs, mix only until combined—maybe 10-15 seconds. Overmixing develops gluten, and your cake turns out tough instead of tender. Stop when there’s no flour streaks left, then call it done.
- LET THE BATTER REST: Skip the rush and give your batter a 10-minute break before baking. This lets flavors meld and air bubbles rise naturally. I know, I know—you’re eager to pop it in the oven. But that extra time makes a real difference in texture.
Essential equipment for great all purpose cake
Stand Mixer Essentials
Your stand mixer is the MVP for this recipe—I swear by my KitchenAid Artisan Series with the paddle attachment for creaming butter and sugar. The paddle ensures even mixing without overdeveloping gluten, which keeps that tender crumb we're after. If you don't have a stand mixer, a hand mixer works in a pinch, but you'll need to mix in 30-second bursts to avoid overheating the butter. 💛 For budget-friendly options, the Cuisinart SM-50BC delivers professional results without breaking the bank.
Precision Measuring Tools
Never eyeball measurements for cake baking—precision matters! Invest in a stainless steel measuring cup set (like the OXO Good Grips) for dry ingredients and a liquid measuring pitcher (I love the Pyrex glass version) for wet ingredients. For the 1 cup butter, use a food scale if you're feeling fancy—it ensures accuracy when cubing. A microplane comes in handy for zesting citrus if you're adding flavor variations like lemon or orange.
Cake Pans and Parchment
Standard 9-inch round cake pans (preferably with removable bottoms) are ideal for layer cakes, but a 9x13-inch pan works for sheet cakes. Line the bottoms with parchment paper rounds (cut to fit) to prevent sticking and ensure clean edges. For professional results, I use Wilton Perfect Results pans—they're non-stick and distribute heat evenly. If you're baking cupcakes, a 12-cup muffin tin with liners makes cleanup effortless.
Temperature Control
An oven thermometer (like the Thermoworks Oven Thermometer) is a game-changer—ovens often run hot or cold, and accurate temperature control is critical. Preheat your oven to 350°F and let it stabilize for 15-20 minutes before baking. For even baking, place a baking stone on the lower rack if your oven runs hot. A wire cooling rack (like the Amazon Basics) is essential for cooling cakes properly—it prevents soggy bottoms and ensures even moisture distribution.
Frosting and Decorating Tools
No cake is complete without frosting! A spatula set (I recommend Wilton's offset spatulas) helps spread buttercream smoothly, while a piping bag with star tips elevates decorating. For glaze, a small squeeze bottle works perfectly. If you're going for a rustic look, a fork or crinkle cutter adds texture. Don't forget a sharp serrated knife for clean slicing—Japanese Global knives are my go-to for professional results. 🌟
Storage Solutions
Store baked cake layers in airtight containers (like Rubbermaid Brilliance) at room temperature for up to 3 days to maintain moisture. For longer storage, freeze layers wrapped in plastic wrap and aluminum foil for up to 3 months. When reheating, use the microwave on low power for 10-15 seconds to restore freshness. A cake stand (like the West Elm Acorn) adds elegance when serving, while parchment-lined plates keep crumbs contained.
Nutrition facts
Frequently asked questions
Can I substitute all-purpose flour for cake flour in this recipe?
You can use all-purpose flour, but for a lighter texture, replace ½ cup of it with ½ cup cake flour or add 1 tbsp cornstarch to the dry ingredients. This reduces gluten development, keeping the crumb tender. The recipe already includes cornstarch, so no extra steps are needed!
How do I make this recipe gluten-free?
Replace the 2.5 cups all-purpose flour with a 1:1 gluten-free baking flour blend like Bob's Red Mill. Add ½ tsp xanthan gum if your blend doesn't include it—this mimics gluten's binding properties. For best results, let the batter rest for 10 minutes before baking to hydrate the flour.
Why did my cake turn out dense instead of tender?
Overmixing is the #1 culprit! Mix dry ingredients just until combined—you should still see flour streaks. Also, ensure your butter is cold but not frozen when creaming, and don't overbake. A toothpick should come out with a few moist crumbs, not clean. Chill the batter for 30 minutes if your kitchen is warm.
Can I bake this cake in a different pan size?
Yes, but adjust baking time! A 9x2-inch round pan needs 25-30 minutes, while an 8-inch pan requires 30-35 minutes. For a 9x13-inch sheet cake, bake 30-35 minutes. Always check with a toothpick—high sides may bake faster than centers. Line pans with parchment for even browning.
How can I add chocolate flavor without making it a chocolate cake?
Replace ½ cup sugar with ½ cup cocoa powder (Dutch-processed for richer flavor) and add ¼ cup milk to balance texture. For subtle chocolate notes, melt ½ cup dark chocolate with ¼ cup butter, cool slightly, then fold into the batter. This keeps the cake light while adding depth!