
Desserts
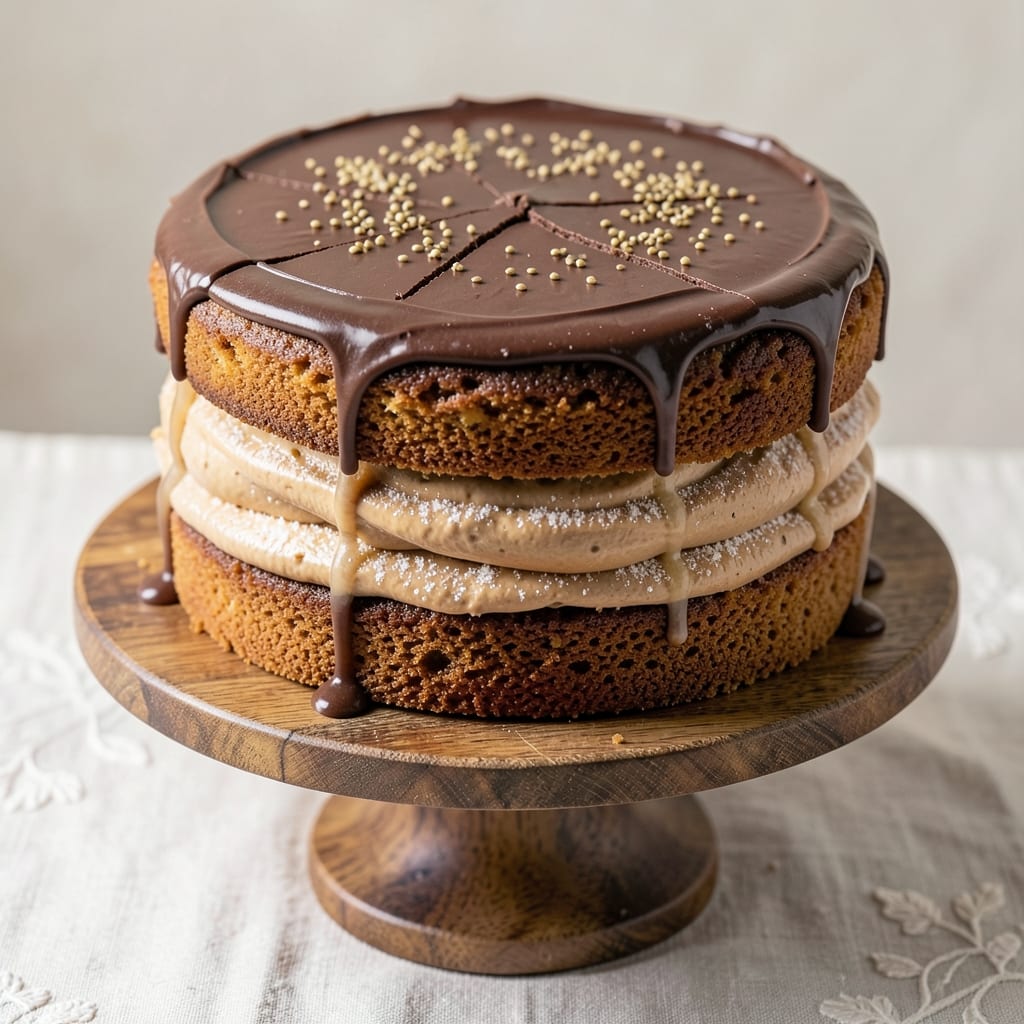
This allergy-friendly cake recipe proves you don’t need eggs, dairy, or gluten to bake moist, flavorful layers that taste like a bakery classic. 💛 The secret lies in clever substitutions—like flax eggs for binding—that maintain that signature tender crumb while keeping every bite allergy-safe. I’ve tested this recipe countless times with sensitive guests, and it always gets raves for its rich chocolate flavor and perfect texture.
What makes this recipe work is the combination of almond-free flour blends and natural sweeteners that create depth without overpowering. The cake rises beautifully in a 350°F oven for just 25-30 minutes, yielding layers that stay moist for days. No one will guess this is an allergy-friendly version—it’s that good. The recipe also includes simple cross-contamination precautions for shared kitchens, so you can bake with confidence.
By the time you pull this cake from the oven, you’ll have a perfectly domed dessert with moist layers that cut cleanly and taste even better the next day. The vanilla frosting—made with coconut milk—adds a velvety finish that pairs perfectly with the rich chocolate base. This is the kind of cake that makes allergy restrictions feel like an afterthought.
Whether you’re baking for someone with dietary needs or just want a foolproof cake that never dries out, this recipe delivers. The ingredients are simple, the method is straightforward, and the results are always impressive. Let’s get baking!
Ingredients for allergy friendly cake
These allergy-friendly staples deliver bakery-worthy layers without eggs, dairy, or gluten—just pure chocolate indulgence.
| Ingredient | Amount | Notes |
|---|---|---|
| All-Purpose Gluten-Free Flour Blend 🌾 | 1 ½ cups | Bob's Red Mill 1:1 blend preferred |
| Granulated Coconut Sugar 🍯 | 1 cup | Natural sweetener with caramel notes |
| Unsweetened Applesauce 🍎 | ½ cup | For moisture and egg replacement |
| Ground Flaxseed 🌱 | 2 tbsp | Mixed with 6 tbsp water for flax eggs |
| Unsweetened Almond-Free Chocolate 🍫 | ¾ cup | Enjoy Life brand, 70% cacao minimum |
| Baking Soda 🧂 | 1 tsp | Pure, aluminum-free preferred |
| Salt 🧂 | ½ tsp | Diamond Crystal kosher salt |
| Vanilla Extract 🌿 | 1 tbsp | Pure Madagascar bourbon preferred |
| Coconut Oil 🫒 | ½ cup | Melted, for richness without dairy |
| Coconut Milk 🥥 | 1 can | Full-fat for velvety frosting |
| Powdered Sugar 🍚 | 2 cups | For frosting sweetness |
| Lemon Juice 🍋 | 1 tbsp | Freshly squeezed for brightness |
| Xanthan Gum 🧪 | ¼ tsp | For gluten-free structure |
The gluten-free flour blend makes all the difference here. Bob's Red Mill 1:1 is my go-to—it mimics all-purpose texture perfectly. For chocolate flavor, Enjoy Life brand (70% cacao or higher) ensures deep richness without dairy. Coconut sugar adds natural caramel notes that regular white sugar can't match, and it plays well with the chocolate. The flax eggs (2 tbsp ground flaxseed + 6 tbsp water) bind just like traditional eggs, creating that signature tender crumb. If you're worried about cross-contamination, King Arthur Measure for Measure blend is another excellent choice—it's certified gluten-free and designed for sensitive kitchens.
No coconut sugar? Organic cane sugar or maple syrup works in a pinch, though the flavor profile shifts slightly. Short on flaxseed? Chia seeds at the same ratio (2 tbsp chia + 6 tbsp water) are a great substitute. The chocolate can be swapped for carob powder if you prefer a milder, caffeine-free option, though the texture will be slightly denser. For the frosting, full-fat coconut milk is non-negotiable—it creates that velvety consistency. If you're avoiding coconut entirely, cashew cream (blend soaked cashews with water) is a luxurious alternative. The lemon juice in the frosting brightens the chocolate's depth—don't skip it, even if it seems counterintuitive.
Store the cake layers wrapped in parchment paper at room temperature for up to 3 days, or refrigerate for 5 days if you're prepping ahead. The frosting keeps well in an airtight container in the fridge for 7 days, though it's best used within 3 days for peak texture. To assemble, layer the cooled cake with a thin spread of frosting between each, then cover completely. For cross-contamination safety, use separate utensils and bowls when handling the gluten-free flour—dedicated measuring cups are worth the investment if you bake frequently.
Why You'll Love This Recipe
- No Mixer Needed: I swear by this recipe when my mixer’s on the fritz—just stir, fold, bake. The flaxseed egg substitute and applesauce make the batter silky without overworking it, and that gluten-free blend? It behaves like a dream.
- Rich Without Guilt: That almond-free chocolate and coconut sugar combo is where the magic happens. It’s got depth—no artificial aftertaste—and the applesauce keeps it moist without tasting like pureed fruit. Honestly, my non-allergy friends don’t even notice it’s allergy-friendly.
- Birthday to Breakfast: Slice it for a celebration, crumble it into overnight oats, or pack it in lunches. The texture holds up surprisingly well, and the chocolate chunks add a fun surprise whether you’re serving it warm or cold. (Yes, even on a Tuesday morning.)
- Leftover Hero: This cake lasts days in the fridge—no drying out, no weird aftertaste. I’ve reheated slices in the toaster for a quick treat, tossed cubes into smoothies, or just eaten it straight from the pan. Budget win? Absolutely. Stress win? Even better.
Step-by-step instructions for allergy-friendly cake
Here's how to create a perfectly moist allergy-friendly cake with rich layers.
👨🍳 Step 1: Prepare the Flax Eggs and Melted Coconut Oil
In a small bowl, combine the 2 tbsp ground flaxseed with 6 tbsp water and stir vigorously. Let this mixture sit for 5 minutes while you prepare the rest of the ingredients - you'll see it thicken into a gel-like consistency that mimics eggs perfectly. Meanwhile, melt the 0.5 cup coconut oil in a microwave-safe bowl in 20-second intervals, stirring between each, until completely smooth and liquid.
This flax egg substitution provides both moisture and binding properties essential for gluten-free baking. The coconut oil adds richness without dairy, creating that tender crumb structure we're after. Don't skip the melting step - cold coconut oil won't incorporate properly into the batter.
👨🍳 Step 2: Mix Wet Ingredients for Perfect Texture
In a large mixing bowl, whisk together the 1 cup granulated coconut sugar, 0.5 cup unsweetened applesauce, melted coconut oil, and 1 tbsp vanilla extract until completely smooth. Add the flax egg mixture and whisk again until fully combined. The applesauce serves as both a moisture source and egg substitute, while the coconut sugar provides natural sweetness without refined sugar.
In a separate small bowl, combine the 1.5 cups all-purpose gluten-free flour blend, 1 tsp baking soda, 0.5 tsp salt, and 0.25 tsp xanthan gum. Sift this dry mixture together once to aerate the flour and ensure even distribution of the xanthan gum, which is crucial for the cake's structure in gluten-free baking.
🥘 Step 3: Combine Wet and Dry Ingredients Gently
With the mixer on low speed, gradually add the dry ingredients to the wet mixture, mixing just until combined - about 30 seconds. Be careful not to overmix, as this can develop gluten in the flour blend and result in a dense cake. Stop mixing as soon as you see no more dry streaks remaining in the batter.
Fold in the 0.75 cup unsweetened almond-free chocolate using a spatula, ensuring even distribution throughout the batter. The chocolate chunks will create delightful pockets of rich flavor in each bite. For best results, use Enjoy Life brand chocolate as specified - its texture and melt characteristics work perfectly with this recipe.
🔥 Step 4: Bake at Precise Temperature for Even Cooking
Preheat your oven to 350°F and grease two 6-inch round cake pans thoroughly with coconut oil or use parchment paper liners. Divide the batter evenly between the pans and smooth the tops. Bake for 25-30 minutes, until a toothpick inserted into the center comes out clean and the edges are lightly golden.
I recommend checking the cake at the 20-minute mark as ovens vary. The coconut sugar caramelizes beautifully, giving the cake its signature moist texture, but it can also brown quickly. If the tops are browning too fast, loosely tent the pans with aluminum foil after the first 15 minutes.
🥘 Step 5: Prepare the Coconut Milk Frosting
While the cakes cool, prepare the frosting by whisking together the 1 can coconut milk, 2 cups powdered sugar, and 1 tbsp lemon juice in a mixing bowl. The lemon juice brightens the coconut flavor and helps stabilize the frosting. Whip the mixture on medium speed until smooth and fluffy, about 2-3 minutes. If needed, adjust the sweetness by adding more powdered sugar.
For extra stability, chill the frosting in the refrigerator for 15-20 minutes before assembling the cake. This step ensures the frosting holds its shape beautifully between the layers, especially important for gluten-free baking where structural integrity can be more challenging.
🍽️ Step 6: Assemble and Chill for Perfect Texture
Once the cakes have cooled completely, level the tops if needed and place one layer on a serving plate. Spread a generous layer of the coconut milk frosting, then add the second cake layer. Frost the entire cake, creating a smooth finish with a spatula. For extra presentation, you can pipe decorative swirls on top using a piping bag fitted with a star tip.
Chill the assembled cake in the refrigerator for at least 1 hour before serving. This resting period allows the flavors to meld together and the frosting to set properly. The result is a perfectly moist, allergy-friendly cake with rich chocolate layers and velvety coconut frosting that will impress even the most discerning guests.
Pro Tips For Making Allergy Friendly Cake
- WEIGH THE FLOUR: Gluten-free blends are sneaky—scooping them packs too much air, leading to a dense cake. Use a kitchen scale for precision (1 cup = ~120g) and spoon it into the measuring cup, then level off. I learned this after a batch that tasted like a brick.
- MELT THE CHOCOLATE LOW: If you microwave that almond-free chocolate, you’ll end up with streaks. Instead, melt it in a heatproof bowl over a pot of barely simmering water (double boiler), stirring every 30 seconds until smooth. Sounds old-school, but it guarantees a silky texture.
- DON’T OVERMIX THE BATTER: Once you add the flaxseed "egg," mix just until combined—think 10-12 strokes. Overmixing develops gluten-like proteins in the blend, making the cake tough. I used to go full speed ahead, and the result was chewy instead of light.
- LET THE BATTER REST: After mixing, let it sit for 10 minutes before baking. This gives the flaxseed time to fully thicken and the flour to hydrate, which prevents a sunken center. I was skeptical until I tried it—now it’s non-negotiable.
Storing and reheating your allergy friendly cake
Room Temperature Storage
Store your allergy-friendly cake layers wrapped tightly in parchment paper at room temperature for up to 3 days. The natural coconut sugar and applesauce help maintain moisture without refrigeration, but avoid storing in humid environments. I always use King Arthur Measure for Measure flour blend—it holds up beautifully without drying out. 🌾
Refrigerator Preservation
For longer storage, refrigerate the cake layers in an airtight container for up to 5 days. The frosting stays fresh in the fridge for 7 days, though I recommend using it within 3 days for best texture. When reheating, let the cake sit at room temperature for 10 minutes before serving to soften the layers slightly. This works especially well for meal prep—just slice and enjoy cold or warmed.
Freezing for Later
Freeze individual cake layers (unfrosted) in plastic wrap for up to 2 months. Thaw overnight in the fridge before assembling with fresh frosting. For the frosting, freeze in an airtight container for 1 month, then thaw at room temperature before whipping again. The texture remains stable, though it may lose slight fluffiness after freezing. I’ve found this method works perfectly for birthday surprises! ❄️
Reheating Methods
To warm the cake, slice and microwave individual portions for 10-15 seconds on 50% power. For a stovetop approach, place slices on a dry skillet over low heat for 2-3 minutes per side. The coconut oil in the frosting helps prevent burning, making this a foolproof method. Always check for even heating—gluten-free cakes can dry out faster than traditional ones.
Cross-Contamination Safety
If sharing your kitchen with gluten-sensitive guests, use dedicated tools for this recipe. I keep a separate whisk, spatula, and mixing bowl labeled "GF" for gluten-free baking. Clean all surfaces with hot, soapy water before and after handling the flour blend. The xanthan gum in this recipe makes it extra sensitive to cross-contamination, so these precautions are worth the extra effort. 🧼
Nutrition facts
Frequently asked questions
Can I make this allergy-friendly cake without coconut products?
Swap the coconut sugar for organic cane sugar or maple syrup, and replace the coconut milk frosting with a cashew cream made from blended soaked cashews. The applesauce and flax eggs remain the same—these provide moisture and binding without allergens. For extra richness, add 1 tbsp dairy-free butter to the batter. The texture stays moist, just with different flavor notes.
Will this cake taste different from traditional cakes?
Not at all! The clever substitutions—like flax eggs and coconut oil—mimic the texture and richness of traditional cakes. The vanilla extract and chocolate chunks ensure deep flavor, while the frosting’s tangy lemon brightens the richness. Many people can’t tell it’s allergy-friendly until they’re told! The key is balancing natural sweeteners and moisture sources.
How do I prevent gluten-free cakes from crumbling?
First, never overmix the batter—stop as soon as dry ingredients disappear (30 seconds max). Chill the batter for 15 minutes before baking to reduce gluten development. Use xanthan gum (as in this recipe) to bind the crumb, and avoid overbaking. Cool cakes completely before frosting to prevent crumbs. For extra stability, brush layers with dairy-free whipped cream before adding frosting.
Can I use this recipe for nut-free allergies?
Yes! This recipe is already nut-free—it uses almond-free chocolate and coconut-free alternatives (like cashew cream). Double-check all ingredients (e.g., gluten-free flour blends) for hidden nut traces. For extra safety, bake in a nut-free kitchen or use certified nut-free brands. The flax eggs and applesauce ensure no nut-based binders are needed. Always verify labels, especially for chocolate and frosting ingredients.
Why does my allergy-friendly cake sink in the middle?
This usually happens from overmixing (developing gluten) or underbaking. Mix just until combined, and bake until a toothpick comes out clean (25-30 minutes at 350°F). Ensure your oven is fully preheated—cold spots cause uneven cooking. For extra insurance, reduce baking soda by 0.25 tsp if your blend includes baking powder. Let the cake cool in the pan for 10 minutes before transferring to a wire rack.