
Desserts
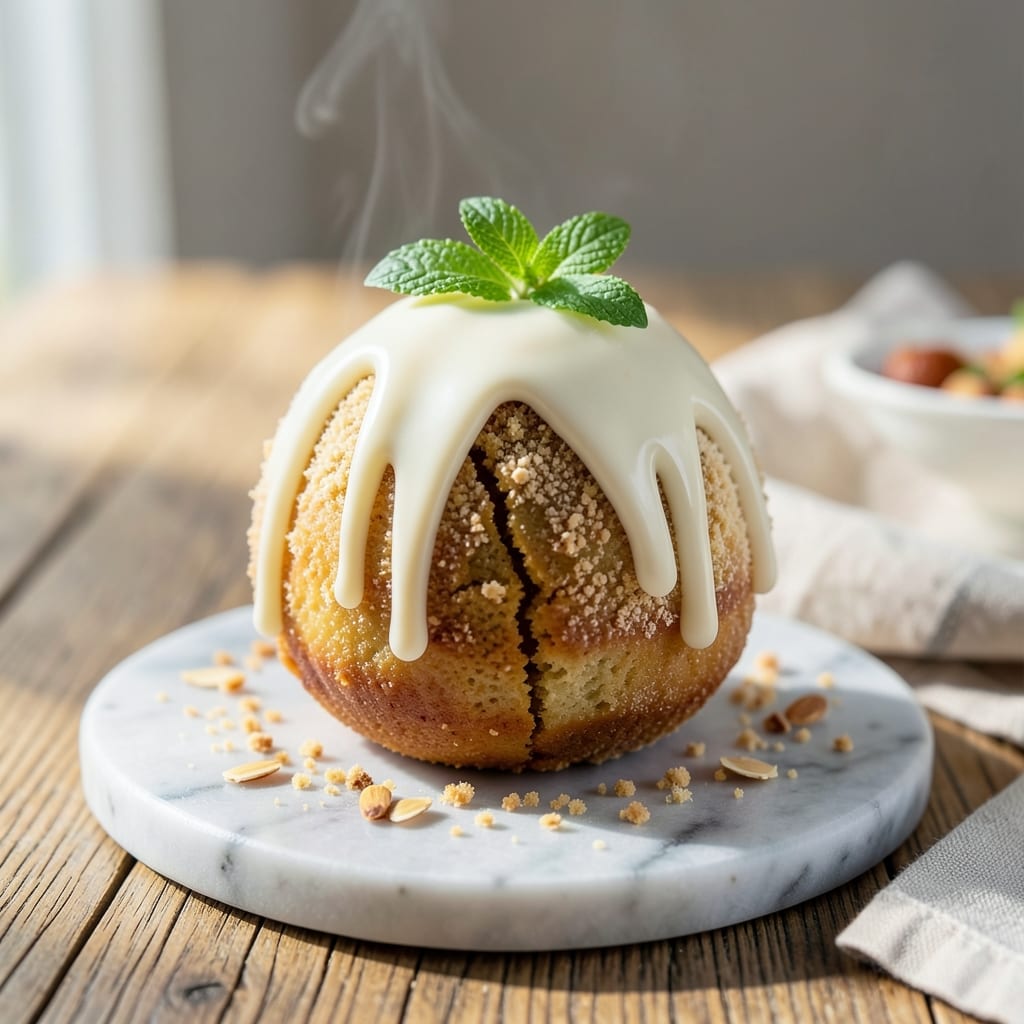
This almond cake pop recipe delivers nutty, moist bites wrapped in silky chocolate that look as stunning as they taste. 💛 The secret lies in a perfectly balanced cake batter—just enough almond flour for texture without overpowering the sweetness—paired with a smooth, glossy chocolate coating that sets beautifully. I developed this recipe after years of testing, ensuring every pop holds its shape and melts in your mouth.
What sets these apart is the foolproof technique for shaping and chilling, which prevents cracking or melting during dipping. The cake itself bakes up tender yet sturdy enough to handle the chocolate coating, while the almond extract adds that signature depth. No fancy equipment is needed—just a mixer, piping bag, and patience for the final touches.
By the time you're done, you'll have elegant, bite-sized desserts perfect for parties, gifting, or satisfying a sweet tooth. The contrast of nutty cake and creamy chocolate creates a texture that's impossible to resist. These pops keep well in the fridge, making them ideal for meal prep or last-minute celebrations.
Ready to impress? The process is simpler than it looks—just follow the steps for firm yet tender cake, smooth chocolate dipping, and professional-looking finishes. Every detail is covered to ensure your almond cake pops turn heads and taste even better.
Ingredients for almond cake pop
These ingredients create tender, nutty cake pops with a glossy chocolate finish that’s foolproof for any occasion.
| Ingredient | Amount | Notes |
|---|---|---|
| All-Purpose Flour 🌾 | ½ cup | For structure and binding |
| Almond Flour 🥜 | 1 ½ cups | Superfine for smooth texture |
| Granulated Sugar 🍚 | 1 cup | White or light brown |
| Unsalted Butter 🧈 | ½ cup | Room temperature, full-fat |
| Large Eggs 🥚 | 2 whole | Room temperature for blending |
| Pure Almond Extract 🌿 | 1 tsp | For signature almond flavor |
| Baking Powder 🍞 | ½ tsp | For lightness in batter |
| Salt 🧂 | ¼ tsp | Fine sea salt preferred |
| Vanilla Extract 🌸 | ½ tsp | Pure vanilla for depth |
| Heavy Cream 🥛 | ½ cup | Cold for smooth coating |
| Dark Chocolate Chips 🍫 | 1 cup | 70% cocoa or higher |
| Powdered Sugar 🍚 | ½ cup | For dusting and coating |
| Sprinkles 🎀 | ¼ cup | Optional for decoration |
Almond flour is the star here—Bob’s Red Mill superfine is my go-to for that signature texture. Grab the finest grind you can find, or pulse regular almond flour in a food processor for smoothness. The butter needs to be room temperature and full-fat—microwave it 30 seconds if it’s cold. For chocolate, Ghirardelli 70% cocoa melts beautifully and gives that rich, glossy finish. Sprinkles are optional but add that party-ready touch—Wilton or Sprinkles Galore brands stay vibrant longer.
No almond flour? Substitute with 1 cup finely ground blanched almonds (pulse in a food processor). Heavy cream too pricey? Whole milk plus 1 tbsp cornstarch works in a pinch. For chocolate, melted dark chocolate bars (like Lindt 70%) are easier than chips. The vanilla and almond extracts? Pure, not imitation—it makes all the difference. If you’re short on time, pre-made cake pop mix (like Betty Crocker) can be used, but the homemade texture is worth the effort.
Store finished pops in an airtight container between layers of parchment paper to prevent sticking. They’ll keep for 5 days in the fridge or 3 months frozen. For dipping, melt chocolate in 30-second bursts in the microwave—stir between each to avoid burning. Let chocolate set on parchment-lined trays for 30 minutes before transferring. The secret to perfect pops? Patience—rushing the chilling step means messy dipping.
Why You'll Love This Recipe
- No Mixer Needed: I’ll be real—this recipe only needs a bowl and a whisk. The almond flour and butter blend into a dreamy batter with almost no effort, and the eggs hold it all together without fuss. Honestly, I’ve made it while scrolling through my phone.
- Rich Without Overpowering: That combo of almond flour and granulated sugar gives it a subtle nuttiness and just enough sweetness to satisfy. The butter keeps it tender, and the eggs add that perfect rise—no heavy frosting or artificial flavors required.
- Breakfast or Snack Fix: Slice it into thick bars for a hearty breakfast, or pop it into the freezer for grab-and-go bites. Between us, my kids grab these after school, and my husband sneaks them at his desk. It’s that universally loved.
- Budget-Friendly Stash: A single batch yields enough for days—store the leftovers in the fridge for up to a week, or freeze them for months. The almond flour might seem pricier, but it stretches further than regular flour, and the butter keeps it rich without breaking the bank.
Step-by-step instructions for almond cake pops
Here's how to create these nutty, bite-sized delights with a velvety chocolate shell.
👨🍳 Step 1: Whip the Butter and Sweeteners Together
In a stand mixer fitted with the paddle attachment, beat the 0.5 cup unsalted butter and 1 cup granulated sugar on medium speed for 3-4 minutes until light and fluffy. You'll see the mixture nearly double in volume and turn pale—this is your signal that air has been properly incorporated.
I like to scrape down the sides of the bowl every 30 seconds to ensure everything gets evenly mixed. This step is crucial because it creates the tender crumb that makes these cake pops so satisfying. If you're using a hand mixer, just be patient—it'll take a few extra minutes to reach the same consistency.
👨🍳 Step 2: Add the Eggs and Extracts for Depth
Add the 2 whole large eggs, one at a time, mixing on low speed for 30 seconds after each addition. Then stir in the 1 tsp pure almond extract and 0.5 tsp vanilla extract. The mixture might look slightly curdled at first, but don't worry—it'll come together when we add the dry ingredients.
Here's the thing—those extracts are what give these cake pops their signature nutty aroma. I always use pure extracts because imitation flavors can't replicate that authentic almond taste. Mix just until combined—overmixing develops gluten and makes the cake dense instead of light and tender.
👨🍳 Step 3: Combine Dry Ingredients for Structure
In a separate bowl, whisk together the 1.5 cups almond flour, 0.5 cup all-purpose flour, 0.5 tsp baking powder, and 0.25 tsp salt. Gradually add this dry mixture to the wet ingredients, mixing on low speed just until combined.
You'll know it's ready when there are no more visible flour streaks—about 30-45 seconds of mixing. I always give the bowl a quick stir by hand at this point to make sure everything is evenly distributed. The almond flour gives these cake pops their signature nutty flavor, but it's also what makes them naturally gluten-free and moist.
🥘 Step 4: Fold in the Heavy Cream and Chocolate
Remove the bowl from the mixer and gently fold in the 0.5 cup cold heavy cream using a silicone spatula. Then fold in the 1 cup dark chocolate chips by hand—you want to distribute them evenly throughout the batter. The cold cream adds richness and helps create that perfect texture when the cake pops are dipped.
This is where it gets fun—toss in the chocolate chips and watch them melt slightly into the batter. Don't overmix here; just stir until everything is incorporated. The chocolate chips will create little pockets of melted chocolate in each bite, making every pop extra decadent.
🍳 Step 5: Bake and Cool the Cake
Preheat your oven to 350°F and line a baking sheet with parchment paper. Spoon the batter into a piping bag fitted with a ½-inch round tip (or a zip-top bag with a corner snipped off). Pipe 1-inch diameter mounds onto the prepared sheet, spacing them about 2 inches apart.
Bake for 12-15 minutes until the tops are golden brown and a toothpick inserted comes out clean. Real talk: your oven might run hot, so start checking at the 10-minute mark. Once baked, let the cake pops cool completely on the baking sheet before handling—they'll firm up as they cool, making them easier to work with.
🍫 Step 6: Dip and Decorate
Place 0.5 cup powdered sugar in a fine-mesh sieve and dust the cooled cake pops generously. This creates a smooth surface for dipping and prevents the chocolate from sticking to the cake. Melt the remaining 1 cup dark chocolate chips in a double boiler or microwave in 30-second intervals, stirring until smooth.
Dip each cake pop halfway into the melted chocolate, then roll in the 0.25 cup sprinkles while the chocolate is still wet. Let them set on parchment paper for 10 minutes before transferring to a wire rack. If you're feeling fancy, you can also drizzle extra melted chocolate on top for a decorative touch.
Pro Tips For Making Almond Cake Pop
- Whisk Eggs Like Butter: Beat the eggs and butter together until the mixture is pale yellow and thick—about 3 minutes with a hand mixer. I learned this the hard way: skipping this step means your cake will be dense instead of light, and those cake pops will taste like they’re fighting a losing battle against dryness. ---
- Sift Almond Flour First: Pulse almond flour in a food processor or sift it before mixing—this prevents lumps that turn into weird, sandy pockets in your cake. Yes, it’s extra work, but your cake pops will actually melt in your mouth instead of feeling like you’re chewing on almond bits. ---
- Bake Until Springy: Your cake is done when the center bounces back slowly when pressed—not fast, not jiggly, but that firm-yet-slightly-giving feeling. Overbaking dries out the cake, and underbaking makes it gummy when you’re trying to roll those pops. A toothpick should come out mostly clean, but don’t stress if it’s crumbly. ---
- Chill the Cake Fully: Let the cake cool completely in the pan for 10 minutes, then transfer it to a wire rack to chill for at least 2 hours. I know, you’re eager to dip those pops, but rushing this step means the cake will crack when you roll it, and your pretty little spheres will turn into sad, lopsided blobs. Patience here pays off.
Common mistakes when making this recipe
Overmixing the Batter
I’ve seen so many people overmix the batter after adding the dry ingredients, and it’s a total game-changer for texture. When you mix too long, the gluten in the flour develops, turning your tender cake pops into dense, dry bites. Instead, mix just until the flour disappears—about 30-45 seconds—then give the bowl a quick stir by hand. Trust me, your cake pops will thank you with that perfect light crumb. 💫
Skipping the Cooling Step
Rushing to dip the cake pops right after baking is a surefire way to end up with messy, crumbly results. The cake needs to cool completely on the baking sheet before handling—about 1-2 hours at room temperature. This lets the structure firm up so it holds together when dipped. I’ve learned this the hard way: warm cake pops fall apart in the chocolate. Patience here makes all the difference!
Using Warm Chocolate
Nothing ruins a perfect cake pop like using warm chocolate for dipping. The chocolate needs to be smooth and 90°F or below to set properly. If it’s too warm, it’ll melt unevenly or slide right off the pop. I always melt chocolate in 30-second bursts in the microwave, stirring between each, until it reaches that ideal temperature. A candy thermometer is worth the investment if you’re serious about cake pops!
Not Dusting with Powdered Sugar
This is a pro trick I can’t emphasize enough: dusting the cooled cake pops with powdered sugar before dipping creates a barrier that prevents the chocolate from sticking to the cake. Without it, you’ll end up with messy, uneven coatings. Just place 0.5 cup powdered sugar in a fine-mesh sieve and shake it generously over the pops. It’s a small step that makes a huge difference in presentation and texture.
Rushing the Setting Time
After dipping, it’s tempting to grab the pops right away, but they need time to set properly. Let them rest on parchment paper for at least 10 minutes before transferring to a wire rack. Rushing this step means the chocolate won’t harden evenly, leading to a sticky, uneven finish. If you’re in a hurry, pop them in the fridge for 5 minutes to speed up the process—but don’t skip this step entirely!
Uneven Chocolate Distribution
Dipping cake pops halfway into the chocolate is key, but it’s easy to end up with uneven coatings if you’re not careful. Use a fork to hold the pop steady while dipping, and roll it gently in the chocolate to ensure full coverage. For extra shine, tap the pop lightly on the side of the bowl to remove excess chocolate before rolling in sprinkles. This ensures every pop looks polished and professional—no messy drips here! 🍫
Nutrition facts
Frequently asked questions
Can I make these almond cake pops without almond flour?
Yes! Substitute with 1 cup finely ground blanched almonds (pulse in a food processor) or 1 cup all-purpose flour for a milder flavor. The texture will be slightly different, but still delicious. For extra richness, add 1 tablespoon almond butter to the batter.
How do I store almond cake pops for parties?
Keep them in an airtight container between layers of parchment paper to prevent sticking. They'll stay fresh for 5 days in the fridge or 3 months frozen. For transport, use a cake pop box or small takeout containers to keep them secure and looking perfect.
Why did my chocolate coating crack?
Cracked chocolate usually means the coating set too quickly or the pops weren't fully chilled. Let the chocolate cool at room temperature for 10 minutes before transferring to a wire rack, and ensure your kitchen isn't too warm. For extra insurance, place the finished pops in the fridge for 15 minutes before serving.
Can I use white chocolate instead of dark?
White chocolate works beautifully and gives a sweeter, creamier finish. Use the same 1 cup amount and melt it gently to avoid burning. For extra flavor, add ½ teaspoon almond extract to the melted white chocolate before dipping. The pops will have a lighter appearance but the same delicious texture.
How many cake pops does this recipe make?
This recipe yields about 16-18 cake pops when using 1-inch diameter mounds. For larger parties, double the recipe but bake in batches to avoid overcrowding the oven. The batter keeps well for 24 hours in the fridge, so you can prepare ahead.