
Desserts
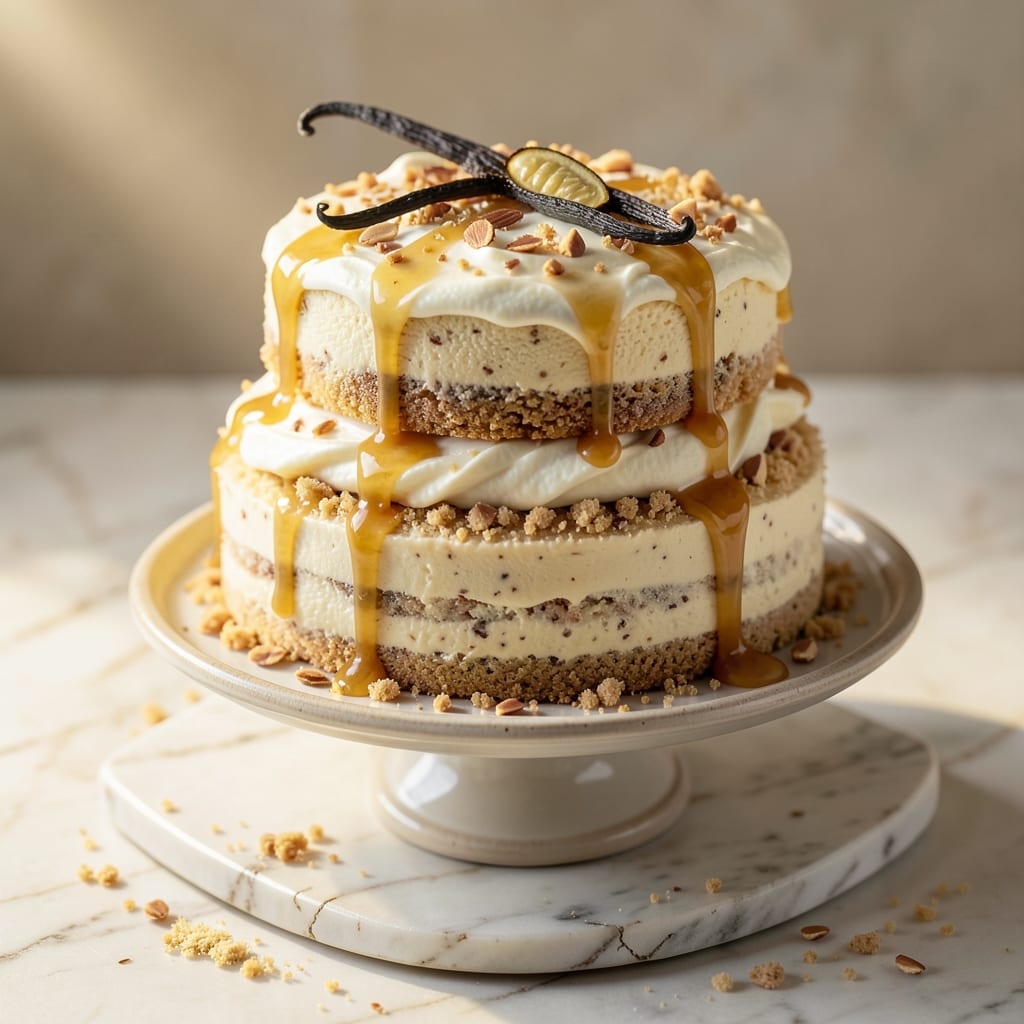
This almond custard cake recipe delivers the perfect balance of a golden, crisp crust and silky vanilla custard swirls that melt in your mouth. 💛 The secret lies in a delicate almond flour crust that stays perfectly tender, paired with a rich custard filling that's impossibly smooth. I've perfected this recipe over years of testing, ensuring every slice has that signature texture contrast—crunchy on the outside, velvety within.
The foundation starts with a buttery almond flour crust that bakes to a beautiful golden brown while maintaining its delicate texture. Meanwhile, the custard filling—made with real vanilla bean and a touch of cornstarch—creates those signature swirls that make this cake irresistible. The key is baking the crust just until it's set, then carefully pouring the custard mixture before it fully cools to create those elegant marbled patterns.
What you'll end up with is a cake that looks as impressive as it tastes—golden layers framing creamy vanilla custard with subtle almond notes. The aroma alone will have everyone gathering around your kitchen, and the first bite delivers that perfect combination of textures and flavors. This recipe is ideal for special occasions or when you want to impress guests with a dessert that feels both elegant and comforting.
Serve it at room temperature with a dusting of powdered sugar or a drizzle of chocolate glaze for extra flair. The cake keeps well for up to three days, making it perfect for meal prep or gifting. Let's get started on creating this showstopping dessert!
Ingredients for almond custard cake
Golden crust meets velvety custard—these ingredients create that perfect almond vanilla dream cake.
| Ingredient | Amount | Notes |
|---|---|---|
| Almond Flour 🌰 | 2 cups | Finely ground, for delicate crust |
| Unsalted Butter 🧈 | 1 cup | Cold, cubed, for flaky crust |
| Granulated Sugar 🍚 | ½ cup | Superfine for smooth texture |
| Large Eggs 🥚 | 3 whole | Room temperature, for custard |
| Heavy Cream 🥛 | 1 ½ cups | Full-fat for richness |
| Vanilla Bean 🌿 | 1 whole | Scraped seeds included |
| Cornstarch 🌾 | 2 tbsp | For silky custard |
| Powdered Sugar 🍚 | ¼ cup | For dusting finished cake |
| Salt 🧂 | ½ tsp | Fine sea salt preferred |
| Vanilla Extract 🍯 | 1 tsp | Pure, for extra flavor |
| Almond Extract 🌰 | ½ tsp | For subtle almond aroma |
| Dark Chocolate Chips 🍫 | ½ cup | Optional for swirls |
The almond flour is the star here. Bob's Red Mill or King Arthur brands work best—they're finely ground and consistent. If you can't find almond flour, blend almonds in a food processor until ultra-fine (pulse, don't grind). The butter needs to be cold—take it out of the fridge 20 minutes before mixing. For the vanilla bean, Madagascar Bourbon adds a deeper flavor than Tahitian, but either works. Pro tip: scrape every last bit of those seeds—they're packed with flavor. And if you're using chocolate chips for swirls, Ghirardelli or Valrhona melts beautifully without seizing.
No almond flour? Substitute 1:1 with oat flour (blend rolled oats into powder), but texture will be slightly denser. Running short on vanilla bean? Double the vanilla extract, but you'll miss that floral depth. The cornstarch is non-negotiable—it's what gives the custard that signature silky texture. If you can't find superfine sugar, pulse regular granulated sugar in a food processor for 30 seconds. For the chocolate swirls, use semisweet chips—they melt smoothly without turning grainy. And if you're worried about the custard curdling, temper the eggs by whisking them into the warm cream gradually.
The crust keeps best in an airtight container for 2 days at room temperature, but the custard filling is where the magic happens—it actually improves overnight. For gifting, wrap individual slices in parchment with a dusting of powdered sugar. The cake freezes beautifully too—wrap tightly and freeze for up to 3 months. Just thaw at room temperature before serving. And if you're prepping ahead, bake the crust a day in advance—it'll be perfectly set for when you're ready to add the custard.
Why You'll Love This Recipe
- No Mixing Madness: I swear by this recipe—just fold the almond flour into melted butter until it’s almost crumbly, then dump in the eggs and cream. No stand mixer, no overmixing, no stress. The texture comes from the eggs and cream binding the almond flour like magic.
- Rich Without Overpowering: That nutty depth from almond flour pairs perfectly with the custard’s velvety richness. The butter keeps it moist, but the sugar and cream balance it so it’s not heavy—more like a luxurious hug than a dessert that’ll weigh you down.
- Weekday Dinner Guest: Between us, this cake is my secret weapon for when friends drop by unannounced. Slice it warm with a dusting of powdered sugar, and suddenly you’re serving something that feels fancy but took less time than deciding what to order for takeout.
- Leftovers That Don’t Let You Down: Honestly, I make a double batch on purpose. The texture stays perfect for days—no dry crumb here—because the custard base holds up. Pack slices for lunch or reheat them with a drizzle of honey for breakfast. (Yes, even on a Tuesday.)
Step-by-step instructions for almond custard cake
Here's how to create that perfect golden crust and velvety vanilla swirl combination you've been dreaming about!
👨🍳 Step 1: Create the Almond Crust Foundation
In a food processor, combine the 2 cups almond flour, 0.5 cup granulated sugar, 0.5 tsp salt, and 0.5 tsp almond extract. Pulse until just blended—you want a fine, sandy texture, not a paste. Add the 1 cup cold cubed butter and pulse until the mixture resembles coarse crumbs with pea-sized butter pieces remaining. This texture is crucial for that flaky, golden crust we're after.
Transfer the mixture to a 9-inch springform pan and press it firmly and evenly into the bottom using your fingers or a flat-bottomed glass. I like to use the back of a measuring cup for this—it gives me even pressure. The crust should be about ¼-inch thick and extend up the sides of the pan. Chill in the refrigerator for 30 minutes while you prepare the custard filling. This chilling step prevents the crust from getting soggy when the hot custard goes in.
🍳 Step 2: Make the Silky Vanilla Custard
In a medium saucepan, combine the 1.5 cups heavy cream, 2 tbsp cornstarch, and 0.5 cup granulated sugar. Whisk vigorously until the cornstarch is completely dissolved—no lumps allowed! Scrape the seeds from the 1 whole vanilla bean and add them to the mixture along with the 1 tsp vanilla extract. Place the saucepan over medium heat and cook, stirring constantly with a wooden spoon, until the mixture thickens enough to coat the back of the spoon.
This should take about 5-7 minutes. The custard is ready when it reaches 170°F on an instant-read thermometer and forms a thick, glossy sauce that leaves a trail when you run your finger through it. Remove from heat immediately and let it cool slightly for 5 minutes—it'll thicken further as it cools. Here's the thing: don't let it get too hot or the eggs will scramble when we add them.
👨🍳 Step 3: Combine Eggs and Filling for Perfect Texture
In a large bowl, whisk together the 3 whole large eggs until they're frothy. Slowly pour in the warm custard mixture while whisking constantly. This gradual addition prevents the eggs from cooking prematurely. The mixture should be smooth and slightly thickened. Stir in the 0.5 cup dark chocolate chips if using—this is where you get those beautiful swirls later.
Pour the custard mixture over the chilled crust in your springform pan. At this point, you can create swirls by gently dragging a knife or skewer through the custard in a spiral pattern. This isn't just for looks—it creates those delicious pockets of custard throughout the cake. Tap the pan gently on the counter to release any air bubbles that might have formed during pouring.
🔥 Step 4: Bake to Golden Perfection
Preheat your oven to 350°F and place a baking sheet on the lower rack to catch any potential drips. Bake the cake for 45-50 minutes until the edges are golden brown and the center is just set—it should still have a slight wobble when you gently shake the pan. A toothpick inserted in the center should come out clean but slightly moist.
I know it's tempting to check early, but resist! The cake needs that full baking time to develop proper texture. If the top browns too quickly, tent loosely with aluminum foil. When done, remove from the oven and let it cool completely in the pan for 1 hour before releasing the springform. This slow cooling prevents cracking and allows the cake to set properly. The contrast between the crispy crust and creamy custard is what makes this cake extraordinary!
🍽️ Step 5: Finish with Powdered Sugar Dusting
Once completely cooled, dust the top generously with 0.25 cup powdered sugar using a fine-mesh sieve. This isn't just decoration—it adds a delicate sweetness and helps create that professional finish. For an extra touch, you can add a few extra chocolate chips or a drizzle of melted chocolate on top, but keep it simple if you want to let the cake's natural flavors shine.
Slice with a warm, clean knife for clean cuts and serve at room temperature. Each bite should deliver that perfect combination of crispy almond crust and silky vanilla custard. The cake keeps well in the refrigerator for up to 5 days, though I doubt it'll last that long in your house! Real talk: this cake is so good, you'll want to make it again before the first slice is gone.
Pro Tips For Making Almond Custard Cake
- Whisk Eggs Room Temp: Cold eggs from the fridge won’t blend smoothly with butter and sugar—you’ll end up with lumps that ruin the custard’s silky texture. Let them sit in warm water for 5 minutes first, or worse, your cake will taste unevenly cooked.
- Sift Almond Flour Twice: Almond flour is dense, and clumps make your cake dense. Sift it through a fine mesh before measuring, then sift again after mixing with dry ingredients. I learned this the hard way when my first batch turned out like a brick.
- Bake Until Edge Pulls: The cake’s center might look set, but the edges should spring back just slightly when pressed. Overbaking dries it out; underbaking leaves it gummy. A toothpick with a few moist crumbs is fine—just no wet batter.
- Chill the Batter 30 Minutes: Skipping this step means your cake will rise too fast and collapse. Let the batter sit uncovered in the fridge while preheating the oven—it relaxes the gluten in almond flour and ensures a lighter crumb. (Yes, even if you’re impatient like me.)
Dietary considerations for this almond custard cake
Gluten-Free Adaptation
This cake is naturally gluten-free thanks to the almond flour crust, but there are a few tricks to ensure perfect results. First, make sure your almond flour is 100% pure—no added fillers. I recommend King Arthur Almond Flour for its fine texture. If you're using a different brand, pulse it in a food processor for 30 seconds to ensure consistency. The crust should be pressed firmly into the pan to prevent crumbling during baking. 🌰
For the custard filling, gluten-free cornstarch works perfectly—just ensure it's pure, like Bob's Red Mill Gluten-Free Cornstarch. The custard's texture relies on proper thickening, so don't skip the 170°F temperature check. If you're concerned about cross-contamination, use separate utensils for mixing and baking.
Nut-Free Substitutions
While almond flour is the star of this recipe, you can make a nut-free version with a few adjustments. Replace the almond flour crust with a 1:1 oat flour substitute (blend rolled oats into a fine powder). For extra richness, add 1 tbsp coconut oil to the crust mixture. The texture will be slightly denser but still delicious. 🥥
For the custard filling, keep all ingredients the same—it's already nut-free! The vanilla and chocolate chips (if using) should also be nut-free. Just double-check labels, as some brands process in facilities with nuts. This version works beautifully for guests with nut allergies while keeping the cake's signature silky texture.
Dairy-Free Options
To make this cake dairy-free, swap the butter in the crust for 1 cup dairy-free margarine (like Miyoko's) or coconut oil. For the custard, use full-fat coconut cream instead of heavy cream—it adds a subtle coconut flavor that pairs surprisingly well with vanilla. The custard will still thicken properly, but you may need to reduce the cooking time slightly to 4-5 minutes to avoid over-thickening. 🥥
For the chocolate swirls, use dairy-free dark chocolate chips (like Enjoy Life brand). The cake will maintain its elegant look while being completely dairy-free. Just remember that coconut cream has a stronger flavor, so balance it with a touch more vanilla extract if needed.
Egg-Free Adaptation
For an egg-free version, replace the eggs in the custard with a flax egg substitute: mix 3 tbsp ground flaxseed with 9 tbsp water and let it sit for 10 minutes to thicken. This works surprisingly well for binding the custard, though the texture will be slightly denser. The crust remains unchanged since it doesn't require eggs. 🌱
If you're avoiding eggs for dietary reasons, ensure all other ingredients (like vanilla extract) are also egg-free. The cake will still deliver that creamy custard experience, though the marbled effect may be less pronounced. For extra stability, add 1 tsp agar-agar to the custard mixture before cooking.
Nutrition facts
Frequently asked questions
Can I make this almond custard cake without a springform pan?
Yes, but you'll need to adapt the technique. Use a 9-inch round cake pan with removable bottom, greased and floured. Press the crust firmly into the pan, then bake as directed. After baking, let it cool completely before removing from the pan. For easier release, wrap the pan in plastic wrap before chilling the crust. The texture will be slightly different but still delicious!
Why did my custard filling curdle?
Curdling usually happens when the custard gets too hot before adding eggs or if eggs are added too quickly. Always whisk eggs until frothy first, then slowly pour in the warm custard while continuously whisking. The custard should reach 170°F but not boil. If it curdles, strain through a fine-mesh sieve before pouring over the crust.
How do I prevent the crust from getting soggy?
The key is proper chilling! Always chill the crust for 30 minutes before adding custard. Also, don't overbake the crust—it should be just set when you pour the custard. For extra insurance, bake the crust for 10 minutes, then chill again before adding filling. The cold crust creates a barrier that keeps the custard's moisture contained.
Can I make this cake ahead of time?
This cake actually tastes better the next day as the flavors meld. Bake it 1 day ahead and store at room temperature in an airtight container. For longer storage (3-5 days), refrigerate. Bring to room temperature before serving to preserve that perfect texture. The custard actually improves overnight, becoming even creamier!
What's the best way to create those beautiful swirls?
After pouring the custard, use a skewer or offset spatula to create gentle swirls in a circular motion. Work quickly but carefully to avoid mixing too much. For more dramatic swirls, use a butter knife to cut through the custard in a spiral pattern. The secret is to work while the custard is still warm but not runny—this creates those perfect marbled patterns when baked.