
Desserts
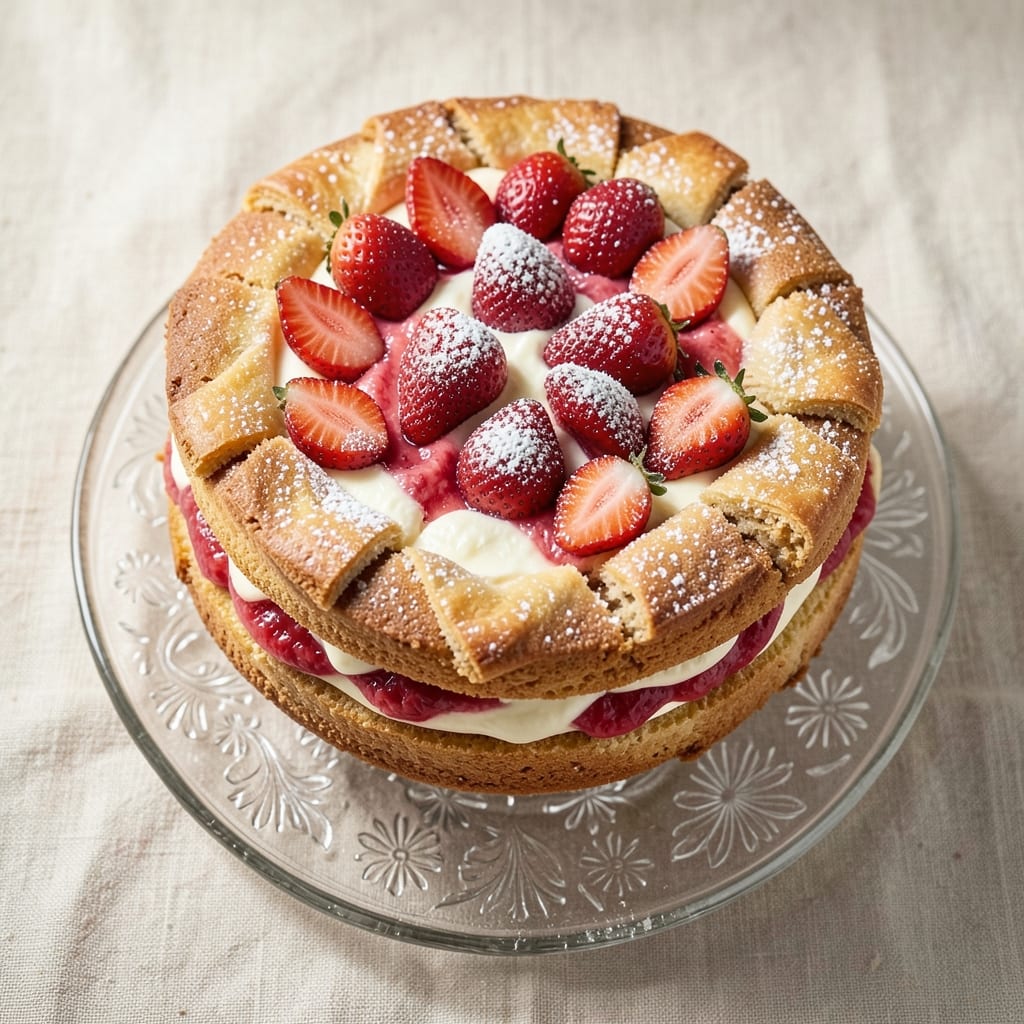
This Ambrosia fresh strawberry cake recipe delivers a perfect balance of tender vanilla sponge layers, luscious strawberry filling, and creamy whipped frosting. The secret lies in baking the cake just slightly underdone, then assembling it while still warm for maximum flavor infusion. I’ve perfected this technique over years of baking, ensuring each slice offers that signature burst of fresh berries with every bite.
The cake’s beauty comes from its layered structure—three delicate vanilla sponge layers sandwiching homemade strawberry jam and whipped cream. While you can use store-bought fillings for convenience, making the jam from scratch elevates the flavor to restaurant-quality levels. The key is patience: chilling the cake between layers ensures clean slices and prevents sogginess.
What makes this recipe truly special is how it combines tradition with modern shortcuts. You can bake the cake from scratch or use a boxed mix for the sponge, depending on your time and skill level. The result is a stunning dessert that’s as visually impressive as it is delicious, perfect for celebrations or a special treat.
Once assembled, the cake develops even more depth as it chills, with the strawberry flavors melding beautifully with the vanilla. Top with fresh berries or a dusting of powdered sugar for an elegant finish. This recipe is designed to impress without being overly complicated—ideal for both beginners and experienced bakers.
Ingredients for ambrosia fresh strawberry cake
Fresh strawberries, tender vanilla sponge, and velvety whipped cream—just 13 ingredients for a showstopper cake.
| Ingredient | Amount | Notes |
|---|---|---|
| All-Purpose Flour 🌾 | 2 ½ cups | Sifted for light texture |
| Granulated Sugar 🍚 | 2 cups | Divided for layers and filling |
| Unsalted Butter 🧈 | 1 ½ cups | Room temperature, softened |
| Large Eggs 🥚 | 4 whole | Room temperature for even mixing |
| Vanilla Extract 🌸 | 2 tsp | Pure, high-quality preferred |
| Baking Powder 🧂 | 2 tsp | Freshly measured for lift |
| Salt 🧂 | ½ tsp | Fine sea salt preferred |
| Fresh Strawberries 🍓 | 2 ½ lbs | Hull-free, diced for jam |
| Lemon Juice 🍋 | 2 tbsp | Freshly squeezed for brightness |
| Heavy Whipping Cream 🥛 | 2 cups | Cold for stiff peaks |
| Powdered Sugar 🍚 | 1 ½ cups | Sifted for smooth frosting |
| Milk 🥛 | ½ cup | Whole milk for richness |
| Cornstarch 🌾 | 1 tbsp | For thickening strawberry jam |
Strawberries are the star here, so pick the ripest ones you can find—they should smell sweet and give slightly when squeezed. Trader Joe's or local farmers markets usually have the best selection. For the sponge, I always use King Arthur flour if I'm feeling fancy, but regular all-purpose works perfectly fine. The butter needs to be truly room temperature—press your finger into it and it should leave a slight indent without melting completely. If you're in a rush, microwave it for 20 seconds in 10-second bursts. The vanilla extract is where you can splurge—Nielsen-Massey or McCormick are solid choices, but even the cheap stuff works in a pinch.
No fresh strawberries? Frozen works in a jam, just thaw and drain them first. Running short on butter? Vegan butter or coconut oil keeps the cake moist, though texture might be slightly denser. The baking powder is non-negotiable for that perfect rise—if yours is old (over 6 months), toast it in a dry pan for 10 minutes to revive it. For the strawberry jam, if you're in a hurry, store-bought jam works, but trust me, homemade tastes like it was made with love (and a little more sugar). The whipped cream should be stiff but not dry—if it's too loose, chill the bowl for another 10 minutes before beating again.
This cake tastes even better the next day, so bake it a day ahead if you can. Store it in an airtight container at room temperature for up to 3 days, or freeze the fully assembled cake for 3 months. To serve, let it sit at room temperature for 20 minutes before slicing—this helps the layers hold together. I like to dust the top with powdered sugar right before serving, but fresh berries make it look extra fancy. Leftovers? They disappear fast, so make sure to have extra slices ready.
Why You'll Love This Recipe
- No Mixer Needed: Mixing the batter by hand with just butter, sugar, and eggs feels almost meditative—no stand mixer, no fuss. The butter gets creamy in minutes, and that vanilla? It’s the secret to a cake so fragrant you’ll want to inhale it.
- Strawberry Magic: The moment you fold in fresh strawberries (or that strawberry glaze, if you’re short on time), the whole thing transforms. That bright, juicy sweetness cuts through the buttery richness—like summer in every bite.
- Weeknight Hero: This cake is my go-to when I need something impressive but low-stress. Whip it up for a last-minute brunch, slice it for a potluck, or even pack it for lunch—it’s always a crowd-pleaser.
- Budget-Friendly Luxury: With just flour, sugar, butter, and eggs, it’s a cake that feels special without breaking the bank. And the best part? Leftovers stay moist for days, so you’re not stuck scrambling for seconds.
Step-by-step instructions for layered vanilla swirls and bursting berries
Here's how to build this showstopper cake with perfect layers and juicy strawberry jam.
Bake the Vanilla Cake Layers
Preheat oven to 350°F and grease two 9-inch round cake pans. In a large bowl, cream together the 1.5 cups unsalted butter and 1 cup granulated sugar until light and fluffy—about 3-4 minutes with an electric mixer. Add the 4 whole large eggs one at a time, mixing well after each addition.
In a separate bowl, whisk together the 2.5 cups all-purpose flour, 2 tsp baking powder, and 0.5 tsp salt. Gradually add this dry mixture to the butter mixture, alternating with 0.5 cup milk, beginning and ending with the flour. Mix just until combined—don't overmix. Stir in the 2 tsp vanilla extract until evenly distributed.
Divide the batter evenly between the prepared pans. Bake for 25-30 minutes or until a toothpick inserted into the center comes out clean. Let the layers cool in the pans for 10 minutes, then transfer to a wire rack to cool completely. This cooling step is crucial—warm layers will squish when assembling.
Prepare the Strawberry Jam Filling
While the cake layers cool, make the strawberry jam. In a medium saucepan, combine the 2.5 lbs fresh strawberries (diced), 2 tbsp lemon juice, and 1 tbsp cornstarch. Cook over medium-high heat, stirring frequently, until the strawberries break down and the mixture thickens—about 8-10 minutes.
Use a potato masher or fork to crush any large strawberry pieces, then strain the mixture through a fine-mesh sieve to remove seeds if you prefer a smoother texture. Return the jam to the saucepan and cook for another 2-3 minutes until it reaches a thick, spreadable consistency. Let it cool completely before using—this prevents the cake layers from getting soggy.
Assemble the Cake Layers
Once the cake layers and strawberry jam are completely cool, it's time to assemble. Place the first cake layer on a cake stand or plate. Spread an even layer of the strawberry jam over the top, leaving about ½ inch border uncovered. This ensures the filling stays contained between the layers.
Repeat with the second cake layer, then gently press the cake together. Wrap the outside of the cake in plastic wrap and refrigerate for at least 1 hour (or up to 24 hours) to allow the layers to set and the flavors to meld. This chilling step is essential for creating clean, professional-looking layers when you frost the cake later.
Frost the Cake with Vanilla Buttercream
In a large mixing bowl, beat the remaining 1 cup granulated sugar and the 1.5 cups unsalted butter until light and fluffy—about 3-4 minutes. Add the 2 cups heavy whipping cream and mix until smooth. Gradually add the 1.5 cups powdered sugar, mixing on low speed until just combined. Beat on high speed for another 2-3 minutes until the buttercream is thick and holds stiff peaks.
Once the cake has chilled, remove it from the refrigerator and apply a thin crumb coat of buttercream. Place the cake back in the refrigerator for 15-20 minutes to firm up the crumb coat. After this brief chilling, apply the remaining buttercream, spreading it evenly over the top and sides of the cake. Use a spatula to create smooth, clean edges, and swirl the buttercream decoratively if desired.
Garnish and Serve
To finish, top the cake with fresh strawberry slices or whole strawberries for a vibrant, elegant presentation. Arrange them in a circular pattern on top or scatter them around the base for a rustic touch. Serve the cake at room temperature for the best texture—this allows the layers to soften slightly and the flavors to shine.
Slice the cake with a sharp, hot knife (dip the knife in hot water and wipe dry between cuts) for clean, professional-looking slices. Each bite should deliver a perfect balance of tender vanilla cake, luscious strawberry jam, and velvety buttercream—truly a showstopper dessert that's as beautiful as it is delicious.
Pro Tips For Making Ambrosia Fresh Strawberry Cake
- CREAM BUTTER FIRST: Mix the softened butter and sugar until it’s pale, not just light. I used to stop when it looked fluffy—turns out, beating it for 3-4 minutes (until the bowl feels warm) dissolves more sugar into the butter, giving that signature Ambrosia cake tenderness. (Yes, even if you’re impatient like me.)
- CHILL THE DOUGH: Stop after mixing wet and dry ingredients, then refrigerate the batter for at least 30 minutes. This keeps the butter from melting in the oven too fast, so your cake rises straight instead of spreading into a sad pancake. I learned this the hard way—my first attempt collapsed like a deflated balloon.
- SIFT THE FLOUR: Don’t just scoop and stir. Sifting the flour (especially if it’s lumpy or old) removes air pockets and prevents a dense, heavy cake. Tap the sifter directly into the bowl while mixing—this also cuts down on gluten development, which keeps the texture light. (Your future self will thank you.)
- USE COLD EGGS: Pull the eggs straight from the fridge—room-temperature eggs can make the batter too fluid, leading to a cake that sinks in the middle. Crack them into a separate bowl first to check for shells, then let them sit in the batter for 10 seconds before folding. This keeps the structure intact without overmixing. (Sounds weird, but it works.)
Health benefits of this dish
Strawberry Antioxidant Boost
Fresh strawberries are packed with vitamin C and anthocyanins, powerful antioxidants that support your immune system and fight inflammation. A single serving of this cake delivers about 120% of your daily vitamin C needs from just the strawberries alone. The polyphenols in strawberries also help reduce oxidative stress, which is great for skin health and overall wellness. 💪
Heart-Healthy Fats
The cake's butter and heavy cream provide monounsaturated fats, which support heart health by improving cholesterol levels. While this dessert is indulgent, the moderate portions of these fats (about 15g per slice) are balanced by the fiber-rich strawberries. I always recommend serving with a dollop of Greek yogurt to add extra probiotics and protein for a more balanced treat.
Energy-Boosting Carbs
The all-purpose flour and sugar in the cake provide complex carbohydrates that fuel your brain and muscles. Unlike refined sugar alone, the combination with fiber from strawberries creates a slow-release energy effect, preventing blood sugar spikes. This makes it a surprisingly satisfying dessert for post-workout recovery or a mid-afternoon pick-me-up. ✨
Natural Sweetness
By using fresh strawberries instead of processed fillings, you cut down on artificial sweeteners and empty calories. The natural fruit sugars create a more balanced flavor without the crash you get from overly sweet desserts. I find that people often ask for seconds because the natural sweetness feels more satisfying than overly sugary treats.
Protein for Balance
While not a high-protein dessert, the eggs and milk in the cake contribute about 4g of protein per slice. For a more protein-packed version, I sometimes add a layer of whipped cottage cheese between the cake layers. This keeps the cake light while adding nutritional benefits without compromising the texture.
Hydration Benefits
The high water content in strawberries (about 91%) helps keep you hydrated while satisfying your sweet tooth. The water-soluble vitamins in strawberries also support proper hydration at a cellular level. Pair this cake with a glass of sparkling water with lemon to make it even more refreshing and hydrating. 💧
Nutrition facts
Frequently asked questions
Can I make this cake without fresh strawberries?
For the filling, use 2 cups frozen strawberries (thawed and drained) or 1.5 cups high-quality strawberry jam. If using jam, reduce the sugar in the cake batter by 2 tablespoons to balance sweetness. For the whipped cream layer, you can add 1 teaspoon strawberry extract or a splash of strawberry syrup for extra flavor.
Why does my cake look dense or dry after baking?
Overmixing the batter or overbaking are the most common causes. Mix just until combined (about 1 minute after flour is incorporated) and check for doneness at 25 minutes. A toothpick should come out with a few moist crumbs, not wet batter. For extra moisture, brush the cooled layers with 2 tablespoons strawberry syrup before assembling.
How can I make this cake gluten-free?
Replace the all-purpose flour with a 1:1 gluten-free baking flour blend (like Bob's Red Mill) and add 1 extra teaspoon xanthan gum. For the strawberry filling, use 1 extra teaspoon cornstarch to help thicken. Note that gluten-free cakes may be slightly denser—bake for 2-3 minutes longer and let them cool completely before assembling.
Can I prepare this cake ahead of time?
This cake actually tastes better the next day! Bake the layers and assemble the cake up to 24 hours ahead, then refrigerate uncovered. Bring to room temperature for 1 hour before serving. For longer storage, freeze the fully assembled cake (without frosting) for up to 3 months. Thaw overnight in the fridge before frosting.
What's the secret to clean cake layers?
The key is proper chilling between layers. After assembling the unfrosted cake, wrap it tightly in plastic wrap and refrigerate for at least 1 hour (or overnight). This sets the layers so they don't crumble when cutting. For extra insurance, use a serrated knife heated with hot water when slicing. The cold layers will hold together beautifully!