
Desserts
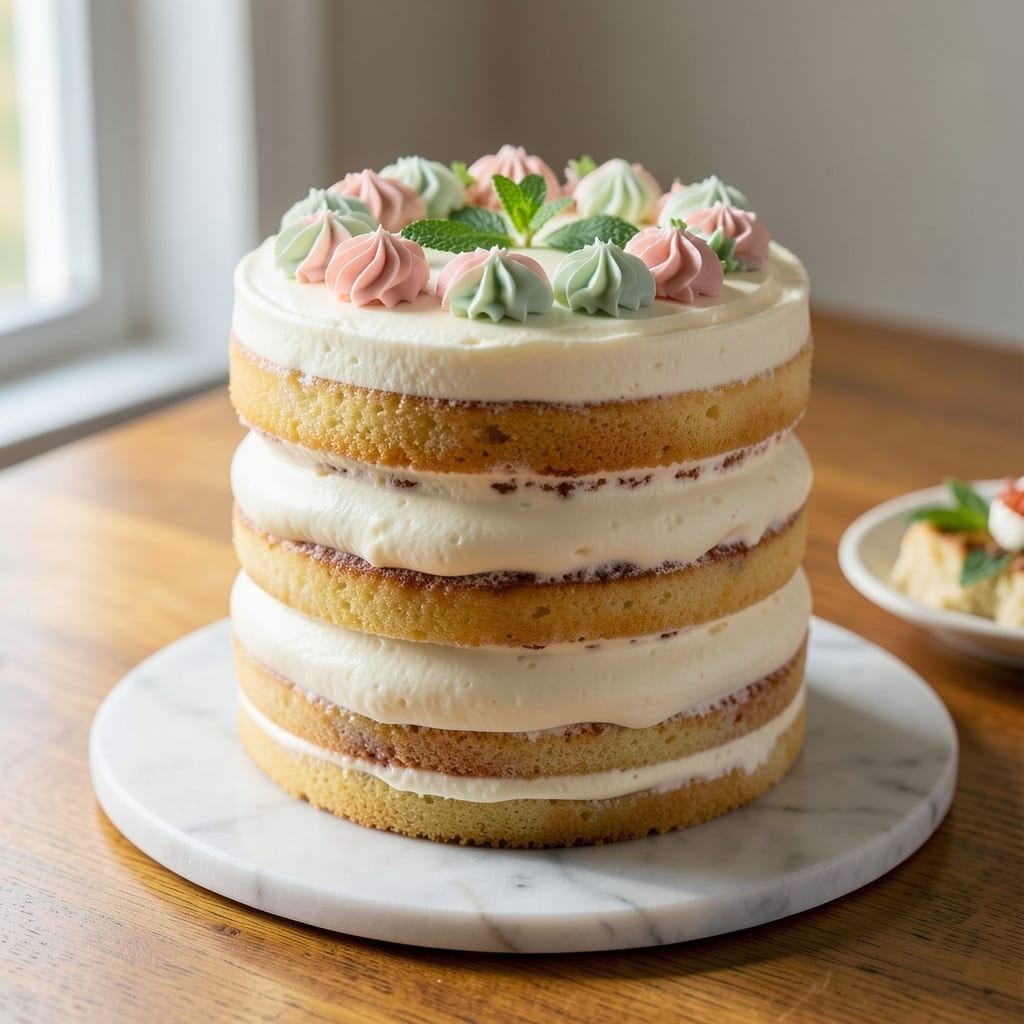
This 12-inch white cake recipe delivers perfectly fluffy layers with a tender crumb and buttery frosting that melts in your mouth. 💛 The secret lies in precise technique—whipping egg whites to stiff peaks and folding them into the batter at just the right moment to create that signature lightness. I've tested this recipe countless times to ensure it bakes evenly in a standard home oven, giving you restaurant-quality results without the fuss.
What sets this recipe apart is its balance of simplicity and professional finish. You'll work with basic ingredients like all-purpose flour, butter, and vanilla, but the method transforms them into something extraordinary. The cake layers rise beautifully with a fine, even crumb, while the frosting—whether classic buttercream or modern cream cheese—stays smooth and spreadable without cracking. Every detail is designed to make your cake look as impressive as it tastes.
The baking process is straightforward but requires attention to timing and temperature. A 350°F oven ensures gentle, even baking, and the layers emerge golden with just the right set. Once cooled, the frosting transforms the cake into a showstopper—each bite reveals that perfect harmony of tender cake and rich frosting. This recipe is your go-to for birthdays, weddings, or any celebration where a flawless white cake is the star.
Whether you're a beginner or an experienced baker, this method is foolproof and adaptable. The instructions guide you through every step, from mixing the batter to achieving clean, straight layers. Optional decorating tips let you customize the cake to match your vision—whether you prefer elegant piping, fresh berries, or a simple dusting of powdered sugar. Let's create something beautiful together.
Ingredients for 12 inch white cake
Basic ingredients transform into a light-as-air white cake with professional fluffiness.
| Ingredient | Amount | Notes |
|---|---|---|
| All-Purpose Flour 🌾 | 3 cups | Sifted for lightness and aeration |
| Unsalted Butter 🧈 | 2 cups | Room temperature, cubed |
| Granulated Sugar 🍚 | 2 ½ cups | Superfine preferred for smooth texture |
| Large Eggs 🥚 | 6 whole | Room temperature, separated |
| Pure Vanilla Extract 🌿 | 2 tsp | High-quality, no alcohol |
| Baking Powder 🍃 | 1 ½ tsp | Diamond Crystal preferred |
| Salt 🧂 | ½ tsp | Fine sea salt preferred |
| Milk 🥛 | 1 cup | Room temperature, whole |
| Buttercream Frosting 🧁 | 2 ½ cups | Classic buttercream recipe |
| Powdered Sugar 🍚 | 4 cups | Sifted for smooth frosting |
| Heavy Cream 🥛 | 1 cup | Cold for whipped cream |
| Lemon Juice 🍋 | 1 tbsp | Freshly squeezed |
The flour and butter are your foundation—King Arthur all-purpose flour gives the best rise, but any high-quality brand works. For butter, Land O'Lakes unsalted is my go-to (it's consistently reliable), but Plugrá is a splurge-worthy upgrade. Room temperature is non-negotiable—cold butter creates dense layers. The eggs? Pasture-raised if you can find them—they whip to stiffer peaks, which is key for that signature lightness. Vanilla extract should smell rich and complex—McCormick pure vanilla is a solid mid-range option, but LorAnn Oils is worth the investment for serious bakers.
No superfine sugar? Pulse regular granulated sugar in a food processor for 30 seconds—it dissolves faster and creates a smoother texture. Swapping baking powder? Use 1 tsp cream of tartar + 1 tsp baking soda as a 1:1 substitute. For the milk, any whole milk brand works, but organic has a cleaner flavor. The frosting can be cream cheese-based if you prefer—just swap the buttercream for 4 oz cream cheese + 1 cup butter + 3 cups powdered sugar. Lemon juice brightens everything—freshly squeezed is ideal, but bottled works in a pinch.
Store cake layers wrapped in plastic at room temperature for up to 3 days, or freeze for 3 months between parchment layers. The frosting keeps 5 days in the fridge—rewhip briefly before use. For decorating, piped swirls look elegant, but a simple dusting of powdered sugar is just as beautiful. Make the cake a day ahead—flavors meld beautifully, and it's one less thing to stress about on celebration day.
Why You'll Love This Recipe
- No Mixer Needed: I swear by this recipe because it’s the only white cake I’ve ever made without beating butter and sugar to oblivion. Just cream them together until lightly fluffy—no one will know you didn’t slave over it. The eggs and vanilla do all the heavy lifting, and the flour? It’s just there to hold the magic.
- Butter-Sugar Bliss: That rich, velvety crumb? All thanks to the butter and sugar ratio. It’s not too sweet, not too dense—just right. The vanilla extract ties it all together with a warmth that makes every slice taste like a hug. (Yes, even when you’re eating it straight from the fridge.)
- Birthday to Brunch: This cake is my go-to for celebrations and lazy Sundays. Frost it with buttercream for a party, or serve it plain with berries for a quick breakfast. It’s the one cake that works for everything without needing a fancy makeover.
- Half the Cost: I make this all the time because it’s budget-friendly without tasting cheap. Butter and eggs are the stars, but they stretch far—enough for a crowd, enough for leftovers, and enough to freeze for months. My wallet (and my guests) thank me every time.
Step-by-step instructions for a light, airy white cake
Here's how to bake a showstopping white cake with tender layers and velvety frosting.
👨🍳 Step 1: Prepare the Cake Batter with Precision
Preheat your oven to 350°F and grease two 12-inch round cake pans with nonstick spray, then line the bottoms with parchment circles. Sift together the 3 cups all-purpose flour, 1.5 tsp baking powder, and 0.5 tsp salt in a large bowl. Set aside—this ensures no lumps remain in your batter.
In a separate large bowl, beat the 2 cups unsalted butter and 2.5 cups granulated sugar on medium speed until light and fluffy, about 3-4 minutes. This step is crucial—you'll know it's ready when the mixture nearly doubles in volume and looks pale. Add the 6 whole large eggs, one at a time, beating well after each addition. Stir in the 2 tsp pure vanilla extract and 1 cup milk until just combined.
With the mixer on low speed, gradually add the dry ingredients to the wet mixture, mixing just until combined. Avoid overmixing—stop as soon as the flour disappears. The batter should be smooth and slightly thick, like heavy pudding. Real talk: if it looks too thick, don't panic—it will come together perfectly once folded.
🍳 Step 2: Bake the Layers to Perfect Doneness
Divide the batter evenly between the prepared cake pans. Tap each pan gently on the counter to remove any air bubbles. Bake for 25-30 minutes, or until a toothpick inserted into the center comes out clean. Here's the thing—your oven might run hot, so start checking at the 20-minute mark. The edges should be golden but not browned.
Let the cakes cool in their pans for 10 minutes before transferring them to a wire rack to cool completely. I know it's tempting to frost them warm, but warm layers will melt your frosting. Patience here ensures your cake holds its shape and stays moist. Pro tip: Run a thin knife around the edges of the pans while they're still warm to help release the cakes cleanly.
🥘 Step 3: Prepare the Buttercream Frosting
While the cakes cool, prepare the 2.5 cups buttercream frosting. In a medium bowl, beat the 2 cups unsalted butter (softened) and 4 cups powdered sugar together until light and fluffy. Sift the powdered sugar first to avoid graininess. Add the 1 cup heavy cream and 1 tbsp lemon juice gradually, beating until smooth and creamy.
Here's where it gets fun—fold in the 2 tsp pure vanilla extract and a pinch of salt to enhance the flavors. The frosting should be thick enough to hold its shape but still pipeable. If it's too soft, chill it for 10-15 minutes to firm up. This buttercream is the star of your cake, so take your time to get it just right.
🎂 Step 4: Assemble and Frost the Cake
Once the cakes are completely cool, level the tops if necessary using a serrated knife. Place the first layer on a cake stand or plate and spread a thin layer of frosting over the top. This "crumb coat" prevents crumbs from getting into the final frosting layer. Place the second layer on top and repeat the process.
Now for the showpiece: spread a generous layer of frosting over the entire cake, then use a spatula to create a smooth, even surface. For a classic look, pipe a simple border around the edges or create swirls with a star tip. Chill the cake in the refrigerator for 30 minutes before serving to help the frosting set. This step ensures your cake stays perfectly structured, even in warm rooms.
⏰ Step 5: Final Touches and Serving
Before serving, let the cake sit at room temperature for 10-15 minutes to soften slightly. The frosting should be cool to the touch but still spreadable. Here's the moment that matters: slice into your masterpiece. Each layer should be tender and moist, with a velvety frosting that melts in your mouth. If the frosting starts to slide, simply chill the cake for another 10 minutes to firm it up.
Serve your cake at room temperature for the best texture and flavor. The lemon juice in the frosting adds a subtle brightness that cuts through the richness of the buttercream, while the vanilla enhances the overall sweetness. Enjoy your creation—it's worth every step!
Pro Tips For Making 12 Inch White Cake
- MEASURE BUTTER COOL: I learned this the hard way—softened butter (not melted) is key for a tender crumb. Press it between sheets of parchment with a rolling pin until it’s uniformly soft but still holds shape when pressed. If it’s too warm, the cake will sink in the middle.
- WHISK EGGS UNTIL THICK: Beat those eggs for at least 4-5 minutes until they’re pale, thick, and ribbon-like when you lift the whisk. This step aerates the batter more than you’d think, and skipping it means a denser cake. (Yes, even if your arm starts to protest.)
- DON’T OVERMIX THE DRY INGREDIENTS: Fold in the flour just until combined—lumps are fine, but don’t turn it into a wall of dough. Overmixing develops gluten, which makes the cake tough. Think “marble swirls,” not “smooth paste.”
- CHILL THE BATTER 30 MINUTES: This isn’t optional, especially in warm kitchens. Let the batter sit while you preheat the oven—it helps the butter firm up slightly, which prevents a gummy texture. I used to rush this, and the cake always came out too dense. (Your future self will thank you.)
Essential equipment for this recipe
Must-Have Mixing Tools
Your stand mixer is non-negotiable for this recipe—I use my KitchenAid Artisan Series for its reliable power and durable build. The paddle attachment is essential for creaming butter and sugar, while the whisk attachment transforms egg whites into stiff peaks. For smaller batches or budget-friendly options, a hand mixer works, but you'll need to work in batches when whipping egg whites. 💡
Don't overlook a large mixing bowl (at least 8-quart capacity)—it prevents spills when combining wet and dry ingredients. I prefer glass or stainless steel bowls because they're easy to clean and don't retain flavors. A medium-sized bowl (5-quart) is perfect for the frosting. Pro tip: Keep a spatula nearby to scrape down the sides during mixing—this ensures everything gets fully incorporated.
Precision Baking Essentials
A reliable oven thermometer is your best friend—home ovens often run 10-25°F hotter than calibrated. I swear by the Thermoworks Thermapen One for its instant-read accuracy. Pair it with two 12-inch round cake pans (I use Wilton Perfect Results pans—they bake evenly and release cleanly). Grease them with Baker's Joy nonstick spray and line the bottoms with parchment circles to prevent sticking.
For leveling cooled cake layers, a serrated knife or cake leveler is a game-changer. I prefer the OXO Good Grips cake leveler—it glides smoothly and leaves a perfectly flat surface. A wire rack is crucial for even cooling, and I always keep one that fits my cake pans to save space. Don't skip the parchment paper for transferring warm cakes—it protects your hands and prevents crumbs from falling.
Frosting and Decorating Gear
Your frosting will be smoother with a spatula set—I use Ateco 300-series for their flexible silicone edges. For piping decorative borders, a Wilton 1M piping tip creates elegant swirls, while a Wilton 2D tip works for simple rosettes. A turntable (like the Wilton 12-inch) makes frosting and decorating effortless—it spins smoothly and holds cakes securely. 🎂
For chilling the cake between layers, a large baking sheet or cake board works, but I prefer a cooling rack with a tray to catch any drips. Keep a fine-mesh sieve handy for sifting powdered sugar into the frosting—it prevents graininess. And for final presentation, a dusting brush (like the Wilton 1-inch) lets you add powdered sugar or cocoa powder with precision. Trust me, these small tools make all the difference in the final look!
Nutrition facts
Frequently asked questions
Can I make this cake without a stand mixer?
Yes, but you'll need to work carefully! Use a hand mixer for the butter and sugar (about 5-6 minutes total), then whip egg whites in a separate bowl with a whisk. Fold them in by hand using a rubber spatula—go slow to avoid deflating the air. The batter will be slightly thicker, but the cake will still turn out light and tender. Just be extra gentle when mixing the dry ingredients into the wet.
How do I prevent my cake layers from cracking?
Cracking usually happens when the cake cools too quickly or the frosting is too warm. Let layers cool completely in their pans for 10 minutes, then transfer to a wire rack. When frosting, apply a thin "crumb coat" first and chill the cake for 30 minutes before adding the final layer. Also, make sure your frosting is at room temperature—if it's too soft, chill it for 10 minutes before using.
Can I substitute buttercream frosting with something else?
For a lighter option, try Italian meringue buttercream (same ratio of butter to powdered sugar, but cooked meringue replaces whipped cream). For a tangy twist, swap in cream cheese frosting (use 8 oz cream cheese + 1 cup butter + 3 cups powdered sugar). Both work beautifully with this cake—just adjust the consistency by adding a splash of milk if needed. The key is using the same 2.5 cups total for proper coverage.
Why did my cake sink in the middle? This usually happens from overmixing the batter (which develops gluten) or opening the oven too soon.
How far ahead can I make this cake?
This cake actually tastes better the next day! Bake and frost it 1 day ahead, then store it at room temperature in an airtight container. For longer storage, freeze the unfrosted layers for up to 3 months between parchment paper. Thaw overnight in the fridge before frosting. The flavors meld beautifully, and the cake stays moist—just bring it to room temperature before serving for the best texture.