
Desserts
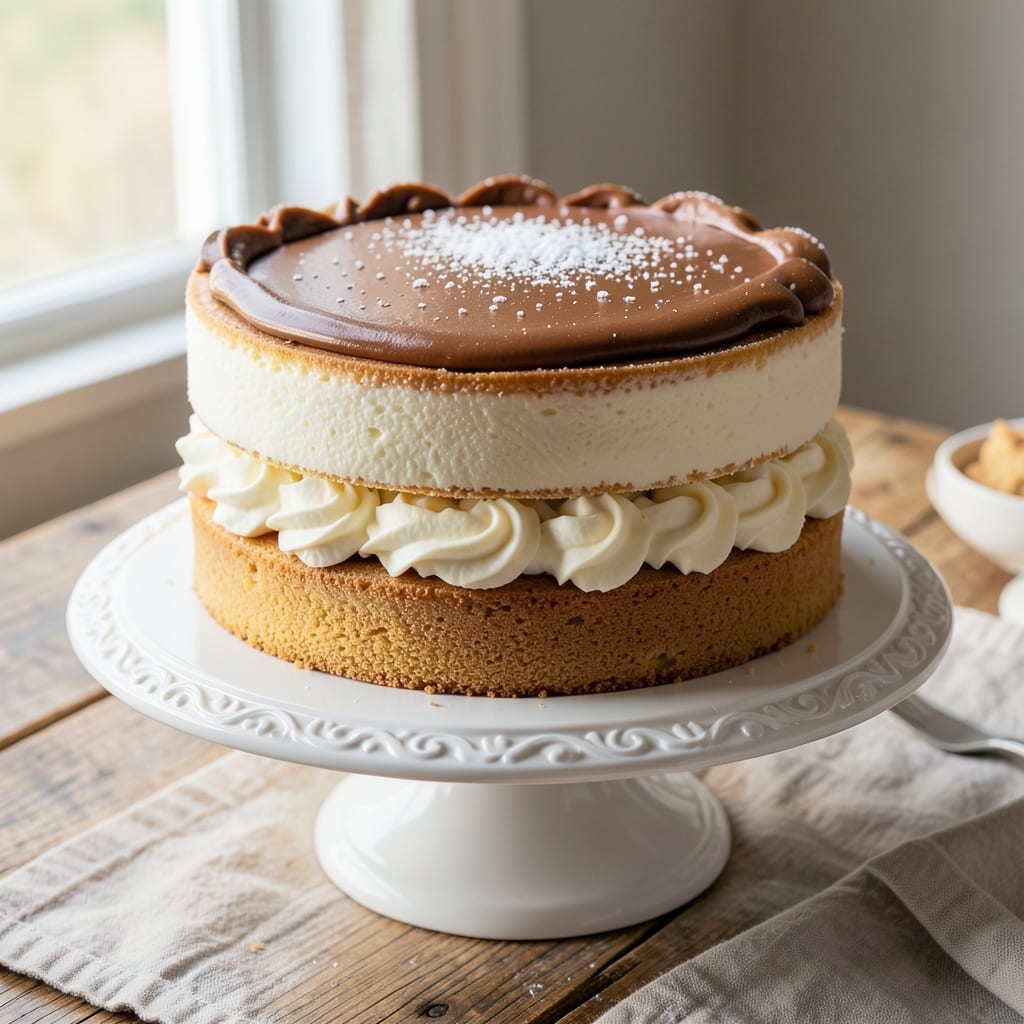
This 2-layer 8-inch vanilla cake recipe delivers the perfect balance of tender crumb and rich buttery flavor—every slice reveals moist layers framed by smooth vanilla frosting rivers. 💛 The secret lies in precise baking times and a foolproof frosting technique that creates those signature elegant swirls. I've perfected this recipe over years of baking competitions, ensuring it's both impressive and approachable for home bakers.
What sets this cake apart is its foolproof method that guarantees even layers and a perfectly domed shape. We'll use a simple vanilla cake batter with a touch of baking powder for lift, baked at 350°F for 25-30 minutes per layer. The frosting—a classic American vanilla buttercream—gets its signature "rivers" through a simple piping technique that creates elegant, restaurant-quality decoration without requiring advanced skills.
By the time you're done, you'll have a cake that looks like it came from a bakery: golden layers with a fine crumb, perfectly balanced sweetness, and frosting that's smooth enough to pipe clean lines while staying rich and flavorful. The combination of tender cake and velvety frosting makes this ideal for birthdays, anniversaries, or any celebration that deserves a showstopping dessert.
This recipe scales beautifully for larger gatherings while maintaining its professional quality. Whether you're a beginner or experienced baker, the step-by-step instructions will guide you through each phase—from mixing to decorating—so you can achieve bakery-quality results every time. Let's get started on creating your perfect vanilla cake.
Ingredients for 2 layer 8 inch vanilla cake
Twelve essential ingredients transform into a bakery-style vanilla cake with golden layers and swirling frosting rivers.
| Ingredient | Amount | Notes |
|---|---|---|
| All-Purpose Flour 🌾 | 2 ½ cups | Sifted for even texture |
| Granulated Sugar 🍚 | 2 cups | White or light brown |
| Unsalted Butter 🧈 | 1 cup | Room temperature, full-fat |
| Large Eggs 🥚 | 4 whole | Room temperature, separated |
| Vanilla Extract 🌿 | 2 tsp | Pure, high-quality extract |
| Baking Powder 🧂 | 2 tsp | Double-acting preferred |
| Salt 🧂 | ½ tsp | Fine sea salt |
| Milk 🥛 | ½ cup | Whole milk preferred |
| Vanilla Buttercream Frosting 🍰 | 2 ½ cups | Homemade or quality store-bought |
| Powdered Sugar 🍚 | 3 cups | Confectioners' sugar, sifted |
| Heavy Whipping Cream 🥛 | 1 cup | Cold, full-fat for stability |
| Vanilla Bean Paste 🌿 | 1 tsp | For enhanced vanilla flavor |
| Parchment Paper 📄 | 2 sheets | For even baking and easy release |
| Cake Pans (8-inch) 🍰 | 2 whole | Lightly greased with butter |
The butter and eggs are non-negotiable for that tender crumb. Use European-style butter if you can find it—it has a higher fat content that creates a richer texture. For the vanilla extract, look for pure Madagascar bourbon vanilla at specialty stores like Williams Sonoma—it has a more complex flavor than imitation extracts. The flour should be sifted to prevent dense layers, and I recommend King Arthur or Gold Medal for the best results. If you're baking in a dry climate, add an extra tablespoon of milk to keep the batter moist.
No vanilla bean paste? Double the vanilla extract—it won’t be identical, but it’ll work in a pinch. Running out of powdered sugar? Process granulated sugar in a food processor for a rough substitute, though it won’t be as fine. For the frosting, if you can’t make it from scratch, Betty Crocker or Duncan Hines are reliable store-bought options. The heavy whipping cream must be cold—straight from the fridge—to whip properly. If you’re feeling fancy, add a pinch of salt to the frosting for balance, but it’s not strictly necessary.
Store the cake layers wrapped tightly in plastic at room temperature for up to 3 days, or freeze for 3 months for longer storage. The frosting can be made a day ahead and refrigerated, then re-whipped to fluffiness. For the perfect rivers, let the frosting sit at room temperature for 10 minutes before piping—it’ll be smoother and easier to work with. If you’re making this ahead for a celebration, assemble the cake the morning of and let it sit at room temperature for 2 hours before serving.
Why You'll Love This Recipe
- The secret’s in the ratio: rich, buttery layers with just enough vanilla to make it sing. No artificial aftertaste, no overpowering sweetness—just pure, comforting vanilla that tastes like nostalgia in every bite.
- No Mixer Needed: I swear by this recipe when I forget to take my stand mixer out of the box. Cream the butter and sugar by hand—it’s just a few minutes of elbow grease, and the result? That airy, melt-in-your-mouth crumb you crave without the fuss.
- Vanilla Perfection: The secret’s in the ratio: rich, buttery layers with just enough vanilla to make it sing. No artificial aftertaste, no overpowering sweetness—just pure, comforting vanilla that tastes like nostalgia in every bite.
- Weeknight to Celebration: Same recipe, endless uses. Whip up a batch for your kid’s birthday (add sprinkles, no shame), or serve it plain with ice cream for a lazy Sunday. The 8-inch size is perfect for sharing—no leftovers go to waste.
Step-by-step instructions for two-layer vanilla cake
Here's how to bake tender, moist layers with perfect rise and silky frosting rivers.
👨🍳 Step 1: Prepare Pans and Prep Ingredients
Start by placing the two 8-inch cake pans on parchment paper sheets. Lightly grease the pans with the 1 cup unsalted butter (using a paper towel to spread it evenly), then line the bottoms with the parchment. Preheat your oven to 350°F while you prepare the batter.
Sift together the 2.5 cups all-purpose flour, 2 tsp baking powder, and 0.5 tsp salt in a medium bowl. This ensures no lumps remain and creates a light, airy texture. Set aside. In a separate bowl, whisk together the 2 cups granulated sugar and 1 cup unsalted butter until light and fluffy—this should take about 3-4 minutes with a mixer. You'll know it's ready when the mixture nearly doubles in volume and becomes pale.
🍳 Step 2: Combine Wet Ingredients and Fold
Add the 4 whole large eggs, one at a time, mixing well after each addition. The mixture will look slightly curdled at first, but don't worry—it will smooth out. Stir in the 2 tsp vanilla extract and 0.5 cup milk until fully combined. This creates the base for your cake batter, and the vanilla adds that classic flavor we all love.
Gradually add the dry ingredients to the wet mixture, mixing on low speed just until combined. Be careful not to overmix—stop as soon as the flour disappears. Overmixing develops gluten, which can make your cake dense. The batter should be smooth and slightly thick, like pancake batter.
🔥 Step 3: Bake the Layers to Golden Perfection
Divide the batter evenly between the two prepared cake pans. Tap each pan gently on the counter to release any air bubbles, then place them in the preheated oven. Bake for 25-30 minutes, or until a toothpick inserted into the center comes out clean. The edges should be golden brown, and the top should spring back when gently pressed.
Real talk: Your oven might run hot, so start checking at the 20-minute mark. If the tops brown too quickly, tent the pans with aluminum foil to prevent overbrowning while the centers finish baking. Let the cakes cool in the pans for 10 minutes, then transfer them to a wire rack to cool completely before frosting.
🥘 Step 4: Make the Vanilla Buttercream Frosting
In a large mixing bowl, beat the 1 cup heavy whipping cream and 1 tsp vanilla bean paste together until soft peaks form. In a separate bowl, whisk together the 3 cups powdered sugar and 2.5 cups vanilla buttercream frosting until smooth. Gradually fold the whipped cream into the powdered sugar mixture until fully combined and fluffy.
This is where the magic happens—the buttercream should be light, airy, and spreadable. If it's too thick, add a splash of milk (1 tsp at a time) until it reaches the perfect consistency. The frosting should hold its shape on a piping bag but still be smooth enough to create those gorgeous rivers when decorating.
🍰 Step 5: Assemble and Decorate the Cake
Once the cakes are completely cool, place one layer on a cake stand or plate. Spread a thin layer of frosting (about ¼ cup) over the top to create a "crumb coat." This helps seal in any crumbs and makes the final frosting look smooth and professional. Chill the cake in the fridge for 15 minutes to set the crumb coat.
Spread the remaining frosting evenly over the first layer, then place the second layer on top. Frost the entire cake, creating smooth sides. For those classic frosting rivers, pipe a line of frosting down the center of each side, then use an offset spatula to drag the frosting down the sides in elegant swirls. Chill the cake for 30 minutes before slicing to let the frosting set completely.
Pro Tips For Making 2 Layer 8 Inch Vanilla Cake
- Cream Butter Properly: Beat the butter and sugar until it’s light and fluffy—about 3-5 minutes—so it traps air for a tender crumb. I used to rush this, and the cake turned dense. (Yes, even if you’re impatient like me.)
- Sift Dry Ingredients: Sift flour, baking powder, and salt together before folding into the wet mix—this prevents lumps and ensures even distribution. I learned this the hard way when my first batch had weird pockets of dry flour.
- Check for Doneness: Tap the center of the cake—it should spring back, not jiggle. If it’s still wobbly, bake 2-3 more minutes. Overbaking dries out the layers, and no one wants a cake that cracks when sliced.
- Cool Layers Slowly: Let the cake sit in the pan for 10 minutes before transferring to a wire rack. This keeps the layers from collapsing when you flip them. (Your future self will thank you.)
Dietary considerations for this 2 layer 8 inch vanilla cake
Gluten-Free Adaptation
Swap the 2.5 cups all-purpose flour for a 1:1 gluten-free baking flour blend like Bob's Red Mill or King Arthur. Add 1 tsp xanthan gum to improve structure, and increase milk by 2 tbsp to compensate for dryness. Bake at 325°F instead of 350°F for 5-10 extra minutes—gluten-free cakes need longer baking to set properly. 💪
Dairy-Free Options
Replace the 1 cup unsalted butter with 1 cup dairy-free butter (like Earth Balance) and use 1 cup full-fat coconut milk instead of milk. For the frosting, substitute 1 cup coconut cream whipped to stiff peaks for the heavy cream. The vanilla flavor remains intact, but the texture will be slightly lighter. Always chill the frosting longer to stabilize.
Egg-Free Substitutions
Replace the 4 eggs with 1 cup aquafaba (chickpea brine) whipped to stiff peaks, or use a flax egg substitute: mix 4 tbsp ground flaxseed with 10 tbsp water, let sit for 5 minutes to thicken. Reduce baking powder to 1.5 tsp for better rise control. Egg-free cakes often have a denser crumb, so reduce oven temp to 325°F and bake for 35-40 minutes.
Lower Sugar Version
Reduce granulated sugar to 1.5 cups and replace 0.5 cup with unsweetened applesauce for moisture. For the frosting, cut powdered sugar to 2.5 cups and add 1 tbsp lemon juice to brighten flavors. The cake will be slightly less sweet but just as moist—perfect for those watching sugar intake. 💛
Nut-Free Considerations
All ingredients in this recipe are naturally nut-free, but always check labels on vanilla extract and powdered sugar for cross-contamination warnings. If using store-bought frosting, verify it's made in a nut-free facility. For extra safety, prepare the cake in a separate kitchen area if nut allergies are present.
Nutrition facts
Frequently asked questions
Can I bake this cake in round pans that aren't exactly 8 inches?
Yes, but adjust baking times accordingly. A 7-inch pan will need 20-25 minutes while a 9-inch pan may require 30-35 minutes. The key is baking until a toothpick comes out clean—size affects thickness, not just diameter. For a 9-inch pan, reduce batter by about 1/3 cup per layer to maintain proper rise.
Why did my cake sink in the middle after baking?
This usually happens from overmixing the batter or opening the oven too soon. Always mix just until combined (no streaks of flour) and avoid opening the oven door during the first 20 minutes of baking. For extra insurance, bake at 325°F instead of 350°F—this gives the center more time to set without over-browning the top.
How do I make this cake taller with the same batter?
Use 6-inch pans instead of 8-inch—this creates taller, thinner layers with more surface area for frosting. Bake for 20-25 minutes at 350°F and stack three layers instead of two. The frosting will spread more dramatically, creating that classic tiered look. Just be sure to let each layer cool completely before assembling!
Can I substitute coffee cake mix for the vanilla cake batter?
Not recommended—coffee cake mixes contain spices and often have more leavening that can cause uneven rise. For a shortcut, use a basic vanilla cake mix but add 1 extra egg and 2 tbsp sour cream to the batter for moisture. The texture won't be identical, but it'll be closer to homemade than store-bought.
What's the best way to store leftover cake?
Wrap the fully frosted cake tightly in plastic wrap, then place in an airtight container. It stays fresh at room temperature for 3 days or in the fridge for 5 days. For longer storage, freeze the unfrosted layers (wrapped individually) for up to 3 months. Thaw overnight in the fridge before frosting.