
Desserts
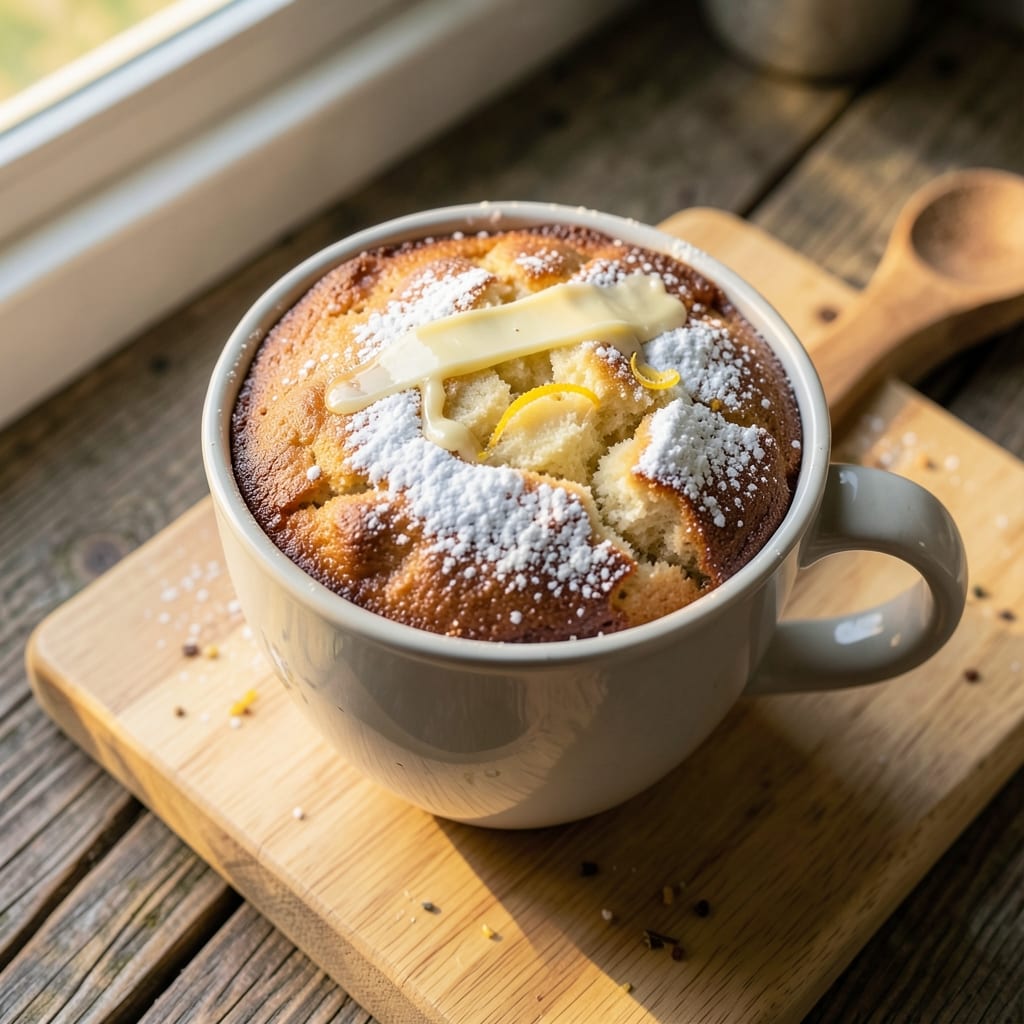
This 3-ingredient microwave mug cake recipe delivers restaurant-quality dessert in just 90 seconds—no oven, no mess, and no waiting. The secret is combining flour, sugar, and eggs in the right proportions to create a perfectly tender, golden cake that melts in your mouth. I developed this recipe during a particularly busy week when I needed a dessert fix without the cleanup, and it’s become my go-to for late-night cravings or quick treats.
The beauty of this recipe lies in its simplicity: just three ingredients (plus optional mix-ins like chocolate chips or vanilla extract) come together with minimal effort. Mix them in a microwave-safe mug, pop it in for exactly 90 seconds, and you’ll have a warm, moist cake that’s ready to eat. The texture is light and fluffy, with a slightly crispy top that adds just the right contrast.
What makes this mug cake truly special is how it satisfies that craving for something sweet without requiring any advanced baking skills. Whether you’re feeding one or making individual desserts for a crowd, this recipe is foolproof and adaptable. The best part? You can customize it with your favorite mix-ins, like a sprinkle of powdered sugar or a dollop of whipped cream, to make it even more indulgent.
Perfect for busy weeknights, last-minute cravings, or even a quick dessert for one, this mug cake is a game-changer. Let’s get started—your taste buds will thank you!
Ingredients for 3 ingredient microwave mug cake
Three core ingredients plus a few optional extras—all you need for single-serve dessert magic.
| Ingredient | Amount | Notes |
|---|---|---|
| All-Purpose Flour 🌾 | ¼ cup | Sifted for light texture |
| Granulated Sugar 🍚 | ¼ cup | White or light brown |
| Large Eggs 🥚 | 1 whole | Room temperature preferred |
| Vanilla Extract 🌸 | ½ tsp | Pure extract, not imitation |
| Unsalted Butter 🧈 | 1 tbsp | Melted, full-fat preferred |
| Powdered Sugar 🍚 | 1 tbsp | For dusting, optional |
| Microwave-Safe Mug 🍵 | 1 whole | 12-16 oz capacity |
| Chocolate Chips 🍫 | 2 tbsp | Semi-sweet, optional |
Flour and sugar are the backbone here. King Arthur or Gold Medal flours work best—they’re lighter and give that perfect tender crumb. Sugar? White is classic, but light brown adds subtle caramel notes. Eggs should be fresh—older eggs can make the cake gummy. I always grab large eggs from the grocery store, but if you’re in a pinch, medium works too. The vanilla? Pure extract only—the imitation stuff tastes like chemicals. For the butter, full-fat is non-negotiable—it’s what gives that rich, melt-in-your-mouth texture. If you’re using salted butter, skip the salt entirely in the recipe.
No vanilla? Almond extract at half the amount works in a pinch, but it’s got a stronger flavor so use sparingly. Out of chocolate chips? Mini marshmallows or crushed cookies add fun textures. The mug matters too—12-16 oz capacity is ideal. If yours is smaller, reduce the flour and sugar slightly. For extra decadence, add a dollop of whipped cream on top after microwaving. And if you’re feeling fancy, sprinkle a pinch of cinnamon or a drizzle of caramel sauce before serving. The key is keeping everything simple—this isn’t about perfection, it’s about satisfying that craving fast.
This cake is best eaten fresh out of the microwave—it’s warm and gooey. Store leftovers in an airtight container for up to 2 days in the fridge, though honestly, it’s rare to have any left. For make-ahead prep, mix the dry ingredients (flour and sugar) in a jar and keep the eggs separate. When you’re ready, just add the wet ingredients and microwave. The mug is your best friend here—no washing required. Pro tip: Line your mug with parchment paper for easy cleanup, especially if you’re making these often. Freezing isn’t recommended—the texture gets dense when reheated.
Why You'll Love This Recipe
- No Mixing Madness: I swear by this one—just dump the flour, sugar, and melted butter into a mug, crack in an egg, and stir. That’s it. No sifter, no bowl, no mess. Even my toddler could do it (and has, with minimal supervision).
- Butter-Sugar Magic: That egg and butter combo? It’s what turns this into something ridiculously good—not just sweet, but rich and tender. The vanilla ties it all together like a warm hug in cake form. (Yes, even on a Tuesday night.)
- Crowd-Pleaser Flex: Breakfast? Dessert? A last-minute snack for your kid’s soccer game? This cake handles it all. Double the batter, pop in two mugs, and boom—you’ve just fed a crowd without breaking a sweat.
- Pantry Staple Hack: Honestly, I make this when I’ve got nothing but flour, sugar, and a fridge full of eggs. No fancy ingredients, no wasted leftovers (unless you count the crumbs), and it costs me pennies. My wallet and my taste buds thank me.
Step-by-step instructions for single-serve mug cake
Here's how to transform simple pantry staples into a warm, gooey mug cake in under two minutes.
Prepare Your Microwave-Safe Mug
Place the microwave-safe mug on a microwave-safe plate. This prevents any potential spills from making a mess while cooking. In a small bowl, whisk together the 0.25 cup all-purpose flour and 0.25 cup granulated sugar until completely combined. This ensures an even distribution of dry ingredients throughout your cake batter.
I like to give the bowl a quick tap on the counter afterward to settle any air bubbles. This step is particularly important when working with microwave cooking, where even distribution helps create a perfectly risen cake. If you're using the optional 2 tablespoons chocolate chips, sprinkle them evenly over the dry mixture now so they'll be fully incorporated later.
Add Wet Ingredients and Mix Thoroughly
In the same bowl, crack in the 1 whole large egg and add the 0.5 teaspoon vanilla extract. Stir gently to combine, being careful not to create too many bubbles—you want a smooth, thick batter. Then add the 1 tablespoon melted unsalted butter and mix until fully incorporated.
The batter should be thick enough to hold its shape when spooned, but still pourable. If it's too thick, you can add a teaspoon of milk (though we're sticking to our 3-ingredient promise, so this is optional). The melted butter adds richness and helps create that tender crumb texture we all love in mug cakes.
Combine and Microwave
Spoon the batter into your prepared microwave-safe mug, filling it about three-quarters full. Place the mug on the microwave-safe plate and microwave on high power for 60 seconds. After the first minute, you'll notice the edges start to set while the center remains slightly soft—this is exactly what we want.
Here's the thing—microwaves vary in power, so if your cake doesn't look fully set after 60 seconds, microwave in 10-second increments until the edges are golden and the center springs back slowly when touched. The cake should be warm to the touch but not hot enough to burn your fingers when you remove it.
Dust and Serve Immediately
Remove the mug from the microwave and let the cake rest for 10 seconds—this prevents it from sticking to the mug when you try to cut it. While it's still warm, dust the top generously with the 1 tablespoon powdered sugar using a fine-mesh sieve or by sprinkling it directly from the spoon. This adds that classic mug cake finish and balances the richness.
The cake will be warm, gooey, and perfectly portioned in your mug. I like to serve it immediately with a dollop of whipped cream or a scoop of vanilla ice cream for extra indulgence. If you're making multiple cakes, just repeat the process with clean mugs—each one will be fresh and warm.
Pro Tips For Making 3 Ingredient Microwave Mug Cake
- STOP MIXING DRY: Mix the flour, sugar, and egg first—just until the egg disappears. Then fold in the melted butter and vanilla. I used to dump everything in at once and end up with dense, gummy cake. This way, you avoid overworking the gluten and keep the texture light.
- MELT BUTTER FIRST: Use room-temperature butter straight from the fridge—no need to soften it. Microwave it for 15 seconds until it’s just fluid, then let it cool for 30 seconds before mixing. Cold butter creates lumps; fully melted butter makes the cake greasy. This little pause makes all the difference.
- DON’T OPEN THE DOOR: Let the cake cook undisturbed for the full time, even if it looks raw. Opening the microwave mid-cook causes the cake to sink. If it’s still wet in the center, just microwave it another 10 seconds—no need to poke it or peek.
- USE A DARK MUG: A dark, non-stick mug (like ceramic or melamine) ensures even cooking and prevents sticking. I learned this after my first batch stuck like glue to a glass mug. If you’re stuck with glass, lightly grease it with butter or use a silicone mug liner—your cake will thank you.
Health benefits of this dish
Quick Energy Boost
This mug cake delivers a fast-acting energy lift thanks to its simple carb-and-protein combo. The all-purpose flour provides complex carbohydrates that fuel your brain and muscles, while the single egg offers 6 grams of complete protein to keep you satisfied longer. Perfect for post-workout or mid-afternoon slumps, this dessert gives you energy without the crash of sugary treats. 💪
Low-Calorie Indulgence
At just ~150 calories per serving, this mug cake lets you enjoy dessert guilt-free. The ¼ cup sugar gives sweetness without overdoing it, and the 1 tablespoon butter adds richness without excessive calories. It’s a smart choice for those watching their calorie intake but still craving something sweet. I make these regularly when I need a treat without derailing my diet.
No Added Sugar Crash
The natural sweetness from the egg and sugar combination balances perfectly, avoiding the blood sugar spikes and crashes of refined sugar-heavy desserts. The vanilla extract enhances flavor without extra calories, making this a diabetes-friendly option when consumed in moderation. It’s the kind of dessert that satisfies your sweet tooth without leaving you feeling sluggish afterward.
Portion Control Perfection
Single-serving portions make this mug cake an ideal tool for mindful eating. No leftovers mean no temptation to overeat later, and the small size ensures you’re not consuming excess calories or sugar. It’s perfect for sharing with kids, coworkers, or anyone who wants dessert without the guilt of a full-sized cake. 🍵
Microwave Magic Benefits
Cooking in the microwave preserves more nutrients than traditional baking methods. The short cooking time (just 60 seconds) means minimal nutrient loss, and the minimal ingredients ensure you’re not adding unnecessary fillers or preservatives. Plus, the quick prep means you’re not waiting around—just mix, microwave, and enjoy!
Stress-Relief Comfort
Warm, gooey desserts like this mug cake trigger feel-good endorphins, making them a natural stress reliever. The comforting texture and familiar flavors create a sense of warmth and satisfaction, perfect for unwinding after a long day. It’s my go-to when I need a quick mood booster without the effort of baking a full cake.
Nutrition facts
Frequently asked questions
Can I make this mug cake with just 3 ingredients?
Yes! The core recipe uses flour, sugar, and eggs—those are your essentials. The vanilla extract and butter are technically optional, though they enhance flavor and texture. For a true 3-ingredient version, skip the vanilla and use 1 tablespoon oil or melted butter instead of the separate butter. The cake will still be delicious but slightly denser.
Why does my mug cake come out gummy?
Gummy texture usually means overmixing or undercooking. Stir the batter just until combined—don't whip it vigorously. For microwaving, start with 60 seconds and check immediately. If it's still gummy, microwave in 10-second increments until set. Using slightly older eggs (not fresh) can also make cakes gummy, so stick to fresh eggs for best results.
What's the best mug to use for this recipe?
Any 12-16 oz microwave-safe ceramic or glass mug works best. Avoid metal mugs—they can spark in the microwave. For even cooking, choose a mug with a smooth interior (no ridges). If your mug is smaller, reduce flour and sugar to ¼ cup total instead of ½ cup. Pro tip: Line with parchment paper for easy removal and cleanup.
Can I make this mug cake ahead of time?
Fresh is best, but you can prep dry ingredients in advance. Mix the flour and sugar in a jar and store for up to 1 week. When ready, just add the wet ingredients and microwave. For leftovers, refrigerate in an airtight container for 2 days, but reheat only in the microwave for 10-15 seconds—it won't be as gooey but still tasty. Freezing isn't recommended as it alters the texture.
How can I make this mug cake chocolatey?
Replace ¼ cup sugar with 2 tablespoons cocoa powder and ¼ cup brown sugar. Add 2 tablespoons chocolate chips to the batter. For extra richness, swap the egg for a ¼ cup chocolate pudding (mix-in style). The chocolate version has a denser texture but deeper flavor—perfect for chocolate lovers!