
Desserts
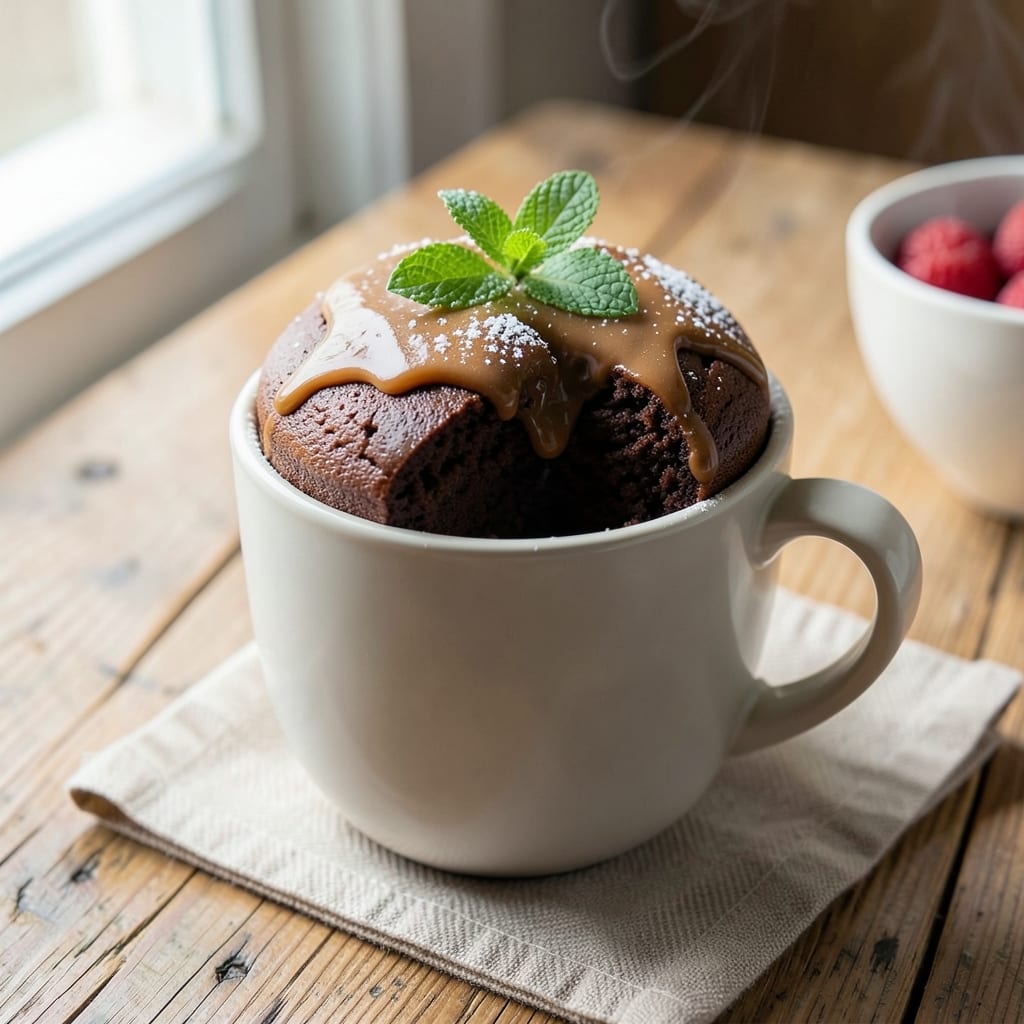
This 3 minute cake in a cup recipe transforms pantry staples into a rich, fudgy dessert with layers of texture that’ll fool anyone into thinking it took hours. The secret lies in a simple mix of flour, sugar, cocoa powder, and eggs—no fancy equipment or measuring cups required. I perfected this while craving something decadent after a long day, and it became my go-to for satisfying sweet tooths in under five minutes.
The magic happens in the microwave, where the batter transforms into a perfectly set cake with a moist center and slightly crispy edges. No oven preheating, no waiting for water to boil—just mix, microwave, and enjoy. The recipe uses basic ingredients you likely already have, making it ideal for last-minute cravings or when you’re hosting unexpected guests. The fudgy layers melt in your mouth, delivering restaurant-quality dessert without the effort.
What makes this recipe truly impressive is its versatility. Swap out chocolate for vanilla or add a pinch of cinnamon for warmth, and it adapts to any flavor preference. Top with whipped cream, a sprinkle of powdered sugar, or a dollop of Nutella for extra indulgence. The best part? You can make it in any microwave-safe cup—no special ramekins needed. This is dessert made effortless, proving that great things don’t always require time.
Whether you’re craving a quick treat or need a foolproof dessert for one, this recipe delivers every time. The simplicity of the method ensures foolproof results, while the rich, fudgy texture makes it feel like a special occasion. Ready to indulge in under five minutes? Let’s get started.
Ingredients for 3 minute cake in a cup
Pantry staples plus a microwave—this quick cake needs almost nothing.
| Ingredient | Amount | Notes |
|---|---|---|
| All-Purpose Flour 🌾 | ½ cup | Sifted for smooth batter |
| Granulated Sugar 🍚 | ⅓ cup | White or light brown |
| Unsweetened Cocoa Powder 🍫 | ⅓ cup | Dutch-processed preferred |
| Large Eggs 🥚 | 2 whole | Room temperature for best mixing |
| Milk 🥛 | ¼ cup | Any kind works |
| Vegetable Oil 🫒 | ¼ cup | Any neutral oil |
| Baking Powder 🍞 | ½ tsp | Aluminum-free preferred |
| Salt 🧂 | ¼ tsp | Fine sea salt |
| Vanilla Extract 🌸 | ½ tsp | Pure vanilla preferred |
| Powdered Sugar 🍚 | 2 tbsp | For dusting tops |
| Chocolate Chips 🍫 | ¼ cup | Optional for extra fudginess |
| Whipped Cream 🥛 | ¼ cup | For serving (optional) |
The cocoa powder is what gives this its rich, fudgy texture. Hershey's Special Dark or Dutch-processed brands work best—avoid the cheap stuff that tastes bitter. If you're using natural cocoa, add an extra pinch of salt to balance. The eggs should be room temperature for a smoother batter. Trader Joe's sells great vanilla extract at a good price, but any pure vanilla will do. The chocolate chips are totally optional but make it feel like a real treat—just toss them in at the end.
No cocoa powder? Substitute with 2 tbsp melted chocolate (dark or semi-sweet) mixed into the milk. Out of baking powder? Baking soda plus 1/4 tsp vinegar works in a pinch. The milk can be any kind—dairy, almond, or oat—just make sure it's cold when you measure it. If you're making this for one, just halve everything and use a smaller cup. The powdered sugar is just for dusting, but if you want extra sweetness, add a tablespoon to the batter too.
This batter keeps in the fridge for up to 3 days—just stir before microwaving. For extra fudgy layers, microwave for 90 seconds total (30 seconds, stir, 30 seconds, stir, 30 seconds). Store leftovers in an airtight container with parchment between layers. The whipped cream adds a nice touch, but honestly, this cake is delicious plain too—just dust that powdered sugar on top and enjoy.
Why You'll Love This Recipe
- No Mixing Madness: I swear by this—just dump the dry stuff (flour, sugar, cocoa) into a cup, crack in an egg, splash milk, and stir. No sifter, no bowl, no stress. The eggs bind it all while the cocoa gives that rich depth without fuss.
- Rich Without Effort: That cocoa powder transforms this into something decadent with almost no work. The sugar caramelizes just enough to balance the bitterness, and the eggs make it moist—like a tiny, perfect mug cake every time. Honestly, it tastes like a bakery treat without the guilt.
- Microwave Magic: Three minutes in the microwave, and you’ve got a warm, gooey cake. No oven preheating, no waiting for layers to bake—just pop it in, let it puff, and enjoy. (Yes, even on a Tuesday night when you’re craving something sweet but don’t feel like turning on the stove.)
- Budget-Friendly Indulgence: Five ingredients, all pantry staples, and you’re golden. No fancy additives, no specialty tools—just flour, sugar, cocoa, eggs, and milk. I’ve made this for date nights, lazy Sundays, and even as a quick pick-me-up after a long day. It’s the kind of treat that doesn’t break the bank but feels like one.
Step-by-step instructions for 3 minute cake in a cup
Here's how to make this decadent mug cake with fudgy layers and silky texture.
Mix Dry Ingredients in a Microwave-Safe Mug
In a microwave-safe mug, combine the 0.5 cup all-purpose flour, 0.33 cup granulated sugar, 0.33 cup unsweetened cocoa powder, 0.5 teaspoon baking powder, and 0.25 teaspoon salt. I like to use a fork to break up any flour clumps—this ensures a smooth batter. The cocoa powder will make the mixture look rich and dark, but don't worry, it'll transform into something magical.
Next, stir in the 0.5 teaspoon vanilla extract and set the mug aside. The vanilla adds depth and warmth that balances the chocolate's intensity. If you're using the 0.25 cup chocolate chips, fold them in now so they're evenly distributed throughout the cake. The chips will melt into gooey pockets when microwaved, adding texture contrast.
Add Wet Ingredients and Whisk Until Smooth
In a small bowl, whisk together the 2 whole large eggs, 0.25 cup milk, and 0.25 cup vegetable oil until fully combined. Room-temperature eggs mix better, so if they're cold, let them sit at room temperature for 10 minutes before using. Pour this wet mixture into the mug with the dry ingredients and whisk vigorously for about 30 seconds until no dry spots remain.
The batter should be thick but pourable—almost like a rich brownie batter. If it looks too thick, add 1 teaspoon milk at a time until it reaches the right consistency. Overmixing can make the cake dense, so mix just until everything is incorporated. The batter will be dark and velvety, promising that fudgy texture we're after.
Microwave for 90 Seconds and Create Fudgy Layers
Place the mug in the microwave and cook on high power for 90 seconds. Immediately after microwaving, let the cake sit for 30 seconds—this resting time helps it set properly. Here's the magic part: use a butter knife to gently cut the cake into two equal layers horizontally. The center should look slightly underdone, which is perfect for creating that gooey middle.
While the cake is still warm, spread 2 tablespoons powdered sugar evenly over the top layer. This step is optional but adds a sweet, dusty finish that pairs beautifully with the rich chocolate. The powdered sugar will melt slightly, creating a glossy sheen that makes the cake look even more tempting.
Assemble with Whipped Cream and Serve Immediately
Place the bottom layer back in the mug, then add a dollop of 0.25 cup whipped cream on top. Replace the top layer and gently press down to create a layered effect. The whipped cream adds a light, airy contrast to the dense, fudgy cake. If you're feeling fancy, you can drizzle a little melted chocolate or extra powdered sugar on top for decoration.
Serve immediately while the cake is still warm and gooey. The combination of the rich chocolate cake, creamy whipped cream, and sweet powdered sugar creates a perfect balance of textures and flavors. This cake is best enjoyed within 10 minutes of making it, so don't wait—dig in while it's still warm and melty!
Pro Tips For Making 3 Minute Cake In A Cup
- STIR LIKE YOU MEAN IT: Mix the batter until it’s just combined—no lumps, but don’t overdo it. I used to whip this like I was making pancakes, and the cakes turned dense. Thirty seconds of steady stirring is all you need.
- SIFT THE COCOA FIRST: Lightly sift the cocoa powder into the dry ingredients before adding milk. This prevents clumps that’ll make your cake look (and taste) uneven. Yes, it’s an extra step, but it’s worth it.
- USE ROOM-TEMP EGG: Cold eggs from the fridge won’t blend smoothly and can make the batter gummy. Let them sit in warm water for 5 minutes—trust me, your cake will be lighter and set faster.
- MICROWAVE IN 20-SECOND BURSTS: Skip the 3-minute guesswork. Start with 20 seconds, then check—if it’s still jiggly, do another 10. Overcooking turns it rubbery, and nobody wants that. (Your microwave’s wattage matters, so adjust if yours is old.)
Storing and reheating your leftovers
Fridge Storage Tips
This cake keeps beautifully in the fridge for up to 3 days if you make it ahead. Let it cool completely first, then store it in an airtight container with parchment paper between layers to prevent sticking. I like using Glasslock containers because they seal tightly and keep the cake moist. When reheating, microwave for 15-20 seconds to restore that warm, gooey texture. 💫
Freezer-Friendly Method
For longer storage, freeze individual portions in quart-sized freezer bags with all the components (layers and whipped cream) separated. Thaw overnight in the fridge before reheating. To reheat, microwave the cake layer for 20-25 seconds and the whipped cream separately for 10 seconds—this keeps the textures perfect. The cake will taste just as rich as fresh!
Reheating for Best Texture
Microwaving is the fastest way to revive this cake. Place it on a microwave-safe plate and heat for 15 seconds at a time, checking after each interval. The goal is to warm it through without drying out the fudgy layers. For extra indulgence, add a fresh dollop of whipped cream after reheating—it melts beautifully against the warm cake. Avoid the oven for reheating; it can make the cake too dry. ⏰
Portioning for One
If you're making just one serving, halve the recipe and use a smaller mug. Store the single portion in an airtight container with a piece of parchment paper over it. Reheat for 10-12 seconds in the microwave—this quick burst of heat keeps the cake tender. The smaller portion reheats faster and more evenly, so you won’t have to worry about uneven textures.
Reviving Day-Old Cake
Day-old cake can be just as delicious with a little creativity. Sprinkle the top with 1 teaspoon hot water and microwave for 10 seconds to refresh it. Add a fresh layer of whipped cream or a drizzle of melted chocolate to make it feel like a brand-new treat. The cake’s fudgy texture actually improves slightly after resting, so don’t toss it out—just give it a little love! 💛
Nutrition facts
Frequently asked questions
Can I make this cake without eggs?
Yes! For a vegan version, replace the 2 eggs with 2 tablespoons ground flaxseed mixed with 6 tablespoons water (let it sit for 5 minutes to thicken). The texture will be slightly denser but still delicious. For a simpler option, use 2 tablespoons applesauce or 1 ripe mashed banana—both work well in mug cakes.
Why does my cake come out dry?
Overmicrowaving is the most common cause. Stick to 90 seconds total (30-second intervals with stirring) and let it rest for 30 seconds after cooking. If it's still dry, try adding 1 teaspoon milk to the batter or reduce the flour by 1 tablespoon next time. The key is a thick but pourable batter—don't overmix!
Can I use a regular oven instead of a microwave?
Preheat to 350°F (175°C) and bake in a greased 6-ounce ramekin for 12-15 minutes until a toothpick comes out clean. The texture will be slightly different (less fudgy) but still delicious. For extra richness, brush the top with melted butter before baking.
What's the best mug size for this recipe?
A 12-ounce mug works perfectly—it gives enough room for the cake to rise without overflowing. If you're using a smaller mug (8 ounces), reduce the batter by 25% to prevent spills. For larger mugs (16 ounces), double the recipe but microwave for 2 minutes total (stirring every 40 seconds).
Can I make this cake gluten-free?
Yes! Swap the 0.5 cup all-purpose flour with 0.5 cup gluten-free 1:1 baking flour (like Bob's Red Mill). Add 0.5 teaspoon xanthan gum if your blend doesn't contain it. The cake will still be fudgy but may be slightly denser. For best results, let the batter rest for 5 minutes before microwaving to help the gluten-free flour hydrate properly.