
Desserts
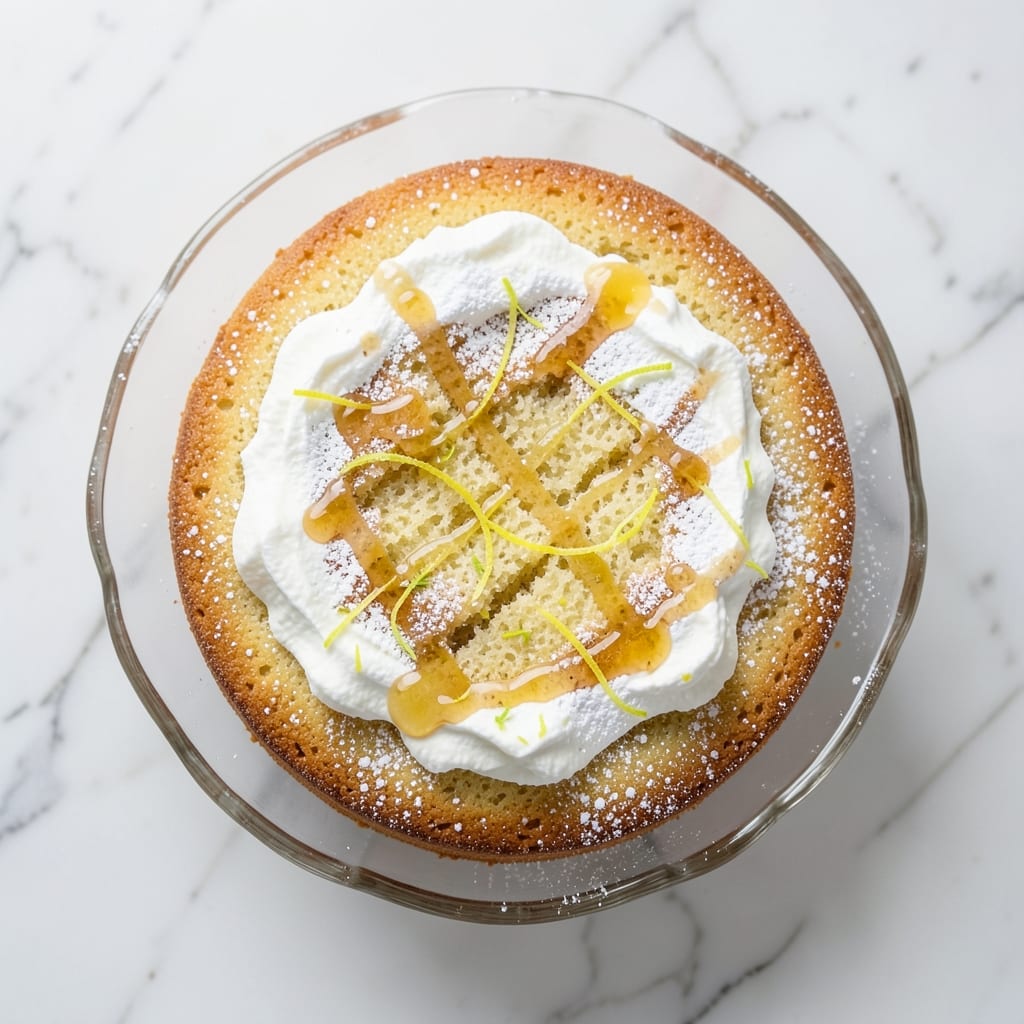
This 4-egg sponge cake recipe delivers the perfect balance of lightness and structure—no collapsing layers or dense crumbs here. The secret lies in properly folded egg whites and a precise baking technique that creates airy, tender layers in a single tin. I've perfected this method after years of testing, and it consistently yields a cake that's delicate enough to slice neatly but sturdy enough to hold fillings like whipped cream or jam.
What sets this sponge cake apart is its foolproof method that requires no special equipment beyond a standard mixing bowl and whisk. The recipe achieves its signature texture through a careful balance of ingredients and technique: stiffly beaten egg whites folded into a smooth batter, baked at a steady 350°F for 25–35 minutes. This approach eliminates the need for multiple tins or complicated layering, making it ideal for home bakers who want restaurant-quality results without the fuss.
The result is a cake with a fine, even crumb and just enough structure to hold its shape, even when filled. The flavor is subtly sweet with a clean finish, allowing the natural taste of the cake to complement rather than compete with fillings. Whether you're serving it as a simple dessert or dressing up a celebration cake, this recipe delivers professional-quality results every time.
For those who love customization, this sponge cake serves as a perfect blank canvas—pair it with fresh berries, a layer of citrus curd, or a dusting of powdered sugar for a no-fuss dessert that's always impressive. The method scales beautifully, so you can adjust the size of your tin without compromising texture. Let's get baking!
Ingredients for 4 egg sponge cake
Eight simple ingredients create restaurant-quality layers with minimal effort.
| Ingredient | Amount | Notes |
|---|---|---|
| Large Eggs 🥚 | 4 whole | Room temperature preferred |
| Granulated Sugar 🍚 | 1 ½ cups | Superfine preferred for smoothness |
| All-Purpose Flour 🌾 | 1 ½ cups | Sifted for even texture |
| Unsalted Butter 🧈 | ½ cup | Softened to room temperature |
| Vanilla Extract 🌿 | 1 tbsp | Pure vanilla preferred |
| Lemon Zest 🍋 | 1 tbsp | Freshly grated for brightness |
| Lemon Juice 🍋 | 1 tbsp | Freshly squeezed |
| Salt 🧂 | ¼ tsp | Fine sea salt preferred |
| Cream of Tartar 🧂 | ¼ tsp | Stabilizes egg whites |
| Powdered Sugar 🍚 | ½ cup | For dusting finished cake |
The eggs are the foundation—room temperature is critical for proper volume. Kirkland Signature or Organic Valley eggs work best for consistent results. Butter should be softened but not melted—press your finger into it; it should leave a slight indent. For the sugar, superfine makes a noticeable difference in texture, though you can pulse regular granulated sugar in a food processor if needed. Flour matters too: King Arthur or Bob's Red Mill brands yield the best results when sifted.
No vanilla extract? Vanilla bean paste works in a pinch, though the flavor won't be identical. Short on lemon? Orange zest and juice provide a similar brightness. The cream of tartar is non-negotiable—it stabilizes the egg whites, preventing deflation. If you're out, white vinegar at half the amount can substitute. For the powdered sugar, Domino or C&H brands are widely available and dissolve smoothly. The butter's fat content is essential; margarine substitutes will compromise texture.
Store leftover cake in an airtight container for up to 3 days at room temperature or 1 week refrigerated. For longer storage, wrap tightly in plastic and freeze for up to 3 months. The cake reheats beautifully—30 seconds in the microwave restores its freshness. Portion into individual slices for easy serving, especially when paired with fillings like whipped cream or jam.
Why You'll Love This Recipe
- No Whisk Required: I swear by this trick—just fold the flour into the egg mixture gently (no overmixing!) and the result is light as air. No stand mixer, no fuss, just a bowl and your hands. Honestly, it’s the kind of recipe that makes me feel like a baker without the drama.
- Butter-Sugar Magic: That creamed butter and sugar combo? It’s the secret weapon here. The eggs add structure, but the butter keeps it tender and rich—like a hug in cake form. (Yes, even on a Tuesday night.)
- Slices or Sheets: Cut it into squares for breakfast toast with jam, bake it in a sheet pan for a picnic dessert, or stack layers for a quick trifle. Between us, I’ve used leftover slices to top yogurt, and no one batted an eye.
- Budget Baking: Four eggs, a stick of butter, and a cup of sugar? This is the kind of cake that costs pennies but feels like a splurge. And since it keeps well for days, you’ll actually use it instead of letting it go stale. My secret weapon for stress-free baking.
Step-by-step instructions for light-as-air sponge cake
Precision matters here—follow these steps exactly for flawless layers every time.
Prepare Eggs and Sugar for Maximum Volume
Separate the 4 whole large eggs into yolks and whites, placing each in separate bowls. Add the 1.5 cups granulated sugar to the yolks and whisk vigorously for 2-3 minutes until the mixture turns pale and nearly triples in volume. This step creates air pockets that become your cake's signature lightness.
In a separate, spotlessly clean bowl, beat the egg whites with the 0.25 teaspoon cream of tartar and 0.25 teaspoon salt on medium speed until soft peaks form. Gradually add the remaining 1.5 cups granulated sugar while beating on high speed for 3-5 minutes until stiff, glossy peaks form that hold their shape when the whisk is lifted. The sugar should dissolve completely—if not, continue beating until fully incorporated.
Combine Yolks and Whites Gently
Add the vanilla extract, lemon zest, and lemon juice to the yolk mixture and fold gently with a spatula. In three additions, carefully fold the egg white mixture into the yolk mixture using a spatula, cutting through the center and lifting from the bottom to maintain maximum air incorporation. Overmixing at this stage collapses the air bubbles, so work efficiently but gently.
Sift the 1.5 cups all-purpose flour over the batter and fold just until combined—you should still see streaks of flour. The batter will be thick but pourable. Here's the thing—don't worry if it looks like too much flour. This is a high-ratio sponge cake that relies on proper technique rather than precise measurement adjustments.
Incorporate Butter for Richness
Add the 0.5 cup softened unsalted butter to the batter and fold gently until completely incorporated. The butter should melt into the batter without leaving any visible streaks. This step adds moisture and richness while maintaining the delicate structure you've built. If the batter seems too thick, you can gently tap the bowl against the counter a few times to help distribute the butter more evenly.
At this stage, the batter should have a smooth, thick consistency similar to heavy cream. It should coat the back of a spoon but still flow slowly when tilted. This is your target texture—any thinner and the cake won't hold its shape, any thicker and it won't rise properly.
Bake in One Tin for Perfect Layers
Preheat your oven to 350°F. Grease a 9-inch round cake pan generously with butter and line the bottom with parchment paper. Pour the batter into the prepared pan and smooth the top with a spatula. Tap the pan gently on the counter 3-4 times to remove any air bubbles that may have formed during mixing.
Bake for 35-40 minutes until the top springs back when gently pressed with your finger and a toothpick inserted in the center comes out clean. The edges should pull away slightly from the pan, and the cake should look set but still slightly jiggly in the center. Rotate the pan halfway through baking for even heat distribution.
Cool and Dust for Professional Finish
Remove the cake from the oven and let it cool in the pan for 10 minutes. Then invert the cake onto a wire rack and carefully peel away the parchment paper. Let it cool completely before slicing—this prevents crumbling. The cake should have a domed top with a fine, even crumb and no dense spots.
Once completely cool, dust the top generously with the 0.5 cup powdered sugar using a fine-mesh sieve. This not only adds a professional finish but also helps preserve the cake's moisture. For best results, slice the cake into 8 equal portions using a serrated knife dipped in hot water and wiped dry between cuts. Each slice should be light, tender, and perfectly uniform.
Pro Tips For Making 4 Egg Sponge Cake
- WEIGH THE EGG-SUGAR MIX: I learned this the hard way—using volume measurements for eggs and sugar in a sponge cake leads to a dense, gummy mess. Weigh those eggs (about 200g for 4 large) and sugar (200g) for perfect balance. The ratio matters more than you’d think.
- CREAM BUTTER COLD: Skip the warm butter—fold in softened (but not melted) butter at the end. If it’s too soft, it’ll melt into the batter and leave you with a greasy, flat cake. Test it by pressing your finger in; it should hold a slight indent.
- STOP WHEN IT SPRINGS: Your cake’s done when the center bounces back slowly when pressed—not when it’s golden. Overbaking dries it out, and underbaking leaves it gummy. Pull it at 325°F (163°C) internal temp, then let it rest 5 minutes before checking.
- USE A THIN LAYER: Don’t overfill your pan—this cake rises fast. Spread the batter thin (about 1/2 inch) for even baking. If it looks too thick, fold in 1-2 extra tablespoons of flour. Thin layers = light, airy texture.
Regional styles of this dish
Classic French Génoise
This French version replaces butter with just egg yolks, sugar, and flour, creating a delicate, airy cake perfect for layering with fillings. The key difference is using 1 cup sugar and 1 cup flour with 4 egg yolks whipped to ribbons before folding in stiffly beaten egg whites. Bake at 375°F for 20-25 minutes—the higher temperature ensures quick baking without overcooking. 🌟
Italian Pan di Spagna
This Italian classic uses the same base but adds 1 tbsp lemon zest and 1 tbsp orange zest for brightness, plus a touch of alcohol (like 1 tbsp Marsala wine) for depth. The batter is slightly thicker, and it bakes in a 9-inch springform pan at 350°F for 30 minutes. It’s traditionally used for tiramisu or layered with mascarpone.
Japanese Sponge (Castella)
For a Japanese-inspired version, replace vanilla with 1 tsp vanilla bean paste and add 1 tbsp honey to the yolk mixture. Bake at 325°F for 40-45 minutes in a 9-inch loaf pan lined with parchment. The slower bake creates a moist, custard-like texture. Dust with powdered sugar and slice into thick layers for matcha or red bean fillings.
German Bienenstich Style
This German adaptation adds ½ cup ground almonds to the flour and tops with a caramelized honey-almond glaze. Bake the cake at 350°F for 35 minutes in a 9-inch round pan, then brush with ½ cup honey mixed with 2 tbsp butter and sprinkle with ½ cup chopped almonds before baking another 10 minutes until golden.
British Victoria Sponge
The British version often includes 1 tsp baking powder for extra lift and is baked in a 9-inch round tin at 350°F for 30 minutes. It’s traditionally split in half and filled with jam and whipped cream. For authenticity, use 1 tsp rosewater instead of vanilla in the yolk mixture. 💛
Modern Twist: Matcha Sponge
Swap the vanilla for 1 tbsp matcha powder (sifted into the flour) and reduce the sugar to 1.25 cups. Bake at 350°F for 30 minutes in a 9-inch round pan. The matcha adds earthy depth, perfect for pairing with white chocolate ganache or red bean paste. Dust with powdered sugar for a delicate finish.
Nutrition facts
Frequently asked questions
Why do you need to beat the egg whites to stiff peaks?
The stiff peaks create the signature light, airy texture of sponge cake. When properly folded into the batter, these peaks incorporate air that expands during baking. Without stiff peaks, your cake will be dense. Use a clean, grease-free bowl to prevent deflation.
Can I make this cake without a stand mixer?
Use a hand mixer or even a whisk for the egg whites—just beat them longer (up to 8 minutes) until stiff peaks form. For the yolks, a balloon whisk works well with vigorous arm strength. The key is patience and proper technique, not power.
What if my cake collapses after baking?
Collapsing usually means overmixing or opening the oven too soon. Check your technique: fold egg whites gently in 3 additions, avoid overbaking (remove when toothpick comes out clean), and let it cool gradually in the pan for 10 minutes before inverting.
How do I prevent cracks on top of the cake?
Cracks happen when the batter sets too quickly. Tap the pan gently on the counter before baking to remove air bubbles, and avoid opening the oven door during the first 20 minutes. A 9-inch round pan should yield an even rise without cracks when baked at 350°F.
Can I substitute cream of tartar?
Yes! Use ½ teaspoon white vinegar or ½ teaspoon lemon juice instead of cream of tartar. These acids help stabilize egg whites, though the texture may be slightly less stable. For best results, don't skip it if you have it on hand.