
Desserts
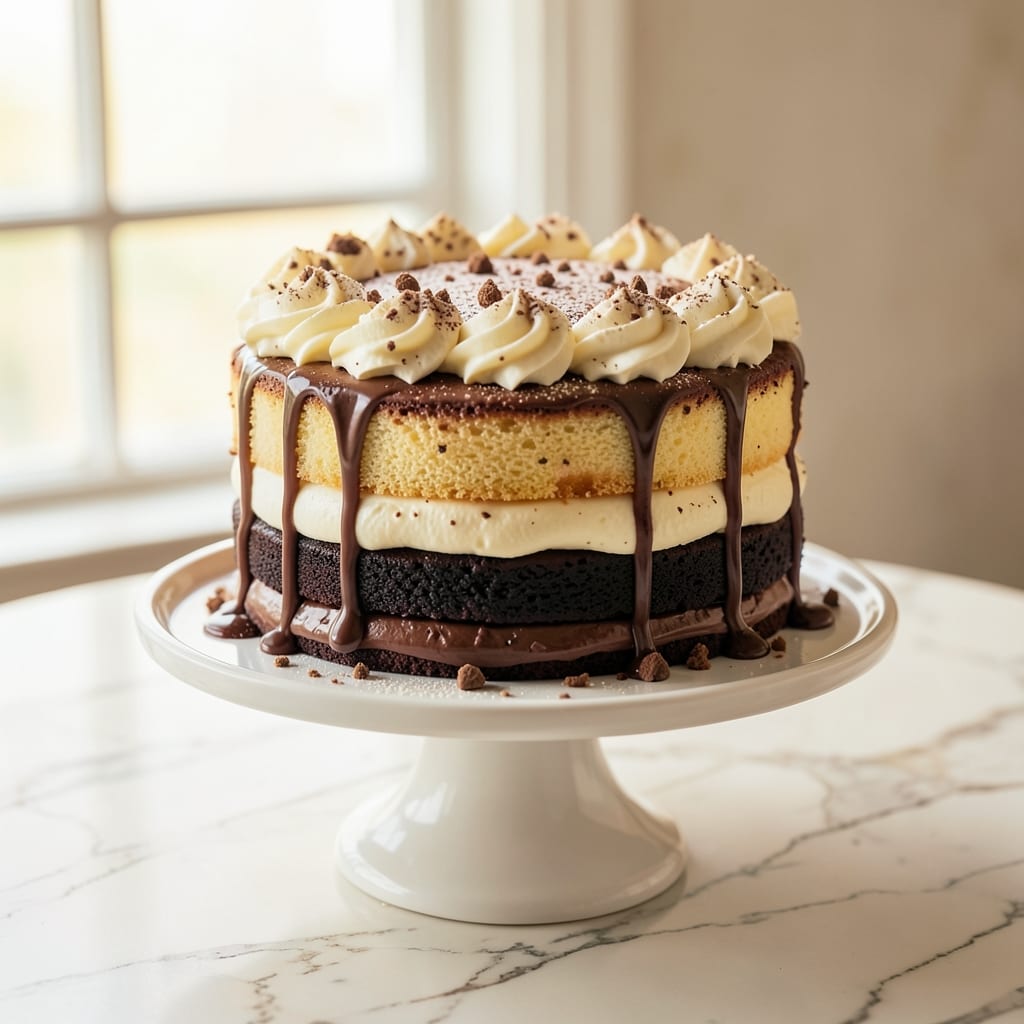
This 5-minute cake recipe delivers decadent single-serve dessert with zero cleanup—just a mug, fork, and microwave. 💛 I developed this after craving cake but lacking patience (or bowls) for traditional baking. The secret? A simple mix of pantry staples that transforms into rich, moist cake in under five minutes—no waiting for ovens or measuring cups.
The magic happens in the microwave, where the batter cooks evenly into a tender, fudgy cake with a golden crust. You only need four ingredients: flour, sugar, oil, and milk (or a dairy-free alternative). The texture is surprisingly similar to classic cake, with just enough structure to hold a forkful while staying moist enough to melt in your mouth.
Perfect for satisfying a late-night sweet tooth, this recipe requires no special equipment beyond what you already own. The cake stays warm enough to eat straight from the microwave, and the rich chocolate flavor makes it feel indulgent—even though it takes less time than boiling water. No frosting needed; the cake is delicious on its own.
Whether you're feeding one person or making a batch for quick treats, this method ensures foolproof results every time. Let's get started—your cake will be ready before you finish reading the instructions.
Ingredients for 5 minute cake
Four core ingredients plus four secret boosters—all you need for microwave magic.
| Ingredient | Amount | Notes |
|---|---|---|
| All-Purpose Flour 🌾 | ¼ cup | Sifted for light texture |
| Granulated Sugar 🍚 | ¼ cup | White or brown preferred |
| Vegetable Oil 🫒 | 2 tbsp | Light or canola works best |
| Milk 🥛 | ¼ cup | Any kind, dairy or plant-based |
| Unsweetened Cocoa Powder 🍫 | 1 tbsp | For rich chocolate flavor |
| Baking Powder 🍞 | ¼ tsp | Ensures proper rise |
| Vanilla Extract 🌸 | ½ tsp | Pure vanilla preferred |
| Salt 🧂 | ⅛ tsp | Fine sea salt recommended |
The flour is your foundation—King Arthur or Gold Medal work best for that tender crumb. Sugar gives structure, but brown sugar adds moisture if you're feeling fancy. Oil is non-negotiable here—it keeps the cake moist without needing frosting. Trader Joe's or store-brand vegetable oil are perfect. Milk? Any kind works—dairy, almond, or even coconut milk. Just make sure it's cold when you mix it in.
No cocoa powder? Substitute 1 tbsp melted chocolate chips—just stir it in at the end. Short on vanilla? Almond extract works in a pinch. The baking powder is crucial—don't skip it or you'll end up with a sad, dense brick. Salt might seem minor, but it balances all those sweet flavors. Diamond Crystal kosher salt dissolves perfectly. For a batch of two cakes, just double everything—no need for fancy math.
This batter keeps 3 days in the fridge if you're prepping ahead, but honestly, it's best fresh. The cocoa powder stays potent for 6 months in a sealed container. Microwave-safe mugs are key—pyrex or ceramic mugs work best. If your cake turns out too dense, next time let the batter sit 1 minute before microwaving. Trust me on that.
Why You'll Love This Recipe
- No Mixing Madness: I swear by this—just dump, stir, and bake. No sifter, no whisk wars, no waiting for eggs to come to room temperature. The cocoa and oil blend so smoothly, the batter’s ready in under two minutes. Honestly, my blender’s seen more action on smoothie days than this recipe ever needs.
- Rich Without Effort: That cocoa powder? It’s the secret weapon here. The milk and sugar cut through its bitterness just enough to make it dangerously good—fudgy but not dense, sweet but not cloying. (Yes, even my picky coworkers ask for seconds.) The oil keeps it moist without tasting greasy, which is basically a miracle.
- Birthday or Breakfast: Serve it warm with a scoop of ice cream for a last-minute party dessert, or cut into squares for a grab-and-go breakfast. I’ve even packed it in lunchboxes—kids love the chocolatey surprise, and it holds up for days. Between us, it’s my go-to for when I forget to plan ahead.
- Pantry Magic: Five ingredients, zero specialty items. You’re probably looking at your flour and sugar right now. The oil and milk are basics, and cocoa? That’s the one thing I always have on hand. Not just cheap—this is my “I only have $3 to spend” emergency dessert. And it never lets me down.
Step-by-step instructions for 5 minute cake recipe
Here's how to whip up this magical single-serve cake in record time—no bowls, no stress.
👨🍳 Step 1: Mix Dry Ingredients Directly in the Mug
Grab your 12-ounce microwave-safe mug and add the 0.25 cup all-purpose flour. Sprinkle in the 0.25 cup granulated sugar, 1 tablespoon unsweetened cocoa powder, 0.25 teaspoon baking powder, and 0.125 teaspoon salt. I like to use a spoon to gently fold these together right in the mug—this prevents creating a flour cloud that'll make your kitchen look like a snowstorm.
Use the back of your spoon to press down any lumps in the dry ingredients. This ensures everything mixes evenly when we add the wet ingredients. The cocoa powder will give your cake that rich chocolate flavor, while the baking powder guarantees it rises properly—even in just 5 minutes of baking.
👨🍳 Step 2: Add Wet Ingredients and Stir Like You Mean It
Pour in the 2 tablespoons vegetable oil and 0.25 cup milk (dairy or plant-based both work). Drizzle in the 0.5 teaspoon vanilla extract and stir vigorously with your spoon for about 30 seconds. You're looking to create a smooth, lump-free batter that coats the back of your spoon.
Here's the thing—don't be shy with the stirring. The batter should look thick but pourable, almost like a heavy pancake batter. If it seems too thick after mixing, add 1 tablespoon more milk and stir again. The key is getting that perfect balance between thick enough to hold its shape and thin enough to bake evenly in just 5 minutes.
🔥 Step 3: Microwave Until Perfectly Set
Place your mug in the microwave and cook on high power (100%) for exactly 5 minutes. I know it seems counterintuitive to leave it in there that long, but trust me—this gives the cake time to fully set without drying out. After 4 minutes, peek at the top to check for any signs of browning or puffing. If it's not quite ready, continue cooking in 30-second intervals until it's set.
When it's done, the cake should spring back when you gently press the center with your finger. It'll look slightly domed and have a beautiful chocolatey sheen on top. Let it cool in the mug for 2 minutes—this helps it set properly before you try to cut it. The edges should pull away from the mug easily, and the center should be moist but firm.
🍽️ Step 4: Serve Immediately for Maximum Joy
Run a knife around the edges to loosen the cake, then invert it onto a plate. The bottom will look slightly underdone—this is normal! The residual heat from the mug will finish cooking it as it sits. You can eat it straight from the mug if you're impatient (I won't judge), but serving it on a plate makes it look extra special.
Here's where it gets fun—top with a dollop of whipped cream, a sprinkle of powdered sugar, or even a few chocolate chips. The cake will be warm, moist, and perfectly sweet with that rich cocoa flavor. And the best part? You did it all in 5 minutes with just one mug and a microwave. That's what I call a win!
Pro Tips For Making 5 Minute Cake
- STIR THE COCOA FIRST: Sift that cocoa powder into the flour before adding wet ingredients—this prevents clumps that turn into dry spots in your cake. I learned this the hard way after pulling out a cake with weird, chalky patches.
- WEIGH THE FLOUR: Scooping flour from the bag packs too much air, making your cake dense. Use a kitchen scale for 1 cup (about 125g) of flour—this keeps the texture light and fluffy, even in a hurry.
- DON’T OVERMIX THE BATTER: Stir just until the flour disappears—overmixing makes the cake tough and rubbery. After 10-12 strokes, stop. Your arms will thank you later.
- USE COLD MILK: Cold milk blends smoother and doesn’t turn your batter into a hot mess. Grab it straight from the fridge, and the cake will rise better without sudden temperature shocks.
Best sauces and condiments for this recipe
Chocolate Ganache
This is my go-to topping for this cake—it adds a luxurious, fudgy layer that pairs perfectly with the moist texture. Melt 2 oz dark chocolate (70% cocoa) with 1 tbsp heavy cream in 10-second bursts in the microwave. Stir until silky smooth, then drizzle over the warm cake. For extra flair, sprinkle with crushed hazelnuts or flaky sea salt. The chocolate's bitterness cuts through the sweetness beautifully. 🍫
Whipped Cream
Lightly sweetened whipped cream elevates this cake to dessert restaurant quality. Whip ½ cup heavy cream with 1 tbsp powdered sugar and ½ tsp vanilla extract until soft peaks form. Pipe a generous dollop on top or spread with a spoon. For a fun twist, fold in 1 tbsp crushed Oreos or mini chocolate chips before whipping. The cream's coolness contrasts perfectly with the warm cake. ✨
Caramel Drizzle
For a sweet-salty balance, try a homemade caramel drizzle. Heat ¼ cup sugar in a saucepan over medium heat until melted, then add 2 tbsp heavy cream and stir constantly until golden. Let cool slightly, then drizzle over the cake. The caramel's richness enhances the chocolate flavor while adding a glossy finish. Store-bought caramel sauce works too—just warm it slightly. 💛
Lemon Curd Swirl
Bright citrus cuts through the richness of the chocolate cake. Mix ¼ cup store-bought lemon curd with 1 tbsp whipped cream and swirl it over the top of the cake using the back of a spoon. The tangy flavor makes each bite feel fresh and balanced. For a homemade version, simmer ½ cup sugar, 3 tbsp lemon juice, 2 egg yolks, and 2 tbsp butter until thickened. 🍋
Salted Caramel Sauce
This is my absolute favorite topping for when I want to feel fancy. Warm ½ cup salted caramel sauce (like Trader Joe's or Smucker's) and drizzle generously over the cake. The caramel's chewiness and saltiness make every bite unforgettable. For extra crunch, sprinkle with flaky sea salt and toasted pecans. The contrast of textures and flavors is pure magic. 🌟
Peanut Butter Drizzle
For a nutty twist, melt 2 tbsp peanut butter with 1 tbsp heavy cream in the microwave. Stir until smooth, then drizzle over the cake. The peanut butter's richness complements the chocolate perfectly. Add a sprinkle of crushed peanuts for extra texture. This combo is like a Reese's cup in cake form! 🥜
Nutrition facts
Frequently asked questions
Can I make this cake without a microwave?
Not exactly, but you can adapt it! For a stovetop version, pour the batter into a small cast-iron skillet and cook over low heat for 8-10 minutes, covered with a lid. Stir occasionally to prevent burning. The texture will be slightly denser but still delicious. For an oven version, bake at 350°F for 12-15 minutes in a greased mini muffin tin. The key is patience—these methods take longer but work in a pinch!
Why does my cake turn out gummy instead of firm?
Gummy texture usually means undercooking or too much liquid. First, check your microwave wattage—older microwaves may need 5-6 minutes instead of 5. If the batter was too thin, reduce milk by 1 tablespoon next time. Let the cake rest 3 minutes after microwaving before testing doneness. Pro tip: Press the center gently—it should spring back slightly but feel firm, not jiggly.
Can I make this cake gluten-free?
Replace the all-purpose flour with a 1:1 gluten-free baking flour blend (like Bob's Red Mill). For best results, add ½ teaspoon xanthan gum to the dry ingredients. The texture will be slightly denser but still moist. Keep all other measurements the same, and microwave for the full 5 minutes—gluten-free batters need the extra time to set properly.
How do I make this recipe into a batch of 4 cakes?
Double all ingredients exactly as written—no need for fancy math! Use four 12-ounce microwave-safe mugs and cook each for 5 minutes (don't overlap). For even baking, space mugs 1 inch apart on a microwave-safe plate. The cakes will be slightly smaller but just as delicious. Store extras in an airtight container for up to 3 days—reheat individual portions for 15 seconds in the microwave.
What's the secret to making this cake extra moist?
The secret is in the oil-to-milk ratio and resting time! Use vegetable or canola oil (not butter or melted shortening) for maximum moisture. For extra richness, replace 1 tablespoon milk with 1 tablespoon sour cream or Greek yogurt. Let the cake cool in the mug for 3 minutes before serving—this helps the moisture distribute evenly. The cocoa powder also adds natural moisture, so don't skip it!