
Desserts
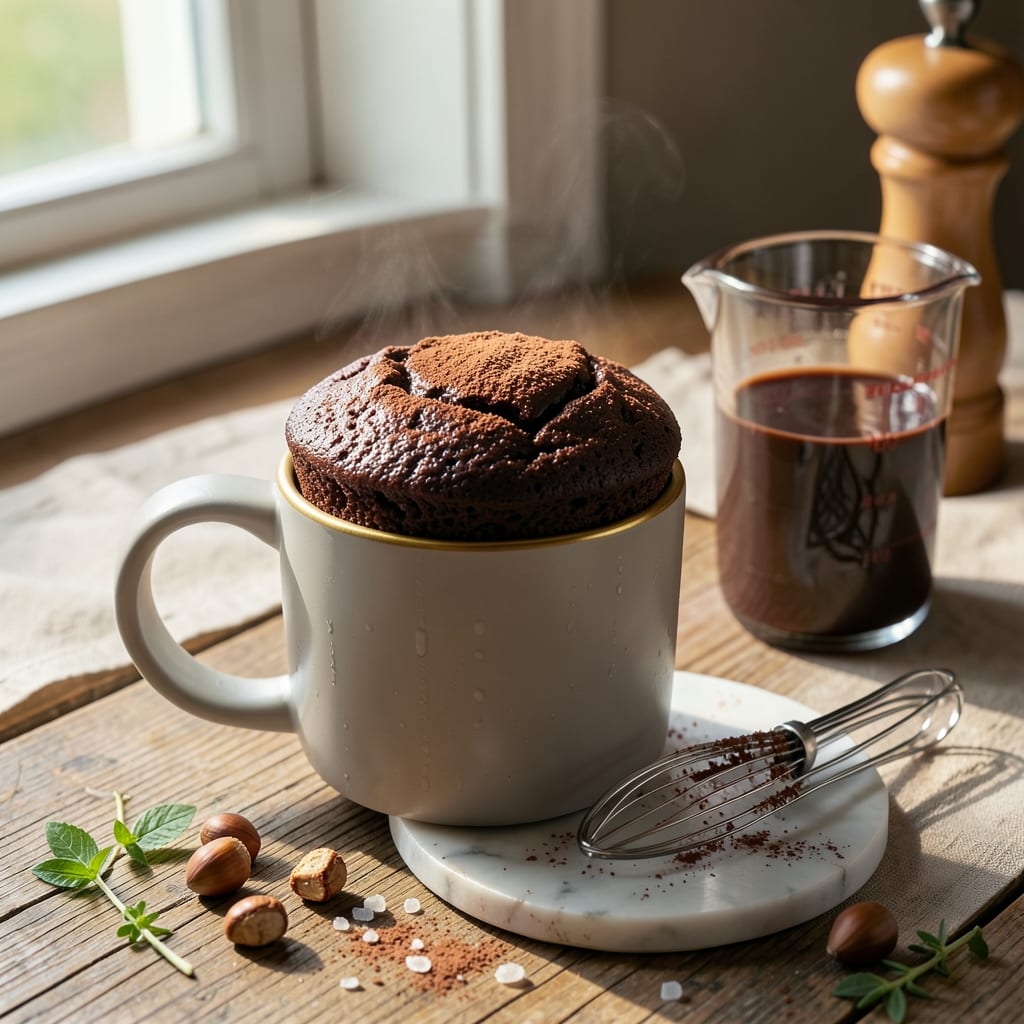
When you crave chocolate cake but only have five minutes, this single-serve mug cake delivers rich, fudgy perfection with no oven required. The secret lies in balancing simple pantry staples—flour, cocoa, sugar, and a single egg—to create a dense, moist texture that rivals bakery treats. I perfected this recipe during late-night cravings when convenience outweighed patience, and it never fails to satisfy.
What makes this recipe truly remarkable is its foolproof simplicity—no measuring cups, no mixing bowls, just a mug and a microwave. The ingredients combine in seconds, and the cake bakes in under two minutes, leaving you with a warm, gooey center and crisp edges. The cocoa powder adds depth, while a touch of oil ensures that signature melt-in-your-mouth texture. It’s the ideal solution for satisfying chocolate cravings without the effort.
By the time you’re done, you’ll have a restaurant-quality dessert that’s ready in less time than it takes to boil water. The cake is rich enough to stand alone but pairs beautifully with whipped cream, chocolate chips, or a drizzle of caramel. The best part? You can customize it with your favorite add-ins—vanilla extract, peanut butter, or even a splash of coffee—to suit your taste.
This recipe is perfect for busy weeknights, last-minute guests, or anytime a chocolate fix hits. Whether you're feeding one or craving a treat for yourself, it’s a game-changer that proves great desserts don’t require time or effort. Let’s get started!
Ingredients for 5 minute chocolate mug cake
Just eleven pantry staples transform into two decadent mug cakes in minutes.
| Ingredient | Amount | Notes |
|---|---|---|
| All-Purpose Flour 🌾 | ¼ cup | Sifted for smooth batter |
| Unsweetened Cocoa Powder 🍫 | ¼ cup | Natural or Dutch-processed |
| Granulated Sugar 🍚 | ¼ cup | White or light brown |
| Large Eggs 🥚 | 1 whole | Room temperature preferred |
| Vegetable Oil 🫒 | ¼ cup | Light or canola oil |
| Milk 🥛 | ¼ cup | Whole milk for richness |
| Vanilla Extract 🌸 | ½ tsp | Pure vanilla preferred |
| Baking Powder 🍞 | ½ tsp | Aluminum-free preferred |
| Salt 🧂 | ¼ tsp | Fine sea salt preferred |
| Mini Chocolate Chips 🍫 | ¼ cup | Optional for extra fudginess |
| Whole Milk Yogurt 🍦 | ¼ cup | For extra moisture |
The cocoa powder is non-negotiable here—Ghirardelli or Hershey's Special Dark are my go-tos, but any high-quality brand works. For the flour, King Arthur or Bob's Red Mill are reliable choices, but honestly, whatever you've got in your cabinet will do. The chocolate chips? Ghirardelli mini chips melt perfectly, but Enjoy Life brand is a great dairy-free alternative. I always double-check the baking powder's expiration date—old baking powder loses its lift, and this recipe relies on it. The yogurt adds that signature fudgy texture, so don't skip it unless you're making this vegan (in which case, swap for applesauce).
No cocoa powder? Dutch-processed cocoa works too, but you might need to adjust the milk slightly if it's too thick. Running low on vanilla? Vanilla bean paste is a luxurious upgrade. The chocolate chips can be swapped for chopped nuts if you prefer savory-sweet, but trust me on the chocolate—it's what makes this recipe sing. For a coffee twist, add 1 tsp instant coffee granules to the dry ingredients. The oil can be swapped for melted butter if you're not avoiding dairy, but the oil keeps this recipe foolproof for microwave baking.
This batter keeps in the fridge for up to 3 days, covered tightly. For best results, make it fresh, but the prepped mix is a lifesaver for those late-night cravings. The chocolate chips will sink to the bottom, so give the mug a quick swirl before microwaving. Leftovers? Freeze portions in ice cube trays for single-serving treats later. The cake reheats beautifully—just 10 seconds in the microwave to restore that gooey center.
Why You'll Love This Recipe
- No Mixing Required: I swear by this one—just dump, stir, microwave. No whisking, no measuring cups, no stress. The cocoa powder and sugar blend into a thick batter in seconds, and the egg and oil bind it all together like magic.
- Rich Without Guilt: That first bite? Pure chocolate satisfaction, but with just a splash of oil to keep it moist. No butter, no fancy add-ins—just the deep, velvety taste of cocoa and sugar hitting the spot. Honestly, it tastes like you slaved over it, even though you didn’t.
- Crowd-Pleaser in Minutes: Need a dessert for one? Done. Hosting a last-minute gathering? Double the mugs. It’s my secret weapon for book clubs, lazy Sundays, or when the kids beg for something sweet after school. No one ever turns it down.
- Pantry Staple Magic: Five ingredients, all of which you probably already have. No specialty items, no wasted leftovers (unless you’re me, who eats the same mug cake for breakfast the next day). Budget-friendly? Absolutely. Time-saving? Even more so.
Step-by-step instructions for single-serve chocolate mug cake
Here's how to create rich, fudgy perfection in just minutes—no oven required.
Combine Dry Ingredients for Smooth Batter
In a microwave-safe mug, whisk together the 0.25 cup all-purpose flour, 0.25 cup unsweetened cocoa powder, 0.25 cup granulated sugar, 0.5 teaspoon baking powder, and 0.25 teaspoon salt. Use a fork or small whisk to break up any lumps completely—this ensures your cake rises evenly and stays tender. I like to sift the flour and cocoa powder first if I have time, but even vigorous whisking works in a pinch.
The cocoa powder is where the deep chocolate flavor comes from, so don't substitute with chocolate chips or powdered cocoa. You want the natural richness of unsweetened cocoa here. If your mug has measurements, use those as a guide to verify you've got all ingredients accounted for before moving forward.
Add Wet Ingredients and Mix Thoroughly
Create a small well in the center of your dry ingredients and crack the 1 whole large egg directly into it. Add 0.25 cup vegetable oil, 0.25 cup milk, 0.5 teaspoon vanilla extract, and 0.25 cup whole milk yogurt to the well. The yogurt adds moisture and gives that signature cakey texture—don't skip it. Use a fork to gently stir everything together until just combined, being careful not to create too many bubbles.
This is where the magic happens—the combination of oil and yogurt creates a tender crumb while the egg binds everything together. If your batter looks too thick, add 1 teaspoon more milk to help it flow more easily when you add the chocolate chips. The mixture should be smooth but still slightly thick—think of it like heavy pudding rather than thin batter.
Fold in Chocolate Chips for Maximum Fudginess
Spoon the 0.25 cup mini chocolate chips into the mug and gently fold them into the batter using your fork. You want them distributed evenly throughout—this ensures every bite has that melty chocolate surprise. Press a few chips against the sides of the mug so they don't all sink to the bottom during microwaving. The mini size is perfect here as they'll melt beautifully without making the cake too heavy.
Here's a pro tip: if you're using a larger mug (12 oz or more), you might want to use slightly more chocolate chips—maybe 2 tablespoons extra—to account for the increased volume. But stick to the 0.25 cup measurement for standard 8-10 oz mugs. The chocolate chips will melt slightly during microwaving, creating pockets of gooey goodness throughout the cake.
Microwave to Golden Perfection
Place your mug in the microwave and cook on high power for 60 seconds. Immediately after the first minute, remove the mug and let it rest for 10 seconds—this prevents the cake from overflowing when it finishes cooking. Then return it to the microwave and cook for another 30-45 seconds until the top is deep golden brown and a toothpick inserted in the center comes out with just a few moist crumbs (not wet batter).
Timing is crucial here—every microwave is different, so start checking at the 90-second mark if you're using a powerful microwave. You want the cake to be just set in the center but still slightly underdone so it continues cooking slightly after you remove it from the microwave. The edges should be pulling away from the mug slightly, indicating it's ready.
Let It Set and Enjoy Immediately
Remove the cake from the microwave and let it cool in the mug for 1-2 minutes. This resting period allows the cake to set slightly and prevents it from falling apart when you try to eat it immediately. The center should still be warm and slightly gooey—this is perfect. If you're serving this to someone else, let it cool for 3-4 minutes so they don't burn their mouth on the molten center.
Here's where the real magic happens: the cake will continue to cook slightly as it sits, developing that perfect balance between cakey exterior and fudgy interior. Serve it straight from the mug with a dollop of whipped cream or a scoop of vanilla ice cream for the ultimate indulgence. Each bite should deliver rich chocolate flavor, tender crumb, and those melty chocolate chip surprises throughout.
Pro Tips For Making 5 Minute Chocolate Mug Cake
- STIR LIKE YOU MEAN IT: Mix the batter until it’s just combined—no streaks of flour, no lumps of cocoa. Overmixing turns your cake into a dense brick, and nobody wants that. Think "smooth but quick," like you’re folding in a lazy Sunday morning.
- SIFT THE COCOA: Skip the scoop-and-stir approach with your cocoa powder—sift it first. That loose, airy texture blends better and prevents clumps, especially if your cocoa’s been sitting in a humid kitchen. Trust me, your cake’s fudginess depends on this.
- USE ROOM-TEMP EGG: Cold eggs? Your cake’s rise will be half-hearted. Crack that egg into a separate bowl first, let it sit for 5 minutes if you’re in a rush. Warm eggs blend smoother and help the batter come together faster—no extra waiting, just better results.
- MUG SIZE MATTERS: Not all mugs are created equal. Use one that’s 12-16 oz—too small, and it’ll overflow; too big, and your cake turns into a sad, thin pancake. If you’re unsure, fill it with water first—if it’s less than halfway up your wrist, it’s too big.
Storing and reheating this recipe
Microwave Storage
If you're making this cake ahead of time, store the batter in an airtight container in the fridge for up to 3 days. When ready to bake, simply microwave the batter for 90-105 seconds (instead of the usual 60-45 seconds) to account for the cooler starting temperature. I like to portion the batter into small silicone cupcake molds before refrigerating—this makes reheating even easier. 💫
Freezing Fresh Cake
For longer storage, let the cake cool completely, then wrap it tightly in plastic wrap followed by a layer of aluminum foil. Store in the freezer for up to 1 month. When ready to enjoy, thaw at room temperature for 10 minutes or reheat in the microwave for 15-20 seconds to restore that warm, gooey center. The texture remains surprisingly moist after freezing—just avoid reheating for too long, or it'll dry out.
Reheating Perfection
For the best results, reheat your mug cake in 10-second bursts on high power. Start with 10 seconds, let it rest for 5 seconds, then continue in 5-second increments until warmed through. This prevents the edges from drying out while keeping the center creamy. I've found that adding a spritz of water to the mug before reheating helps maintain moisture—just microwave for 2-3 extra seconds to evaporate it.
Make-Ahead Batter
Prep the batter ahead of time and store it in individual portion-sized containers (like small mason jars) in the fridge. When cravings strike, just pour the batter into a mug and microwave as directed. I keep a batch ready in my fridge at all times—it's the ultimate lazy dessert solution. For extra convenience, freeze the batter in ice cube trays, then transfer to a freezer bag. Thaw overnight in the fridge before microwaving.
Portion Control Tips
If you're making two cakes at once, use two separate mugs instead of one large one. This ensures even cooking and prevents one cake from steaming the other. For single servings, a 10-ounce mug works perfectly, but if you're using a 12-ounce mug, reduce the batter by 1 tablespoon to avoid overflow. The key is always to leave at least 1 inch of headspace in the mug for expansion during microwaving.
Leftovers Strategy
Turn leftover cake into chocolate mug cake truffles by crumbling the cooled cake, mixing with 2 tablespoons melted butter and 1 tablespoon powdered sugar, then rolling into balls. Chill for 30 minutes before dipping in melted chocolate. This is my favorite way to repurpose any cake that didn't get eaten immediately. The texture transforms beautifully into bite-sized treats! 🍫
Nutrition facts
Frequently asked questions
Can I make this without an egg?
Yes! Replace the egg with 0.25 cup unsweetened applesauce or 0.25 cup Greek yogurt for a vegan version. The texture will be slightly denser but still delicious. For extra moisture, add 1 teaspoon extra milk to the batter. This works perfectly for those avoiding eggs or following plant-based diets!
Why did my cake overflow the mug?
This usually happens when the mug is too full or the batter isn't mixed well. Always leave 1 inch of headspace in your mug, and stir until the batter is smooth but not bubbly. If it overflows, try microwaving in 15-second intervals instead of one long burst. A larger mug or overfilling will cause spillage—stick to an 8-10 oz mug for best results.
How do I make it less sweet?
Reduce the sugar by 2 tablespoons (about 0.125 cup) and add 1 teaspoon vanilla extract or 0.5 teaspoon cinnamon to enhance flavor. For a richer chocolate taste, increase the cocoa powder by 1 tablespoon. The yogurt and oil already add natural sweetness, so don't cut sugar too much—0.15 cup is the minimum for structure.
Can I use a regular oven instead of a microwave?
Preheat oven to 350°F (175°C) and bake in a greased 6-ounce ramekin for 12-15 minutes until a toothpick comes out clean. For two cakes, use 4-ounce ramekins and bake for 10-12 minutes. The texture will be slightly denser but still fudgy. This method is great for making ahead—just store baked cakes in an airtight container for up to 3 days.
What's the secret to the perfect fudgy texture?
The yogurt and oil are your texture heroes! The yogurt adds moisture while the oil keeps the cake tender. For extra fudginess, replace 2 tablespoons milk with 2 tablespoons melted butter or add 1 tablespoon instant coffee granules to deepen the chocolate flavor. Always microwave just until set—the center should stay slightly underdone for that melt-in-your-mouth quality.