Desserts
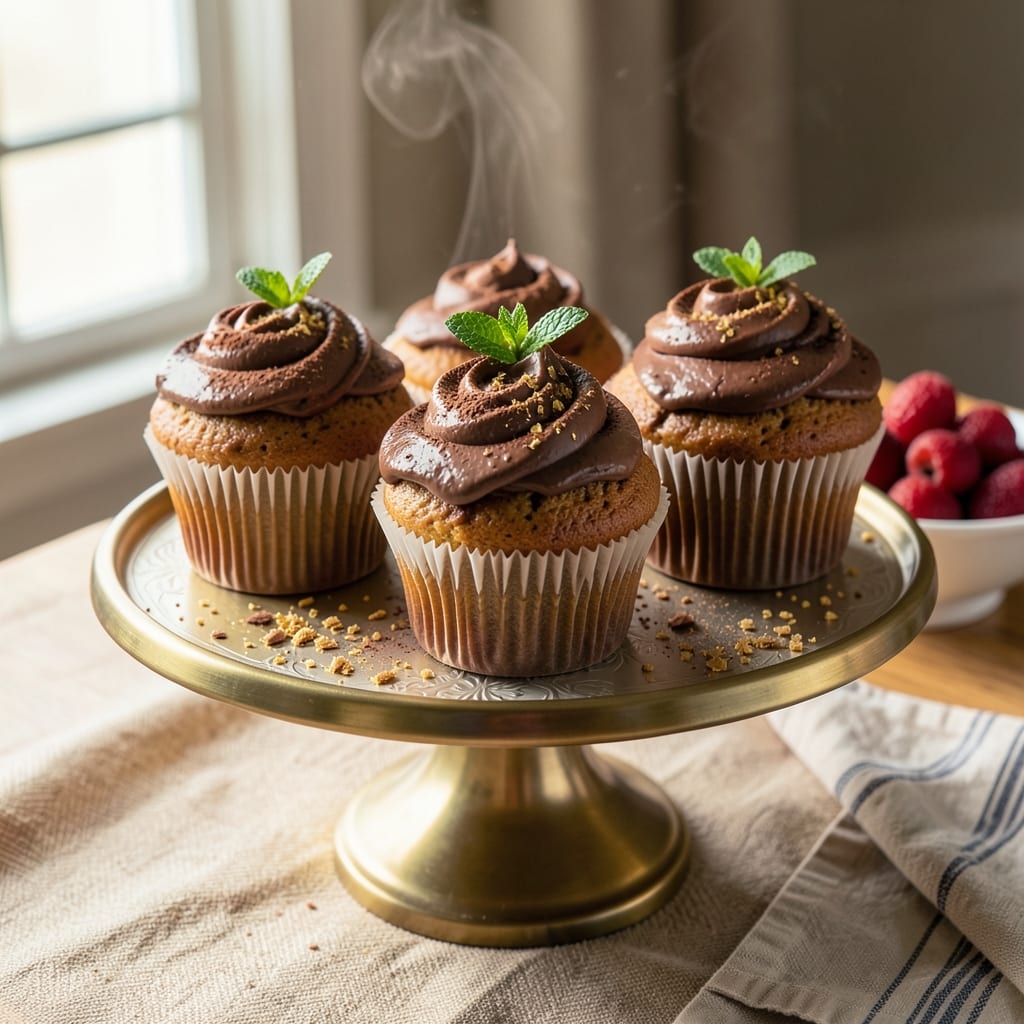
This 5-star chocolate cupcake recipe delivers bakery-quality results with rich cocoa flavor, towering height, and decadent swirls of frosting. The secret lies in precise ingredient ratios—like using Dutch-processed cocoa and buttermilk—and baking at the right temperature to create a moist, fudgy crumb with a crisp top. Every bite lives up to the name, with a velvety texture that melts in your mouth and a flavor so deep it feels like a dessert restaurant experience at home.
What sets these apart is the foolproof technique for achieving both height and moisture without dryness. A simple syrup glaze keeps them fresh, while the swirled buttercream adds that luxurious restaurant touch. The recipe balances simplicity with professional results—no special equipment needed, just attention to detail in mixing and baking times. Perfect for birthdays, holidays, or when you want to impress without spending hours in the kitchen.
By the time you're done, you'll have towering cupcakes with a crackly top, a tender crumb, and frosting swirls that look (and taste) like they belong on a dessert menu. The aroma alone will have everyone gathering in the kitchen, and the first bite delivers that rich, chocolatey payoff. These aren't just cupcakes—they're a showstopper dessert that rivals any bakery's finest.
Whether you're serving them at a celebration or treating yourself, this recipe ensures every cupcake is restaurant-quality—just like the ones you'd pay top dollar for. The frosting stays smooth and pipeable, the cupcakes hold their shape, and the flavor? Absolutely unforgettable. Let's get baking!
Ingredients for 5 star chocolate cupcake
Twelve ingredients, restaurant-quality chocolate cupcakes with towering height and decadent swirls.
| Ingredient | Amount | Notes |
|---|---|---|
| All-Purpose Flour 🌾 | 2 ½ cups | Sifted for light texture |
| Dutch-Processed Cocoa Powder 🍫 | ¾ cup | High-quality for rich flavor |
| Granulated Sugar 🍚 | 2 cups | Superfine preferred for smoothness |
| Light Brown Sugar 🍚 | ½ cup | Packed for moisture |
| Unsalted Butter 🧈 | 1 cup | Cold, cubed for creaming |
| Large Eggs 🥚 | 2 whole | Room temperature for even mixing |
| Buttermilk 🥛 | 1 cup | Cultured for tang |
| Vanilla Extract 🌿 | 2 tsp | Pure for authentic flavor |
| Baking Soda 🧂 | 1 tsp | Fresh for lift |
| Salt 🧂 | ½ tsp | Fine sea salt |
| Hot Water 💧 | ½ cup | For simple syrup glaze |
| Granulated Sugar 🍚 | ¼ cup | For glaze |
| Powdered Sugar 🍚 | 2 cups | For buttercream |
| Unsalted Butter 🧈 | 1 cup | Softened for buttercream |
| Heavy Cream 🥛 | ½ cup | Chilled for stability |
| Vanilla Extract 🌿 | 1 tsp | For buttercream |
The cocoa powder is non-negotiable—Dutch-processed like Valrhona or Hershey's Special Dark ensures that deep, velvety chocolate flavor. King Arthur or Bob's Red Mill flour gives the best texture, but don't stress if you've got all-purpose. The buttermilk adds moisture without making the cupcakes dense, and the brown sugar keeps them tender. For the butter, Land O'Lakes or Plugrá brands work perfectly, but if you're using salted, reduce the recipe's salt by half. The secret to that crackly top? Baking powder and proper mixing—don't overmix, or you'll lose that airy quality.
No buttermilk? Mix 1 tablespoon lemon juice or vinegar with 1 cup milk and let it sit for 5 minutes. Short on vanilla? Vanilla bean paste is a game-changer if you're splurging, but pure extract works fine. The glaze is where the magic happens—simple syrup glaze keeps the cupcakes moist for hours, and the buttercream? Use powdered sugar from Domino's or C&H for the smoothest texture. If you're feeling adventurous, add a pinch of espresso powder to the batter for a mocha twist. The frosting swirls are all about technique—pipe half the buttercream, add filling, then top with the rest for that restaurant-worthy look.
Store cupcakes in an airtight container at room temperature for 2 days, or freeze for 3 months. The glaze sets quickly, so work fast if you're adding it after baking. For the buttercream, cover tightly and refrigerate—it'll soften at room temperature in about 10 minutes. These cupcakes reheat beautifully—just pop them in the oven at 300°F for 5 minutes to revive the texture. Make a double batch—they disappear faster than you think!
Why You'll Love This Recipe
- No Mixer Needed: I swear by this recipe when my stand mixer’s on strike—creaming butter and sugars by hand still gives that velvety texture. The Dutch-processed cocoa? That’s the secret weapon here; it dissolves like a dream, so no lumpy batter to stress over.
- Rich Without Bitter Notes: That combo of granulated and light brown sugar? It’s the magic. The brown sugar adds a caramel depth, while the cocoa’s deep, smooth flavor shines—no chalky aftertaste, just pure chocolate satisfaction. (Yes, even my picky teen approves.)
- Bake Once, Enjoy Twice: Make a batch on Sunday, and you’ve got dessert for the week. These cupcakes freeze like champs—just thaw 10 minutes, and they’re fresh again. Honestly, I’ve had them straight from the freezer with a scoop of ice cream. No judgment.
- Budget-Friendly Luxury: Butter and cocoa might sound fancy, but this recipe stretches further than pricier box mixes. A single tub of butter and a bag of cocoa last me months, and the flavor? Way better than anything from the grocery store bakery. (Between us, I’d rather spend $5 here than $10 there.)
Step-by-step instructions for decadent chocolate cupcakes
Here's how to create cupcakes with towering height and rich chocolate flavor.
Cream Butter and Sugars Together
In a stand mixer fitted with the paddle attachment, beat the 1 cup unsalted butter (cold and cubed) with the 2 cups granulated sugar and 0.5 cup light brown sugar on medium speed for 3-4 minutes. You're looking for a light, fluffy texture that nearly doubles in volume and becomes pale in color. This creaming process incorporates air, which helps create that signature cupcake height and tender crumb.
Scrape down the sides of the bowl with a spatula to ensure even mixing. The butter should be completely smooth with no visible lumps. If you're using room-temperature butter, you might need an extra minute to reach the same consistency. This step is crucial—under-creaming leads to dense cupcakes, while over-creaming develops gluten and makes them tough.
Add Eggs and Buttermilk Alternately
Add the 2 whole large eggs, one at a time, mixing on low speed for 30 seconds after each addition until fully incorporated. Then add 1 cup buttermilk and mix again until smooth. The mixture will look slightly curdled at first, but don't worry—it will come together when you add the dry ingredients.
Here's the thing—alternating wet and dry ingredients prevents gluten development and ensures even distribution of moisture. After adding the buttermilk, the batter should be thick but pourable. If it looks too thin, add 1 tablespoon of the 2.5 cups all-purpose flour to adjust the consistency. This is where the magic happens for that perfect cupcake texture.
Combine Dry Ingredients and Fold Gently
In a separate bowl, whisk together the 2.5 cups all-purpose flour, 0.75 cup Dutch-processed cocoa powder, 1 teaspoon baking soda, and 0.5 teaspoon salt. Sift the mixture directly into the wet ingredients to avoid clumps. Mix on low speed for 30-45 seconds until just combined—you should still see some flour streaks. Overmixing develops gluten, which makes cupcakes tough.
Remove the bowl from the mixer and gently fold in the 2 teaspoons vanilla extract using a silicone spatula. The batter should be thick and slightly shiny. If it's too stiff to pipe, let it rest for 5 minutes—this allows the flour to fully hydrate. Here's a pro tip: don't overmix after adding the vanilla, or you'll deflate all that air you worked so hard to incorporate earlier.
Pipe and Bake for Perfect Height
Preheat your oven to 350°F and line a 12-cup muffin tin with cupcake liners. Fill each liner ⅔ full using a piping bag fitted with a large star tip or a spoon. For extra height, I like to use a 2-tablespoon scoop and gently tap the liners on the counter to settle the batter. Bake for 18-22 minutes until a toothpick inserted into the center comes out clean and the tops spring back when touched.
Timing is key here—cupcakes continue rising as they cool, so pull them out when they're just set. If you wait too long, they'll become dense. I always set a timer for 18 minutes and then check visually. The edges should be set, but the tops should still look slightly underdone. Let them cool in the pan for 5 minutes before transferring to a wire rack to cool completely.
Make the Chocolate Glaze and Buttercream
For the glaze, combine the 0.5 cup hot water and 0.25 cup granulated sugar in a small bowl. Stir until the sugar dissolves completely, then let it cool to room temperature. This simple syrup creates a glossy finish that makes your cupcakes look like they're from a bakery.
For the buttercream, beat the 1 cup unsalted butter (softened) with the 2 cups powdered sugar on medium speed until light and fluffy. Add the 0.5 cup heavy cream and 1 teaspoon vanilla extract, mixing until smooth. Fold in the cooled simple syrup to create a swirl effect—this is where those decadent frosting swirls come from. Pipe the buttercream onto cooled cupcakes, then drizzle with the remaining glaze for that show-stopping finish.
Pro Tips For Making 5 Star Chocolate Cupcake
- Sift the Cocoa: Mixing dry ingredients by hand? Stop. Dutch-processed cocoa powder is heavy and clumpy—sifting it with the flour and leavening agents (baking soda/powder) cuts out lumps and guarantees even distribution. I learned this the hard way after pulling apart cupcakes with dense, uneven pockets of cocoa.
- Measure Butter Cold: Use unsalted butter straight from the fridge—no softening needed. Cut it into tablespoons and let them sit at room temp for 10 minutes before creaming. Cold butter creates tiny pockets of air for a lighter crumb, and skipping this step makes your cupcakes dense. (Yes, even if you're impatient like me.)
- Don’t Overmix the Batter: Mix the wet and dry ingredients just until combined—about 20 strokes with a spatula. Overmixing develops gluten in the flour, leading to tough, rubbery cupcakes. I used to go full speed ahead, and my cupcakes ended up tasting like they’d been kneaded, not baked.
- Swap Brown Sugar for White: Replace half the light brown sugar with granulated sugar if you want sharper chocolate flavor and a slightly taller rise. The molasses in brown sugar adds moisture but can mute the cocoa’s depth. It’s a small tweak that makes a real difference in the final taste.
Perfect pairings for these flavors
Side Dish Pairings
Serve these cupcakes alongside a vanilla bean ice cream scoop for a classic dessert duo. The cool creaminess contrasts beautifully with the rich chocolate flavor, creating a luxurious experience. I love using Breyers Vanilla Bean or Häagen-Dazs for that ultra-smooth texture. For a lighter option, try whipped coconut cream—its subtle sweetness complements the cupcakes without overpowering them. 🥥
Drink Pairings
A dark chocolate milk made with whole milk and a splash of chocolate syrup is my go-to drink pairing. The warmth of the milk enhances the chocolate notes in the cupcakes. For a boozy twist, serve with espresso martinis—the bitterness of the espresso balances the sweetness perfectly. If you prefer something non-alcoholic, chilled chai tea with a splash of vanilla syrup adds a cozy, aromatic touch. 🍫
Garnish Upgrades
Elevate your cupcakes with edible gold leaf or crushed pistachios for a touch of elegance. A sprinkle of flaky sea salt on top intensifies the chocolate flavor, while raspberry jam swirls add a tangy contrast. For a festive look, pipe white chocolate rosettes around the base—it’s a simple trick that makes them look like they’re from a high-end bakery. 💛
Seasonal Variations
In summer, add fresh berries like raspberries or blackberries to the buttercream for a fruity twist. For fall, swap the glaze for a caramel drizzle and top with pecan halves. Winter calls for cinnamon-infused buttercream with a dusting of powdered sugar and a mint leaf garnish. These seasonal touches keep the cupcakes feeling fresh and exciting year-round. ❄️
Presentation Tips
For a restaurant-worthy display, arrange cupcakes on a tiered serving tray with linen napkins and gold-rimmed plates. Add a small bowl of extra glaze for dipping and a sprig of fresh mint as a garnish. If serving at a party, place them on a chocolate-drizzled cake stand—it’s a crowd-pleaser that looks as good as it tastes. 🌟
Nutrition facts
Frequently asked questions
Why does this recipe use Dutch-processed cocoa instead of regular cocoa?
Dutch-processed cocoa has a smoother, milder flavor with less acidity, which prevents the cupcakes from tasting bitter. It also creates a richer chocolate taste that stands out in the batter. Regular cocoa powder can make chocolate desserts taste slightly harsh, so this high-quality version ensures that deep, velvety chocolate flavor you'd expect from a 5-star dessert.
How do I get cupcakes this tall without them falling over?
Fill liners only ⅔ full and bake at 350°F for 18-22 minutes—they'll continue rising slightly as they cool. Use a large star piping tip or spoon to fill them evenly. Avoid overmixing the batter (just until combined) and let them cool in the pan for 5 minutes before removing. This prevents collapse and keeps them sturdy enough for frosting.
Can I make these cupcakes ahead of time?
Bake them 1 day ahead and store in an airtight container at room temperature. The glaze will set overnight, so just add fresh buttercream and a quick drizzle before serving. For longer storage, freeze baked cupcakes (without frosting) for up to 3 months. Thaw at room temperature and frost when ready—no reheating needed.
What's the secret to perfect frosting swirls?
Pipe half the buttercream onto each cupcake, then add a spoonful of filling (like chocolate ganache or jam), and top with the remaining frosting. Use a piping bag with a star tip and twist gently as you pipe to create swirls. Chill the buttercream for 10 minutes before piping for better stability—this ensures clean lines and that professional look.
My cupcakes are dense—what went wrong?
Dense cupcakes usually mean overmixing the batter or using too much flour. Check your mixing time—stop as soon as the flour disappears. Also, make sure your butter is cold (not melted) when creaming with sugar, and don't overfill the liners. If the batter seems too thick, add 1 tablespoon milk at a time until it reaches a thick, pourable consistency.