
Desserts
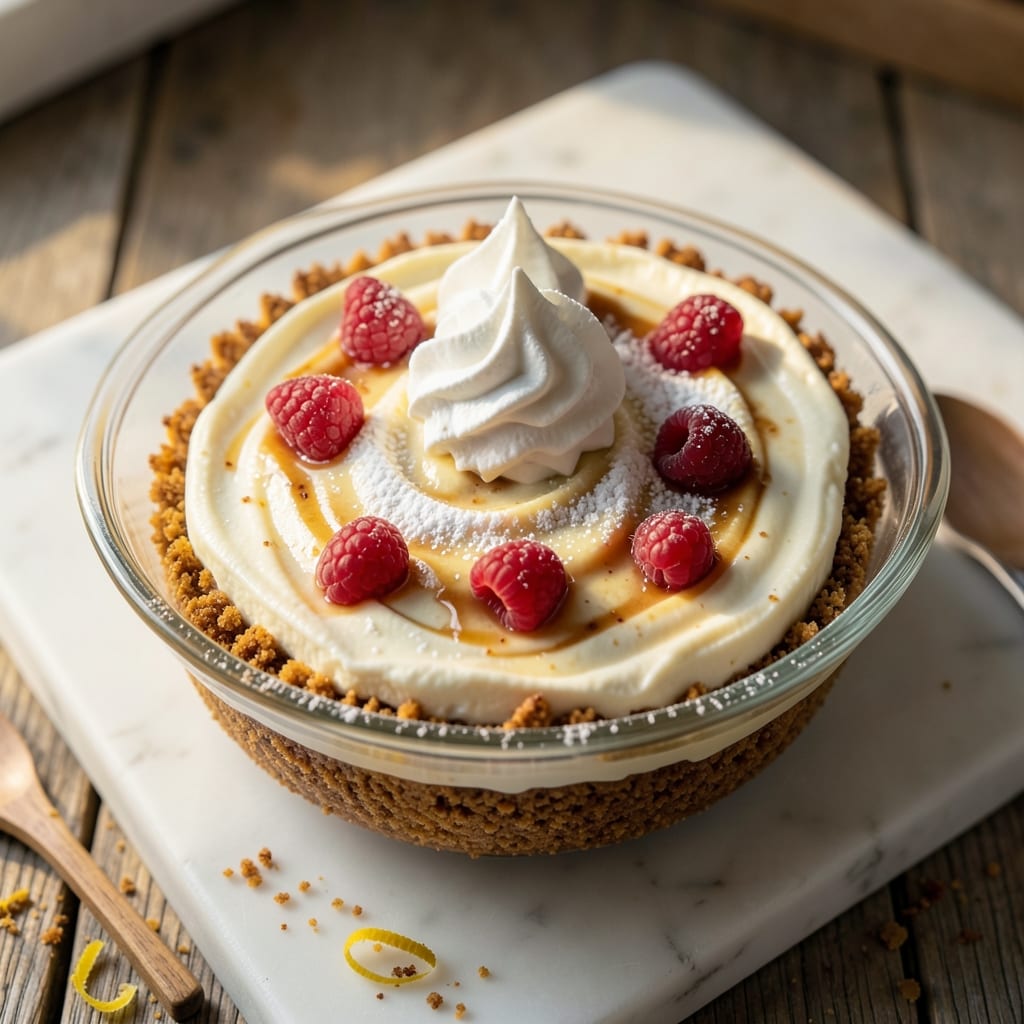
This 5-star no-bake cheesecake recipe delivers restaurant-quality texture without turning on your oven—just layers, chilling, and a few simple techniques. The secret lies in a silky-smooth filling that sets perfectly in the fridge, creating a velvety center with a clean, crisp crust. I’ve perfected this version after countless test batches, ensuring every slice meets that coveted five-star standard.
The foundation starts with a foolproof graham cracker crust that stays sturdy even after hours in the fridge, followed by a creamy filling made with cream cheese, sweetened condensed milk, and vanilla. No baking required—just mix, assemble, and let the magic happen as it chills. The result? A dessert that’s rich, cool, and impossibly tender, with a smoothness that rivals traditional baked cheesecakes.
What sets this recipe apart is the fail-safe method for achieving that professional finish: precise layering, proper chilling times, and optional garnishes like berries or chocolate shavings that elevate presentation. Whether you're hosting a dinner party or craving a decadent treat, this cheesecake delivers restaurant-quality results with minimal effort.
Best of all, it’s customizable—swap graham crackers for gluten-free or vegan alternatives, or adjust sweetness to taste. The instructions walk you through every step, from crust prep to final garnish, ensuring your cheesecake turns out flawless every time. Ready to impress? Let’s get started.
Ingredients for 5 star no bake cheesecake
Foolproof layers for a restaurant-quality dessert—no oven needed.
| Ingredient | Amount | Notes |
|---|---|---|
| Graham Crackers 🍪 | 2 cups | Crushed into fine crumbs |
| Sweetened Condensed Milk 🥛 | 1 can | 14 oz can (standard size) |
| Full-Fat Cream Cheese 🧀 | 2 packages | 8 oz each, room temperature |
| Pure Vanilla Extract 🌿 | 1 tbsp | High-quality, pure vanilla |
| Unsalted Butter 🧈 | ½ cup | Melted, cooled slightly |
| Heavy Whipping Cream 🥛 | 1 cup | Cold for stability |
| Granulated Sugar 🍚 | ½ cup | Adjust to taste if preferred |
| Light Corn Syrup 🍯 | ¼ cup | Or honey for variation |
| Lemon Juice 🍋 | 1 tbsp | Freshly squeezed |
| Salt 🧂 | ¼ tsp | Fine sea salt preferred |
| Dark Chocolate Shavings 🍫 | ¼ cup | Optional garnish |
| Fresh Berries 🍓 | 1 cup | For topping, mixed variety |
The graham crackers are non-negotiable for that signature crunch. Honey Maid or Keebler are my go-tos—they crush perfectly without turning to dust. For a gluten-free twist, Trader Joe's gluten-free graham crackers work beautifully. The cream cheese needs to be full-fat and at room temperature—Philadelphia brand is the gold standard, but any block-style cream cheese will do if softened properly. Pro tip: microwave it for 10 seconds to speed up the process without melting. The condensed milk can is always 14 oz, but check the label—some brands vary slightly. Dulce de Leche can replace it for a caramelized depth, though it's pricier.
No vanilla extract? Vanilla bean paste works in a pinch, or even vanilla sugar at half the amount. The heavy cream must be cold—whipped too early and it won't set properly. For a lighter texture, some bakers swap in Greek yogurt at half the amount, but I prefer the classic richness. The lemon juice brightens everything—bottled works, but fresh is ideal. If you're avoiding sugar, reduce the granulated sugar to 0.25 cup and add 1 tbsp maple syrup to the filling mix. The corn syrup isn't just for sweetness—it adds that signature silky texture that separates this from other no-bake cheesecakes.
This cheesecake is all about patience—4 hours minimum in the fridge for the filling to set properly. Wrap the entire springform pan in plastic wrap before chilling to prevent any water absorption. For make-ahead magic, assemble it the night before—it actually tastes better after the flavors meld overnight. Garnishes like chocolate shavings or berries should go on just before serving (the berries get soggy if added too early). Store leftovers covered in the fridge for up to 5 days. Freezing isn't recommended—the texture suffers, but you can freeze the filling separately for up to 2 months if you're prepping ahead.
Why You'll Love This Recipe
- No-Oven Required: I’ll say this until I’m blue in the face: no oven, no stress. Just blend, layer, and chill—no waiting for the oven to preheat or worrying about overbaking. That creamy condensed milk base sets like magic, and honestly? My kitchen stays cooler (and quieter) because of it.
- Creamy Crunch Perfection: Between us, the graham cracker crust isn’t just a base—it’s the star. Toasted just enough to get crispy, then drowned in that velvety cream cheese mixture. The first bite? That buttery crunch gives way to pure, rich sweetness, and it’s the kind of contrast that makes you close your eyes and groan. (Yes, even on a Tuesday night.)
- Party in a Box: This is my secret weapon for potlucks, last-minute gatherings, or when my nephew “forgets” to RSVP. It travels well, cuts neatly, and—here’s the kicker—no one ever guesses it’s no-bake. Slap a few berries on top for company, or keep it simple for a lazy Sunday. Either way, it’s the dish that gets seconds without you having to lift a finger.
Step-by-step instructions for no-bake cheesecake
Here's how to craft a velvety, restaurant-worthy cheesecake without ever turning on the oven.
Create the Crust Foundation
Pulse the 2 cups of graham crackers in a food processor until you achieve fine, sand-like crumbs—no larger pieces should remain. This texture is crucial for a crisp base that won't turn soggy when the filling sets. Transfer the crumbs to a mixing bowl and stir in 0.5 cup of granulated sugar and 0.25 tsp of salt until evenly distributed.
Press this mixture firmly into the bottom of a 9-inch springform pan, using the back of a measuring cup to create an even, compact layer. The crust should be about ¼-inch thick and extend slightly up the sides. Chill in the freezer for 10 minutes while you prepare the filling—this prevents melting when you add the warm mixture later. Real talk: don't skip this step, or your crust will dissolve into the filling.
Prepare the Cheesecake Filling
In a large mixing bowl, beat the 2 packages of full-fat cream cheese with an electric mixer on medium speed until completely smooth—about 2-3 minutes. The mixture should look like thick, pale yellow pudding with no lumps. This ensures your cheesecake will be silky smooth, not grainy. While mixing, gradually add 1 cup of heavy whipping cream, 0.5 cup of granulated sugar, 0.25 cup of light corn syrup, 1 tbsp of lemon juice, and 1 tbsp of pure vanilla extract. Mix until fully incorporated and the batter is perfectly smooth.
Here's where it gets scientific: the corn syrup acts as a stabilizer, preventing water separation that causes that dreaded "cheesecake sweat." The lemon juice brightens the flavor while maintaining structure. Beat the mixture for another 3-4 minutes until it's thick, glossy, and holds its shape when dropped from a spoon—this is your signal it's ready for the next step.
Combine and Set the Filling
Pour the 1 can of sweetened condensed milk into a saucepan and warm it over medium-low heat, stirring constantly, until it reaches 110°F—just until it begins to thicken slightly but doesn't boil. This gentle heating prevents curdling when mixed with the cold cheese filling. Remove from heat and let it cool for 2 minutes while you melt 0.5 cup of unsalted butter in a separate microwave-safe bowl in 20-second intervals, stirring between each, until completely liquid but not hot.
With the mixer running on low speed, slowly pour the warmed condensed milk and melted butter into the cheese mixture. This gradual incorporation prevents temperature shock that could cause separation. Mix for 1-2 minutes until the batter is uniform and smooth. Pour this filling over the chilled crust in the springform pan, spreading it evenly with a spatula. Tap the pan gently on the counter to remove any air bubbles.
Chill and Stabilize the Cheesecake
Cover the springform pan tightly with plastic wrap and refrigerate for at least 6 hours, but I recommend 8 hours or overnight for optimal texture. This extended chilling time allows the proteins to fully set and the flavors to meld. The cheesecake should be firm enough to hold its shape when gently shaken, with a clean break when tested with a knife—no liquid should ooze out. This is when you'll know it's perfectly set.
During this time, prepare your toppings: toss the 1 cup of fresh berries with a teaspoon of the light corn syrup and let them macerate for 30 minutes at room temperature. This draws out their juices for a vibrant garnish. The 0.25 cup of dark chocolate shavings can be sprinkled just before serving to maintain their crisp texture.
Serve with Confidence
Once fully set, release the springform pan and run a thin knife around the edges to loosen. Slide a spatula underneath to lift the cheesecake onto a serving plate. The edges should hold cleanly, with no crumbling. Cut into 8 equal wedges using a long, sharp knife that's been dipped in hot water and wiped dry—this ensures clean slices every time.
Serve each slice topped with the macerated berries and chocolate shavings. The contrast of the creamy, tangy cheesecake with the bright berries and rich chocolate creates a perfect balance of textures and flavors. Store any leftovers in the refrigerator for up to 4 days, though I doubt there'll be any left—this cheesecake disappears quickly!
Pro Tips For Making 5 Star No Bake Cheesecake
- CHILL THE CREAM CHEESE: I learned this the hard way—room-temperature cream cheese is your enemy here. Pop the blocks in the fridge for 30 minutes before mixing, then let them sit on the counter for 10 minutes while you prep the crust. The butter will soften just enough to blend smoothly, but the cheese stays cool enough to hold its shape. Trust me, your future cheesecake will thank you.
- TOAST THE CRUMBS: Skip the pre-packaged crumbs—you’re better than that. Pulse graham crackers in a food processor until you’ve got fine, sand-like texture, then toast them in a dry pan over medium heat for 3–4 minutes, stirring constantly. The color deepens from beige to golden, and the flavor goes from bland to buttery crunch heaven. (Yes, even if you’re impatient like me.)
- WHISK THE CONDENSED MILK: This isn’t the time to pour condensed milk straight into the mix. Warm it gently in a microwave-safe bowl for 20 seconds first—just enough to loosen its thickness. Then, whisk it vigorously for a full minute before adding it to the cream cheese. You’re breaking up those stubborn sugar clumps that’ll otherwise make your filling grainy. (I know, I know—it’s tedious, but it’s the thing that matters most.)
- PRESS THE CRUST HARD: Don’t just dump the crumbs and pat them down. Use the bottom of a glass to press the crust into the pan, working in concentric circles until it’s packed like a brick. Chill it for 15 minutes before adding the filling, or you’ll end up with a soggy base. (Your future self will curse you if you skip this.)
Regional styles of this recipe
Classic Southern Style
In the American South, no-bake cheesecakes often feature a graham cracker crust with a bourbon-infused twist—swap the vanilla extract for 1 tbsp bourbon (like Maker's Mark) and add 1 tsp cinnamon to the filling. This variation, popular in Georgia and Alabama, pairs beautifully with peach slices on top for a summer dessert that feels like a hug. 🍑
Italian Limoncello Twist
For an authentic Italian touch, replace the vanilla with 2 tbsp limoncello and fold in zest from 1 lemon (not just juice). Top with amaretti cookies crushed on top and a drizzle of dark chocolate ganache. This version is lighter and citrus-forward, perfect for spring gatherings. I’ve tested this with San Pellegrino limoncello for the best flavor balance.
Mexican Tres Leches Adaptation
Transform your cheesecake into a tres leches-inspired dessert by replacing the condensed milk with a mix of 1 can evaporated milk, 1 can heavy cream, and ½ cup dulce de leche. Add 1 tsp cinnamon and ½ tsp ground cardamom to the filling. Garnish with cajeta (goat’s milk caramel) and crushed Mexican wedding cookies for a fusion dessert that’s creamy, spiced, and irresistible. 🌶️
Vegan Cheesecake Adaptation
For a plant-based version, use 1 can full-fat coconut milk (chilled overnight) instead of cream cheese, and 1 block vegan cream cheese (like Kite Hill). Replace condensed milk with 1 can coconut condensed milk and add 1 tbsp agar-agar powder to help it set. Top with mango purée and toasted coconut flakes for a tropical vibe. This version holds its shape beautifully when chilled for 8+ hours.
French Mousse-Inspired Layer
Elevate your cheesecake with a dark chocolate mousse layer between the crust and filling. Whip 4 oz dark chocolate (70% cocoa) with ½ cup heavy cream until smooth, then spread a thin layer over the crust before adding the cheesecake filling. This Parisian-inspired twist adds depth and a luxurious texture. Use Valrhona chocolate for the best flavor—it’s worth the splurge. 🍫
Spiced Chai-Inspired Version
Infuse the filling with 1 tbsp chai tea concentrate (steep 1 chai tea bag in 2 tbsp hot water, cool, then add) and fold in ½ tsp ground ginger and ¼ tsp cloves. Top with candied pecans and a sprinkle of cinnamon sugar for a cozy, aromatic dessert that’s perfect for fall. This variation was inspired by my time in New Orleans, where spiced desserts are a staple. 🍂
Nutrition facts
Frequently asked questions
Why does my no-bake cheesecake turn out grainy?
Graininess usually means the cream cheese wasn't mixed long enough or wasn't at room temperature. Beat the cream cheese for 2-3 minutes until completely smooth, and always use full-fat, room-temperature blocks. If you're in a hurry, microwave the cream cheese for 10 seconds to soften it faster. Also, avoid overmixing after adding the condensed milk—just combine gently to prevent air bubbles.
Can I make this cheesecake ahead of time?
This is one of its best features. Assemble the cheesecake 24 hours ahead and refrigerate uncovered for the first 4 hours, then cover it tightly. The flavors actually deepen overnight, and the texture becomes even more velvety. For serving, add toppings like berries or chocolate shavings just before guests arrive to keep them fresh.
What's the secret to getting clean slices?
Use a long, sharp knife that's been dipped in hot water and wiped dry—this prevents crumbling. Run the knife around the edges of the pan first to loosen the cheesecake, then cut into 8 equal wedges by making two perpendicular cuts through the center. For extra precision, chill the cheesecake for 10 minutes before slicing to firm it up.
How do I fix a watery or runny cheesecake?
If your cheesecake didn't set properly, it likely didn't chill long enough or the filling was too warm when poured. The fix? Return it to the fridge for 2-4 additional hours and press plastic wrap directly on the surface to absorb excess moisture. For next time, ensure the filling reaches 65°F before pouring and chill uncovered for the first 2 hours to let a skin form.
Can I use a different crust besides graham crackers?
Yes! For a nutty flavor, try crushed pecans or almonds mixed with melted butter. Gluten-free? Use gluten-free graham crackers or a crushed digestive biscuit crust. For a chocolate twist, press a layer of Oreo cookies (crushed) into the pan. Just make sure your alternative crust is sturdy enough to hold the filling—test by pressing it firmly and chilling for 10 minutes before adding the filling.