
Desserts
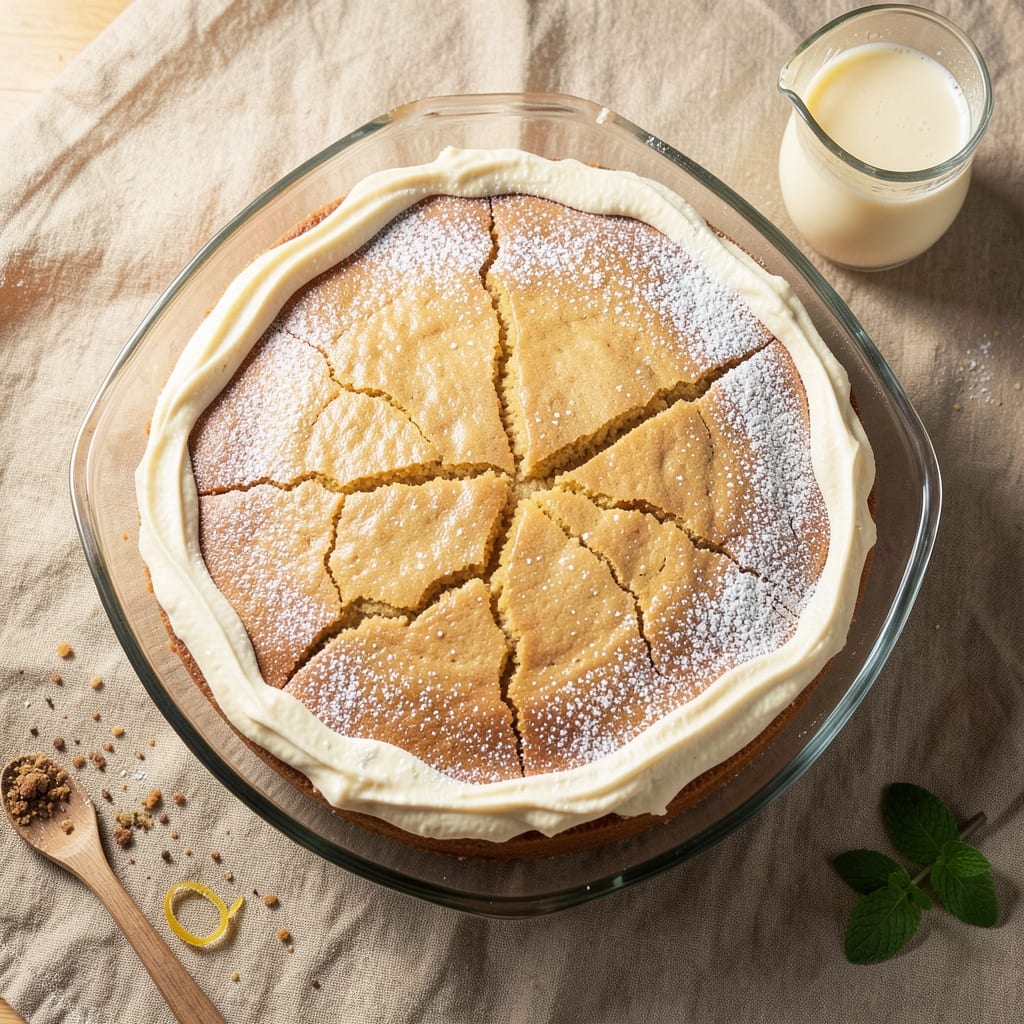
This 8x8 vanilla snack cake recipe delivers perfectly tender, moist bites that disappear in seconds—no one will believe they're this easy to make. The secret lies in a simple batter that bakes up with just the right balance of fluffiness and slight density, creating those classic snack cake layers that beg to be cut into squares. I've perfected this version over years of baking, ensuring every slice has that signature vanilla flavor without being overly sweet.
The beauty of this recipe is its simplicity: just a few pantry staples and 25 minutes in the oven. You won't need fancy equipment or special techniques—this is a foolproof method that works every time. The cake's texture is what sets it apart: tender enough to melt in your mouth but sturdy enough to hold its shape when sliced. It's the kind of dessert that's perfect for potlucks, office parties, or satisfying a sudden sweet tooth craving.
What makes this 8x8 vanilla snack cake truly special is how versatile it is. You can enjoy it plain, dusted with powdered sugar, or topped with a simple glaze for extra shine. The recipe also scales effortlessly—double the batter for a 9x13 pan if you're feeding a crowd. Each bite delivers that comforting vanilla flavor you love, with just enough richness to make it feel like a treat rather than a simple dessert.
Once you try this recipe, you'll never go back to store-bought snack cakes again. The aroma filling your kitchen as it bakes is enough to draw everyone in, and the first bite will have them asking for seconds. Let's get baking—this is the kind of dessert that brings joy to any occasion.
Ingredients for 8x8 vanilla snack cake
Just nine ingredients—no fancy substitutions—create these irresistible vanilla squares everyone will beg for.
| Ingredient | Amount | Notes |
|---|---|---|
| All-Purpose Flour 🌾 | 1 ½ cups | Sifted for light texture |
| Granulated Sugar 🍚 | 1 cup | White or light brown |
| Pure Vanilla Extract 🌸 | 2 tsp | High-quality, no imitation |
| Unsalted Butter 🧈 | ½ cup | Room temperature, full-fat |
| Large Eggs 🥚 | 2 whole | Room temperature, fresh |
| Milk 🥛 | ½ cup | Whole milk preferred |
| Baking Powder 🍞 | 1 ½ tsp | Aluminum-free preferred |
| Salt 🧂 | ½ tsp | Fine sea salt |
| Powdered Sugar 🍚 | ¼ cup | For dusting, optional |
The flour is your foundation. Bob's Red Mill or King Arthur brands give the best texture, but any all-purpose works. For the butter, Land O'Lakes or Plugrá are my go-tos—they're reliable and room temperature fast. Eggs should be fresh (the whites hold better), and milk? Whole milk adds richness, but 2% works in a pinch. The vanilla extract is where flavor shines—Nielsen-Massey or McCormick are solid choices. Never use imitation vanilla; it's worth the splurge for real extract.
No vanilla extract? Vanilla bean paste at double the amount works beautifully. Short on butter? Coconut oil or applesauce at half the quantity keeps things moist, though texture changes slightly. The baking powder is crucial—Diamond Crystal is my preference, but regular works too. For the powdered sugar topping, Domino is widely available and affordable. If you're feeling fancy, swap the powdered sugar for a simple glaze—just mix powdered sugar with milk and a splash of vanilla. The cake itself is forgiving, so don't stress over minor swaps.
Batter keeps for 24 hours in the fridge if you want to prep ahead. Once baked, these stay fresh for 3 days at room temperature, wrapped tightly. For longer storage, freeze individual squares—1 month in a sealed bag. Reheat slices for 10 seconds in the microwave to restore that just-baked warmth. Trust me, the first bite out of the oven is worth the wait—everyone will think you slaved over this!
Why You'll Love This Recipe
- No Mixer Needed: I swear by this recipe on days when I’m too tired to cream butter and sugar—just melt the butter, mix the wet ingredients in a bowl, then fold in the dry stuff. That’s it. The eggs and sugar do all the heavy lifting.
- Vanilla Overload (In the Best Way): Between the vanilla extract and the sugar, this cake tastes like a hug from a bakery. Honestly, I’ve made it with imitation vanilla before, and it’s noticeable—this version is worth the splurge for that pure, warm flavor.
- One-Pan, Zero Stress: Bake it, slice it, wrap it—no layers, no frosting fuss. The 8x8 pan means perfect squares for lunchboxes or coffee breaks, and the edges stay tender while the center stays moist. (Yes, even on a Tuesday night.)
- Budget-Friendly Comfort: Flour, sugar, butter, eggs—these are pantry staples that won’t break the bank. A single batch feeds four, and leftovers reheat beautifully. I’ve even frozen slices for "emergency dessert" days. Reliable, simple, and always welcome.
Step-by-step instructions for 8x8 vanilla snack cakes
Here's how to make perfectly tender, bite-sized vanilla cakes that bake up golden and moist every time.
Prep Ingredients for Perfect Texture
Start by sifting together the 1.5 cups all-purpose flour, 1.5 teaspoons baking powder, and 0.5 teaspoon salt in a medium bowl. This ensures your cakes will be light and airy—not dense. In a separate large bowl, beat the 0.5 cup room-temperature unsalted butter and 1 cup granulated sugar on medium speed for 3-4 minutes until light and fluffy.
Here's the thing—room-temperature butter is critical. If it's too cold, your cakes will be tough. If it's too soft, they'll spread too much. Press the butter gently between your fingers; it should hold its shape but still feel pliable. This creaming process incorporates air, which gives your cakes that classic tender crumb.
Mix Wet Ingredients for Smooth Batter
Add the 2 whole large eggs, one at a time, beating well after each addition until fully incorporated. Then stir in the 2 teaspoons pure vanilla extract and 0.5 cup milk. The mixture should be smooth and slightly thick—almost like heavy cream. If it looks too thick, add 1 tablespoon milk at a time until it reaches a pourable consistency.
Don't skip this step. The vanilla extract needs to be fully distributed, and the milk helps create that classic moist texture. I like to scrape down the sides of the bowl with a rubber spatula to ensure everything is evenly combined.
Combine Wet and Dry Ingredients Gently
With the mixer on low speed, gradually add the sifted dry ingredients to the wet mixture. Mix just until combined—you should still see small streaks of flour. Overmixing develops gluten and makes cakes tough. Once combined, pour the batter into an 8x8-inch baking pan lined with parchment paper, smoothing the top with a spatula.
Here's my pro tip: Tap the pan gently on the counter a few times to release any air bubbles. This prevents dome-shaped cakes. Also, don't worry if the batter looks slightly thick—it will spread slightly as it bakes.
Bake to Golden Perfection
Preheat your oven to 350°F while the pan is being prepared. Bake the cake for 25-30 minutes, or until a toothpick inserted in the center comes out clean. The edges should be golden brown, but the center should still look slightly underbaked—it firms up as it cools.
Don't open the oven during baking. The sudden temperature change can cause the cakes to sink. If you're unsure whether it's done, trust the toothpick test over the timer. Once baked, remove from the oven and let cool in the pan for 10 minutes before transferring to a wire rack.
Dust and Serve for Maximum Appeal
While the cakes are still slightly warm, dust the top generously with the 0.25 cup powdered sugar using a fine-mesh sieve. This adds a beautiful, professional finish. Cut into 16 equal squares—about 2x2 inches each—for perfect bite-sized portions.
Serve warm for the best texture, or let them cool completely for neat stacking. These cakes stay moist for days when stored in an airtight container, making them perfect for parties or snacking. The vanilla flavor shines through without being overpowering, and the tender crumb makes every bite satisfying.
Pro Tips For Making 8x8 Vanilla Snack Cake
- MEASURE BUTTER COLD: I learned this the hard way—soft butter in an 8x8 cake means uneven baking and a dense center. Scoop it straight from the fridge, cut into tablespoons, and let it sit just until it yields slightly when pressed (about 10 minutes). This keeps the cake tender but properly set.
- WHISK EGGS ROOM TEMP: Cold eggs from the fridge won’t blend smoothly into the batter, and you’ll end up with lumps that turn into tough pockets in your cake. Pop them in warm water for 5 minutes while you measure—trust me, the difference in texture is night and day.
- STOP WHEN TOOTHPICK TESTS CLEAN: That cake might look done at 30 minutes, but resist the urge to pull it early. Wait until a toothpick comes out with just a few moist crumbs (not wet batter) before pulling it. Overbaking dries out the vanilla flavor, and nobody wants that.
- SIFT FLOUR ONCE, THEN FOLD: Dumping flour straight into the bowl creates air pockets that collapse during baking, leading to a dense cake. Sift it first, then gently fold it into the wet ingredients with a spatula—just until combined. This keeps the crumb light and airy, which is what makes an 8x8 snack cake worth making.
Best sauces and condiments for these flavors
Classic Vanilla Glaze
For a showstopping finish, whisk together ½ cup powdered sugar, 1-2 tablespoons milk, and ½ teaspoon vanilla extract until smooth. Drizzle over the warm cakes while still in the pan, then let set for 5 minutes before cutting. This glaze adds subtle sweetness and a professional shine—perfect for special occasions. 🌟
Chocolate Ganache Drizzle
Melt ½ cup semi-sweet chocolate chips with 2 tablespoons heavy cream in a microwave-safe bowl in 30-second intervals, stirring until silky. Let cool slightly, then drizzle over the cooled cakes. The chocolate contrasts beautifully with vanilla and adds rich depth. I like to sprinkle crushed peppermint candies on top for a festive touch.
Lemon Curd Swirl
Spread ½ cup lemon curd (store-bought or homemade) over the warm cakes, then use a butter knife to gently swirl it into the batter. The bright citrus cuts through the vanilla's sweetness perfectly. For extra flair, top with a dusting of powdered sugar and a few lemon zest strips. This variation feels fancy but takes just minutes to prepare.
Caramel Drizzle
Heat ½ cup granulated sugar in a saucepan over medium heat until melted, then add 2 tablespoons butter and 2 tablespoons heavy cream. Stir constantly until smooth—about 3 minutes. Cool slightly, then drizzle over the cakes. The caramel's buttery richness pairs perfectly with vanilla, creating a decadent treat that feels indulgent yet simple.
Strawberry Compote
Simmer ½ cup sliced strawberries, 1 tablespoon sugar, and 1 teaspoon lemon juice in a small saucepan for 5-7 minutes until thickened. Spoon the warm compote over the cakes and let it soak in for 10 minutes** before serving. The berry flavor adds freshness and vibrant color, making these cakes feel like a summer dessert year-round.
Salted Caramel Topping
Combine the caramel drizzle recipe above with a pinch of flaky sea salt (like Maldon) while still warm. Drizzle over the cakes, then sprinkle with additional flaky salt. The salt enhances the caramel's sweetness, creating a sophisticated flavor profile that elevates these simple vanilla cakes to restaurant-quality. 💛
Nutrition facts
Frequently asked questions
Can I use this recipe in a 9x13-inch pan instead? Yes! For a 9x13-inch pan, simply double the recipe (all ingredients) and bake at 350°F for 30-35 minutes. The larger pan will give you 36 squares instead of 16, perfect for parties or crowd feeding. Just
Why did my vanilla cakes turn out dense instead of tender?
Dense cakes usually happen from overmixing the batter or using cold butter. Mix just until combined (small flour streaks should remain) and always use room-temperature butter. Another common mistake is opening the oven too soon—let the cakes bake undisturbed for the full 25-30 minutes. If your oven runs hot, try baking at 325°F instead.
How do I store these vanilla cakes for maximum freshness?
Store at room temperature in an airtight container for up to 3 days, or freeze individual squares for 1 month. For reheating, microwave a square for 5-10 seconds to restore that warm-from-the-oven texture. The powdered sugar topping stays crisp for 24 hours if kept sealed—after that, add fresh sugar before serving.
Can I make this recipe gluten-free or dairy-free?
For gluten-free, swap the all-purpose flour for a 1:1 gluten-free baking flour blend (like Bob's Red Mill) and add ½ teaspoon xanthan gum. For dairy-free, use vegetable oil or dairy-free butter and almond milk instead of regular milk. The texture will be slightly denser, but still delicious. Adjust baking time by 2-3 minutes if needed.