
Desserts
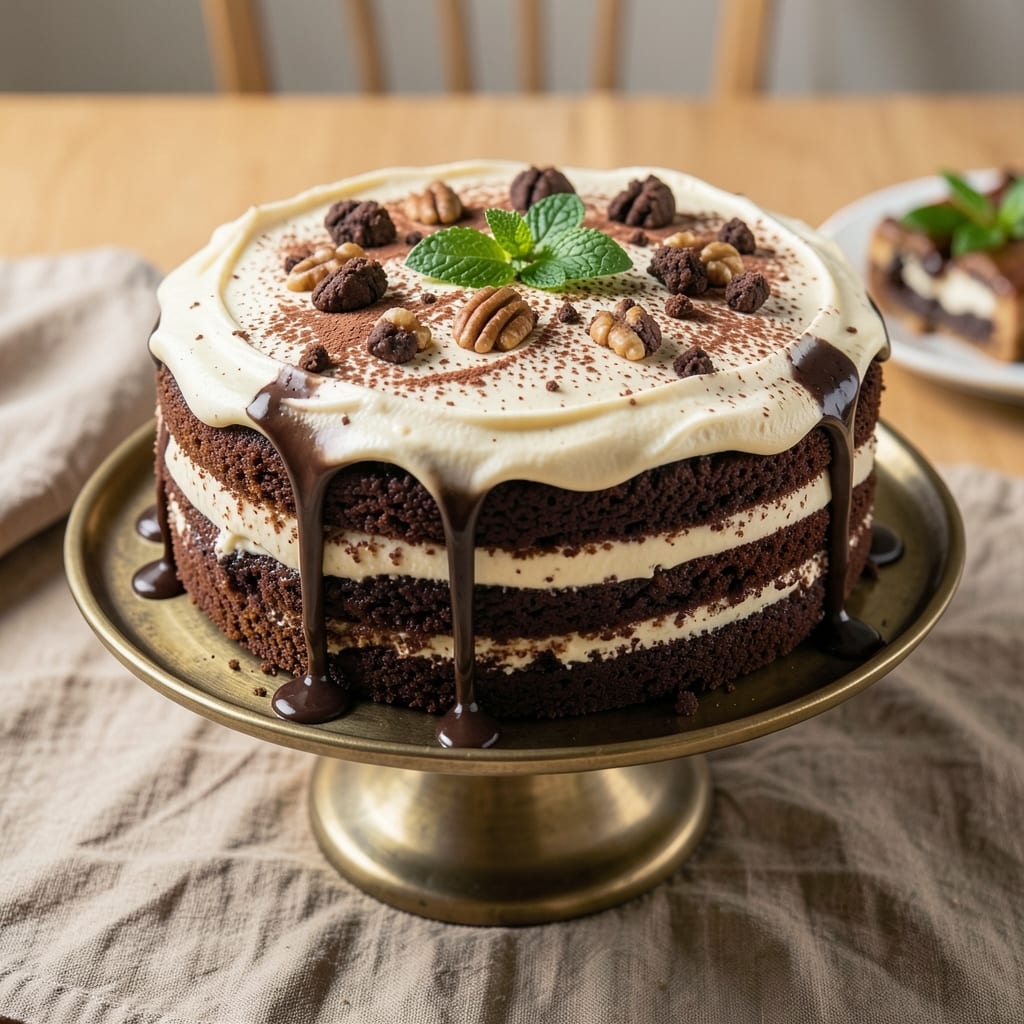
This All-American chocolate cake recipe delivers the perfect balance of rich, moist layers and velvety vanilla swirls that make every slice unforgettable. 🌟 The secret lies in a precise blend of cocoa powder and buttermilk, creating a tender crumb that stays fresh for days. I've baked this version countless times for family gatherings, and it never fails to impress—whether served with classic buttercream or a glossy chocolate ganache.
The cake's signature swirls come from a simple technique: folding vanilla pudding into the batter before baking, which creates those signature ribbons of flavor. No fancy equipment needed—just a few mixing bowls and a steady hand. The result is layers that are tender yet sturdy enough to hold frosting without crumbling, a hallmark of true American chocolate cake tradition.
What makes this recipe stand out is its foolproof method for achieving that signature moistness without drying out. The buttermilk tenderizes the crumb while the baking soda ensures a light rise, and the vanilla pudding filling adds a creamy contrast to the rich chocolate. Each bite delivers a perfect harmony of flavors and textures, making it the ultimate crowd-pleaser for birthdays, holidays, or just because.
Once baked, the cake develops a subtle golden crust that hints at the decadence inside, while the vanilla swirls peek through like hidden treasures. Top with your favorite frosting or a dusting of powdered sugar for a finish that looks as impressive as it tastes. This is the kind of dessert that turns any occasion into something special—simple, classic, and utterly satisfying.
Ingredients for all american chocolate cake
Twelve simple ingredients transform into America's most beloved cake—moist layers and swirling vanilla magic.
| Ingredient | Amount | Notes |
|---|---|---|
| All-Purpose Flour 🌾 | 2 ½ cups | Sifted for light texture |
| Unsalted Butter 🧈 | 1 ½ cups | Room temperature, cubed |
| Granulated Sugar 🍚 | 2 cups | White or light brown |
| Cocoa Powder 🍫 | ¾ cup | Dutch-processed preferred |
| Buttermilk 🥛 | 1 cup | Fresh, not powdered |
| Large Eggs 🥚 | 2 whole | Room temperature |
| Vanilla Extract 🌿 | 2 tsp | Pure, not imitation |
| Baking Soda 🧂 | 1 tsp | Pure, not baking powder |
| Salt 🧂 | ½ tsp | Fine sea salt |
| Instant Vanilla Pudding Mix 🍮 | 3 tbsp | Vanilla flavor |
| Milk 🥛 | ½ cup | Any variety |
| Vegetable Oil 🫒 | ¼ cup | For swirling |
The cocoa powder is non-negotiable here—Dutch-processed gives that signature deep, velvety flavor. Hershey's Special Dark is my go-to, but any quality brand works. The buttermilk? Grab the carton kind, not powdered—it makes all the difference in that tender crumb. Eggs should be at room temperature (pop them out of the fridge 30 minutes before baking), and room-temperature butter mixes smoother. For the vanilla swirls, the pudding mix is the secret—it thickens beautifully when baked, creating those gorgeous ribbons. Betty Crocker or Jell-O both work perfectly.
No buttermilk? Mix 1 tbsp vinegar or lemon juice with 1 cup milk and let sit 5 minutes. Dutch-processed cocoa hard to find? Natural cocoa plus 1/4 tsp baking soda mimics it. Short on vanilla extract? Vanilla bean paste or even a scraped vanilla bean works wonders. The vegetable oil for swirling can be swapped for melted butter if you're out, but it won't be quite as glossy. And that baking soda? Don't skip it—it's what gives this cake its signature lift. If you're feeling fancy, add 1/4 tsp espresso powder to the dry ingredients for a subtle coffee note that deepens the chocolate flavor.
This cake keeps beautifully—3 days at room temperature wrapped in plastic, or 1 week refrigerated in layers with parchment between them. For longer storage, freeze fully assembled (unfrosted) for up to 3 months. I always bake mine the day before—it gives the flavors time to meld and makes slicing a breeze. The swirls look best when the cake is at room temperature before frosting, so plan ahead. Leftovers? Toasted to perfection in the oven with extra frosting make amazing breakfast treats.
Why You'll Love This Recipe
- No-Fuss Mixing: I swear by the creamy butter-and-sugar combo here—just cream, then fold in the dry stuff. No sifting, no overmixing, and that buttermilk keeps the texture perfectly tender without fighting you.
- Rich Without Bitter Notes: The cocoa powder and sugar balance so well, you get that deep chocolate flavor without a hint of dustiness. Honestly, the buttermilk’s tang cuts through the sweetness just enough to make it ridiculously satisfying.
- Birthday to Brunch: This cake handles anything—frosted for celebrations, crumbled in ice cream for a lazy Sunday, or even as a breakfast cake with whipped cream. I’ve served it at potlucks, picnics, and even as a midnight snack. (Yes, even on a Tuesday night.)
- Budget-Friendly Magic: Uses pantry staples you already own—flour, butter, sugar—and stretches further than fancier recipes. A single batch feeds six, and leftovers? They disappear faster than I can say "second slice." My wallet and my taste buds thank me.
Step-by-step instructions for all-American chocolate cake
Here's how to create the perfect chocolate cake with moist layers and that iconic vanilla swirl!
👨🍳 Step 1: Cream Butter and Sugar for Maximum Moisture
In a large mixing bowl, combine the 1.5 cups unsalted butter and 2 cups granulated sugar. Using an electric mixer on medium speed, beat for 3-4 minutes until the mixture is light and fluffy—it should nearly double in volume and look pale. This step is crucial for creating that tender crumb texture we're after.
Here's the thing—room temperature butter is key. If your butter is too cold, it won't cream properly. If it's too soft, you'll end up with a greasy cake. Press a finger into the butter: it should leave a slight indent but hold its shape. Scrape down the sides of the bowl occasionally to ensure even mixing.
👨🍳 Step 2: Add Eggs and Vanilla for Rich Flavor
Add the 2 whole large eggs, one at a time, mixing well after each addition. Then stir in the 2 teaspoons vanilla extract and 3 tablespoons instant vanilla pudding mix. Mix on low speed for 1 minute until fully combined. The pudding mix might seem odd, but trust me—it's what creates that signature moist texture and subtle vanilla flavor throughout each bite.
I like to add the pudding mix at this stage because it dissolves completely into the wet ingredients, ensuring an even distribution. If you notice any lumps, use a silicone spatula to gently fold them out. This is also when the cake's flavor profile really starts coming together—rich chocolate notes from the butter and sugar, balanced by the sweet vanilla.
👨🍳 Step 3: Combine Dry Ingredients for Perfect Texture
In a separate bowl, sift together the 2.5 cups all-purpose flour, 1 teaspoon baking soda, 0.5 teaspoon salt, and 0.75 cup cocoa powder. Whisk gently to combine—don't overmix or you'll develop too much gluten, which makes cakes tough. The cocoa powder should be evenly distributed throughout the flour mixture.
With the mixer on low speed, gradually add the dry ingredients to the wet mixture, mixing just until combined. You'll want to see a few flour streaks remaining—this indicates you haven't overmixed. The batter should be thick but smooth. Here's a pro tip: alternate adding the dry ingredients with the 1 cup buttermilk and 0.5 cup milk, beginning and ending with the dry ingredients. This helps create an even texture.
🥘 Step 4: Create the Vanilla Swirl Layer
In a small bowl, whisk together the 0.25 cup vegetable oil and 1 teaspoon vanilla extract. This becomes our vanilla layer. Divide the chocolate batter in half, placing one portion back in the mixing bowl. To the remaining portion in the small bowl, gently fold in the oil-vanilla mixture until just combined—you're looking for a marbled effect, not a completely mixed batter.
Here's where the magic happens: spoon half of the plain chocolate batter into a greased and floured 9-inch round cake pan. Then add dollops of the vanilla batter on top, followed by the remaining chocolate batter. Use a knife to gently swirl the batters together, creating that beautiful marbled pattern. Don't overmix—just enough to create visible streaks. The swirls will become more pronounced as it bakes.
🔥 Step 5: Bake to Golden Perfection
Preheat your oven to 350°F and place the cake pan in the center rack. Bake for 35-40 minutes, or until a toothpick inserted in the center comes out clean with just a few moist crumbs clinging to it. The edges should be golden brown, and the top should spring back when gently pressed.
Real talk: don't open the oven during baking. The temperature fluctuations can cause the cake to sink or develop a dome. If you're worried about doneness, check at the 30-minute mark. When it's done, let the cake cool in the pan for 10 minutes before transferring to a wire rack to cool completely. This resting period helps the layers set properly and prevents cracking.
Pro Tips For Making All American Chocolate Cake
- MIX DRY INGREDIENTS FIRST: I learned this the hard way—adding cocoa powder directly to wet ingredients makes lumps. Sift the flour, cocoa powder, and baking powder together first, then whisk in the sugar. This keeps the batter smooth and prevents that dreaded grainy texture in every bite.
- MELT BUTTER SLOWLY: Cold butter in the batter? Big mistake. Melt the butter until it’s just warm to the touch—not hot, not greasy—before mixing it with the sugar. Too hot and you’ll cook the eggs; too cold and the cake turns dense. Room-temperature butter is your golden middle.
- DON’T OVERMIX THE BUTTERMILK: Buttermilk’s tangy magic fades fast once it hits the batter. Measure it last and fold it in just until combined—no more. Overmixing activates the gluten in the flour, and suddenly you’ve got a cake that’s more cakey than moist. Gentle is the way.
- CHECK DONENESS WITH A TOOTHPICK: The cake’s edges might look set, but the center’s still jiggly? That’s your cue to stop. Insert a toothpick into the thickest part—it should come out with a few moist crumbs, not wet batter. If you’re unsure, err on the side of underbaking; it’ll keep cooking as it cools. (Yes, even if you’re impatient like me.)
Dietary considerations for all american chocolate cake
Gluten-Free Adaptation
For a gluten-free version, replace the 2.5 cups all-purpose flour with a high-quality blend like King Arthur Measure for Measure or Bob's Red Mill 1:1 Gluten-Free Flour. These blends mimic the texture and structure of traditional flour. Add 1 teaspoon xanthan gum to the dry ingredients to improve elasticity—this is crucial since gluten-free flours lack natural binding properties. 🌱
Dairy-Free Options
Swap the buttermilk and butter for dairy-free alternatives. Use unsweetened almond milk mixed with 1 tablespoon lemon juice for buttermilk, and vegan butter like Miyoko's or Earth Balance for the fat component. The cake will still be moist, though the texture might be slightly denser. For frosting, use dairy-free buttercream made with coconut milk powder or vegan cream cheese.
Lower Sugar Version
Reduce the 2 cups granulated sugar to 1.5 cups and replace the remaining 0.5 cup with unsweetened applesauce or mashed banana. This cuts calories while maintaining moisture. For added sweetness, increase the vanilla extract to 3 teaspoons. The cake will still taste rich but with a lighter touch—ideal for those watching sugar intake.
Nut-Free Considerations
If nut allergies are a concern, avoid any nut-based substitutes like almond milk or almond flour. Stick to dairy-free options like oat milk (check for certified gluten-free if needed) or soy milk for buttermilk alternatives. For frosting, use a simple powdered sugar glaze** made with dairy-free margarine or coconut oil instead of butter.
Egg-Free Substitution
Replace the 2 eggs with 2 tablespoons ground flaxseed mixed with 6 tablespoons water (let it sit for 5 minutes to thicken). This binds the batter similarly to eggs. For extra moisture, add 2 tablespoons unsweetened applesauce to the wet ingredients. The cake will be slightly denser but still delicious—just ensure it bakes a few minutes longer to compensate for the lack of egg proteins.
Nutrition facts
Frequently asked questions
Why does this cake have vanilla swirls?
The signature vanilla swirls come from folding vanilla pudding mix into half the batter before baking. This creates those beautiful ribbons of flavor that contrast perfectly with the rich chocolate layers. The technique originated as a way to add moisture and a subtle sweetness without overpowering the chocolate's depth.
Can I make this cake in a different pan size?
Yes, but adjust baking time accordingly. For an 8-inch pan, bake 25-30 minutes, and for a 10-inch pan, bake 40-45 minutes. The key is to check with a toothpick—it should come out clean with a few moist crumbs. Smaller pans will give you a taller, denser cake, while larger pans create a shorter, wider one.
What's the best frosting for this cake?
Classic buttercream frosting is perfect—its richness complements the chocolate layers beautifully. For a lighter option, try chocolate ganache or a simple powdered sugar glaze. Pro tip: Let the cake cool completely before frosting to prevent melting. The vanilla swirls will peek through like hidden treasures under any of these options.
Why did my cake crack on top?
Cracking usually happens when the cake cools too quickly or if you opened the oven door too soon. Always let the cake cool in the pan for 10 minutes before transferring, and avoid opening the oven during baking. For extra insurance, place the pan on a baking sheet to catch any drips that might cause uneven cooling.
How do I store leftovers?
Wrap individual layers tightly in plastic wrap and store at room temperature for 3 days. For longer storage, refrigerate layers separately with parchment between them for up to 1 week. To freeze, assemble the cake (unfrosted) and freeze for up to 3 months**. Thaw overnight in the fridge before serving.