
Desserts
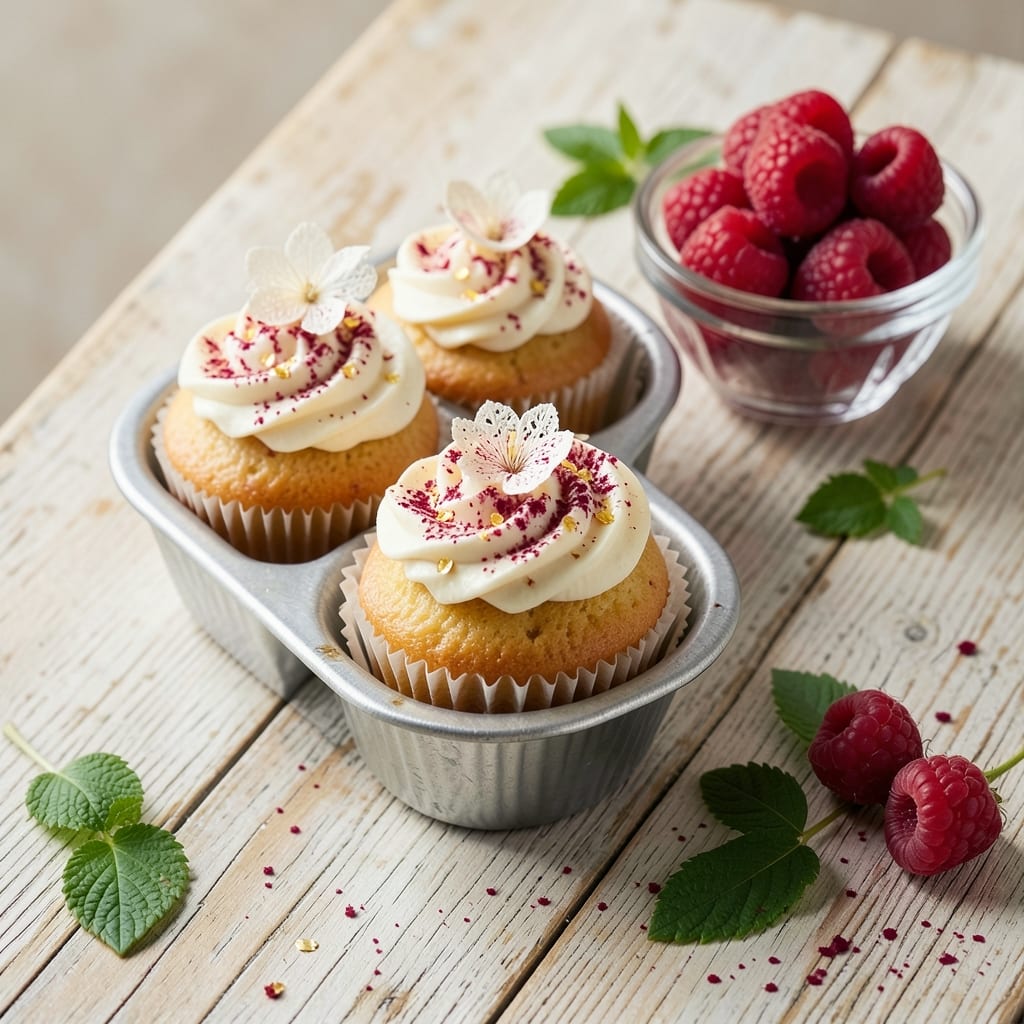
A 6-month birthday cake deserves the same care as a first cake—just in mini form. This recipe delivers soft, moist vanilla layers with swirls of vanilla buttercream, perfect for tiny hands and milestone celebrations. The secret? A simple cake batter that bakes just until tender, ensuring every bite is easy to eat and delightful to share. I designed this for parents who want something special without the fuss of elaborate decorating.
What makes this recipe stand out is the mini batch approach—small enough to store easily, yet impressive enough for photos. The vanilla flavor is universally loved, and the buttercream swirls add a touch of elegance without requiring advanced piping skills. Baking times are precise, and the frosting comes together in minutes, so you can focus on celebrating rather than stressing. This cake is foolproof for baby showers, milestone parties, or quiet family moments—whenever you want to mark the occasion.
The result is a light, fluffy cake with a tender crumb that melts in your mouth. The buttercream isn’t too sweet, making it baby-friendly while still satisfying for adults. Each slice is bite-sized, perfect for little ones to explore (with supervision, of course). The swirls add visual appeal, and the recipe scales easily for larger gatherings if needed. Whether you’re baking for a six-month birthday or a shower, this cake checks all the boxes.
Storage is simple: keep it covered at room temperature for up to 2 days, or refrigerate for longer freshness. The frosting holds up well, so you can assemble it ahead of time and decorate just before serving. This recipe is your go-to for making a 6-month birthday cake that’s as memorable as the milestone itself.
Ingredients for 6 month birthday cake
Soft layers, swirled frosting, and perfect mini portions for a milestone celebration.
| Ingredient | Amount | Notes |
|---|---|---|
| All-Purpose Flour 🌾 | 1 ½ cups | Sifted for light texture |
| Granulated Sugar 🍚 | 1 cup | White or light brown |
| Unsalted Butter 🧈 | ¾ cup | Softened to room temperature |
| Large Eggs 🥚 | 2 whole | Room temperature for even mixing |
| Milk 🥛 | ½ cup | Whole milk for richness |
| Vanilla Extract 🌸 | 1 ½ tbsp | Pure vanilla for authentic flavor |
| Baking Powder 🧂 | 1 ½ tsp | Freshly measured for lift |
| Salt 🧂 | ½ tsp | Fine sea salt preferred |
| Vanilla Buttercream Frosting 🍰 | 1 ½ cups | Store-bought or homemade |
| Powdered Sugar 🍚 | 2 cups | Sifted for smooth texture |
| Heavy Cream 🥛 | ½ cup | Cold for stiff peaks |
| Vanilla Bean Paste 🌸 | 1 tbsp | For extra vanilla depth |
| Mini Cupcake Liners 🧻 | 12 pieces | For bite-sized portions |
The flour and sugar are your foundation—King Arthur or Gold Medal brands bake the most reliably. Unsalted butter is a must for the cake layers (the frosting gets its own flavor boost), so grab Plugrá or Land O’Lakes if you want consistency. Eggs should be at room temperature—cold eggs create dense cake. For the frosting, powdered sugar matters: Dominion is the gold standard, but Duncan Hines works too. If you're making your own buttercream, use heavy cream straight from the fridge to whip it up faster—it whips better cold.
No vanilla bean paste? Pure vanilla extract at double the amount works in a pinch. Substituting milk? Almond milk or oat milk keeps the cake moist, but it’ll be slightly less rich. For the frosting, vanilla pudding mix can replace the vanilla bean paste if you’re in a hurry (just add 1 tbsp to the powdered sugar). The baking powder is non-negotiable—double-check the expiration date or your cake won’t rise. And if you’re short on mini cupcake liners, parchment paper circles cut with a glass work just as well—no one will know the difference.
Store the cake layers wrapped in plastic at room temperature for up to 2 days—they’ll stay moist but not soggy. The frosting? Whip it up fresh or store it in an airtight container for up to 5 days in the fridge. Assemble the cake just before serving so the frosting stays fluffy. For a 6-month birthday, I like to decorate with edible gold sprinkles or mini fondant shapes—they’re easy to handle and add that celebratory touch. Leftovers? Keep them covered in the fridge for 3 days or freeze the layers for up to 1 month.
Why You'll Love This Recipe
- No Mixer Needed: I swear by this recipe when my hands are full—just a bowl and a fork. The butter and sugar get creamed by hand in minutes, and the eggs blend right in without fuss. (Yes, even when my toddler "helps" by licking the spoon.)
- Sweet Spot Simplicity: That perfect balance of flour, sugar, and butter? It’s like a hug in cake form. The milk keeps it tender without being dense, and the eggs add just enough richness to make every bite feel special—no fancy ingredients required.
- Double Duty Cake: Make it for the birthday, then slice the leftovers for breakfast the next morning. Honestly, the slightly stale edges toast up beautifully with a sprinkle of sugar—my kids call it "cake pancakes," and I’m not correcting them.
- Pantry Staple Magic: You’re already stocked for this one. Flour, sugar, butter, eggs, milk—these are the basics I always have on hand. No last-minute grocery runs, no overcomplicating things. It’s the kind of cake that proves you don’t need a bakery to make something worth celebrating.
Step-by-step instructions for mini vanilla cupcakes with buttercream swirls
Here's how to create perfectly tender cupcakes with professional swirls—no fancy equipment needed.
Prep Ingredients and Preheat Oven
Start by preheating your oven to 350°F and placing a rack in the center position. Line a 12-count mini muffin tin with the mini cupcake liners, pressing them gently into each well to prevent shifting. While the oven heats, sift together the 1½ cups all-purpose flour, 1½ teaspoons baking powder, and ½ teaspoon salt in a medium bowl. This step ensures your batter will be light and airy—no lumps to weigh down those delicate cupcakes.
In a separate large bowl, measure out the 1 cup granulated sugar and ½ cup unsalted butter (softened to room temperature). The butter should be pliable but not greasy—press a finger into it; it should leave a slight indent but hold its shape. This consistency is crucial for achieving that tender crumb we're after. Let these sit while you prepare the remaining ingredients.
Mix Wet Ingredients and Combine
Using an electric mixer on medium speed, beat the butter and sugar together for 3-4 minutes until the mixture is light and fluffy, nearly doubling in volume. You'll see it go from pale to slightly off-white—this is the air incorporation that creates those beautiful domed cupcakes. Scrape down the sides of the bowl with a spatula to ensure even mixing.
Add the 2 large eggs one at a time, mixing on low speed after each addition until fully incorporated. Then stir in the ½ cup milk and 1½ tablespoons vanilla extract until smooth. The batter should be thick but pourable. Here's the thing—don't overmix once you add the dry ingredients, or you'll develop gluten and end up with tough cupcakes instead of tender ones.
Fold in Dry Ingredients and Bake
With the mixer on low speed, gradually add the sifted dry ingredients to the wet mixture. Mix just until combined—you should still see small streaks of flour. The batter will be thick and glossy, almost like cookie dough. Divide the batter evenly among the 12 mini cupcake liners, filling each about ⅔ full. This portion control is key for perfectly proportioned cupcakes.
Bake for 12-15 minutes, or until a toothpick inserted into the center comes out clean. The edges should be golden brown, but the tops might look slightly underdone—they'll firm up as they cool. I like to open the oven a crack after 10 minutes to let any steam escape; this prevents dome tops from collapsing. Let the cupcakes cool in the pan for 5 minutes, then transfer them to a wire rack to cool completely.
Create Vanilla Buttercream Swirls
While the cupcakes cool, prepare the buttercream by beating the ½ cup heavy cream (chilled) with an electric mixer until stiff peaks form. In a separate bowl, whisk together the 2 cups powdered sugar and 1 tablespoon vanilla bean paste until smooth. Gradually add the powdered sugar mixture to the chilled cream while mixing on low speed until fully combined.
For the swirl effect, pipe a small amount of buttercream onto each cooled cupcake, then use a small offset spatula to create gentle swirls. The key here is to work quickly—warm cupcakes will melt the buttercream. For extra flair, you can add a dollop of the 1½ cups vanilla buttercream frosting on top and drag the spatula through it to create marbled patterns. The contrast between the smooth buttercream and the swirled design makes these cupcakes look like they came from a bakery.
Assemble and Serve
Once all cupcakes are decorated, let them sit at room temperature for 10 minutes to allow the buttercream to set slightly. This resting time ensures the swirls hold their shape and the frosting doesn't slide off. Serve immediately for the best texture—these cupcakes are best enjoyed fresh, with that perfect balance of tender crumb and creamy frosting.
For a special touch, dust the tops with a little extra powdered sugar or add a few sprinkles. These mini cupcakes are perfect for celebrations, gifts, or just treating yourself. The secret to their success lies in the precise measurements and gentle handling—no shortcuts here! Each bite should deliver that perfect harmony of moist vanilla cake and rich buttercream.
Pro Tips For Making 6 Month Birthday Cake
- USE COLD BUTTER: I learned this the hard way—soft butter in this cake makes it dense and greasy. Take that butter out of the fridge 30 minutes before measuring, but not longer. You want it soft enough to cream smoothly, not melted. (Yes, even if you're impatient like me.)
- WEIGH YOUR FLOUR: Scooping flour from the bag packs too much air, and this cake won’t rise evenly. Use a kitchen scale for precision—6 months old deserves a cake that’s light, not brick-like. If you’re measuring by cup, spoon it in and level it off. No shaking the bowl.
- DON’T OVERMIX: After adding the eggs, stop mixing the second the batter looks just combined. Overmixing develops gluten, and this cake turns tough instead of tender. Swirl in any dry bits with a spatula—it’s messy, but it works.
- BAKE UNTIL COOLER THAN YOU THINK: This cake’s done when the center reads 205°F (90°C) on an instant-read thermometer. It’ll keep rising another 10°F (5°C) as it cools, so pull it out sooner than you’d think. Let it cool in the pan for 10 minutes, then transfer—no rushing, or it’ll crack.
Common mistakes when making your 6 month birthday cake
Overmixing the Batter
This is the #1 mistake I see with tender cakes—especially when using an electric mixer. Once you add the dry ingredients, mix just until combined (about 10-12 strokes by hand or 15-20 seconds with a mixer). Overmixing develops gluten, which creates tough, dense cupcakes instead of the light, airy texture we want. I've ruined many batches by letting the mixer run too long—look for small flour streaks remaining in the batter as your cue to stop. 💫
Incorrect Butter Temperature
The butter must be softened to room temperature—not melted, not cold. Press your finger into it: it should leave a slight indent but hold its shape. Cold butter creates dense cupcakes, while melted butter can cause sinking. I keep mine at 65-68°F by setting it out for 1-2 hours before baking. For faster results, microwave in 10-second bursts while stirring, but never let it melt completely.
Underbaking or Overbaking
These mini cupcakes need 12-15 minutes at 350°F—no exceptions. Underbaking leaves them gummy, while overbaking dries them out. The toothpick test is foolproof: insert it into the center and check for crumbs (not wet batter). I pull mine when the edges are golden but the tops still look slightly underdone—they'll firm up as they cool. Opening the oven door too early releases steam and can cause domes to collapse.
Skipping the Cooling Phase
Never decorate cupcakes while they're still warm! Let them cool completely on a wire rack for at least 30 minutes before adding frosting. Warm cupcakes melt buttercream instantly, and the swirls won't hold their shape. I've learned this the hard way—once, I rushed and ended up with a sad, melted mess. Patience here makes all the difference for that perfect professional finish. ✨
Using Old or Improper Ingredients
Baking powder older than 6 months loses its lift, causing flat cupcakes. Always check the expiration date! Also, never substitute baking soda for baking powder—they're not interchangeable. For butter, unsalted is a must (the frosting gets its own flavor). I keep a stash of King Arthur flour and Dominion powdered sugar because they're reliable brands that deliver consistent results every time.
Incorrect Portion Control
Filling the mini liners ⅔ full is critical—any more and they'll overflow, any less and they'll be too small. Use a ¼ cup measuring cup to divide the batter evenly among all 12 liners. I weigh my portions on a kitchen scale for precision, but the measuring cup works in a pinch. Uneven portions lead to inconsistent baking times and textures, which ruins the uniformity we want for these milestone celebrations.
Nutrition facts
Frequently asked questions
Can I make this cake gluten-free for a baby with allergies?
Yes! Swap the all-purpose flour for a 1:1 gluten-free baking flour blend like Bob's Red Mill. Use 1½ cups of the blend and add ¼ cup extra powdered sugar to the batter to improve texture. Keep all other ingredients the same, but expect slightly denser cupcakes. Test with a small batch first to adjust moisture levels.
How do I adjust this recipe for a larger group?
Double the recipe for 24 cupcakes, but use two mini muffin tins to maintain even baking. For a 2-layer cake, bake 36 cupcakes total, then layer them in a 6-inch round pan with parchment between layers. Frost with 3 cups buttercream and decorate with sprinkles or fondant shapes for a showstopper.
What's the best way to store leftovers?
Keep unfrosted cupcakes in an airtight container at room temperature for 2 days or refrigerate for 5 days. Frosted cupcakes stay fresh for 3 days in the fridge. For longer storage, freeze unfrosted cupcakes for 1 month—thaw at room temperature and refrost before serving. Never freeze frosting separately.
Can I make this cake ahead of time?
Bake the cupcakes 1 day ahead and store them unfrosted. Assemble the cake 4 hours before serving to let the frosting set. For a 6-month birthday, decorate with edible gold dust or mini fondant animals just before the party—they'll look fresh and festive. Keep the cake covered until serving time.
What if my buttercream doesn't swirl right?
Use a small offset spatula to gently drag the buttercream through the frosting in quick motions. For extra control, chill the cupcakes for 10 minutes in the fridge before decorating—this firms up the frosting. If it's too warm, refrigerate the buttercream for 15 minutes before using. Practice on a paper plate first to get the technique down!